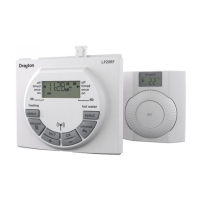
INTRODUCTION Cont...
T
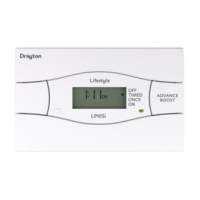
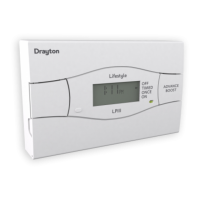
here are 3 models in the Lifestyle range:
n
LP241Si – a 24hr program, with central heating and hot water
w
orking independently for up to 3 heating periods each day, and
e
very day the same.
n LP522Si – a 5/2-day program allowing for different timings at
t
he weekends, with central heating and hot water working
i
ndependently for up to 3 heating periods each day.
n
LP722Si – a 7-day program allowing for different timings on
each day of the week, with central heating and hot water
working independently for up to 3 heating periods each day.
I
f the engineer hasn’t set your timings for you, your programmer
will work with a standard program that has been set at the
f
actory. If this doesn’t suit you, it’s very easy to change it –
w
hen you’ve read this introductory section, simply go to the
section that contains your programmer model.
Remember:
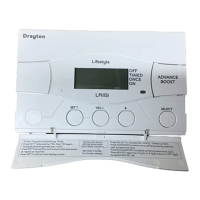
n Make your changes using the SET?, YES/-, and + buttons on
the programmer.
n
You can’t set ON1 as the last timing before midnight, but you
can set OFF3 after midnight – providing it’s not more than 23
h
ours and 59 minutes after ON1.
n You need to set the timings in sequence – i.e. ON1, OFF1, ON2,
OFF2, ON3, OFF3. If you get out of sequence, the display will
flash a warning.
S
WITCHING
ON 1
– start of first timed period
OFF 1
– end of first timed period
ON 2
– start of second timed period
O
FF 2
– end of second timed period
ON 3
– start of third timed period
O
FF 3
– final switch-off of the day
The engineer has set your program and timings – you
w
on’t need to do anything else. Just keep this guide in a
safe place for future reference.
D
AY-TO-DAY VARIATIONS
Sometimes you might need to change the way you use your
c
entral heating or hot water temporarily – perhaps due to an
unusually cold day, or exceptional demand for hot water.
H
ere’s how to do it – without affecting your program.
Switching on and off
O
n the front of the programmer there are two Advance buttons
– one for central heating and one for hot water. They allow you
t
o switch either on or off, irrespective of the program. So if the
h
eating is off, and you want warmth now – press Advance to
switch it on, and it will stay on until the end of the next OFF
p
eriod. Or if the hot water is on and you don’t need it, press
Advance and it will go off until the beginning of the next ON
period.
Over-riding the program
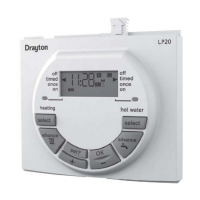
On each side of the display there are four operating modes –
one group for central heating, the other for hot water. You can
change modes with immediate effect by using the appropriate
S
ELECT button. This won’t alter the timings in your program,
w
hich you can return to by selecting TIMED.
O
FF =
continuously off.
TIMED = on for up to 3 periods a day.
ONCE = on for 1 period a day, from the start of ON1
to the end of OFF3.
ON = continuously on.
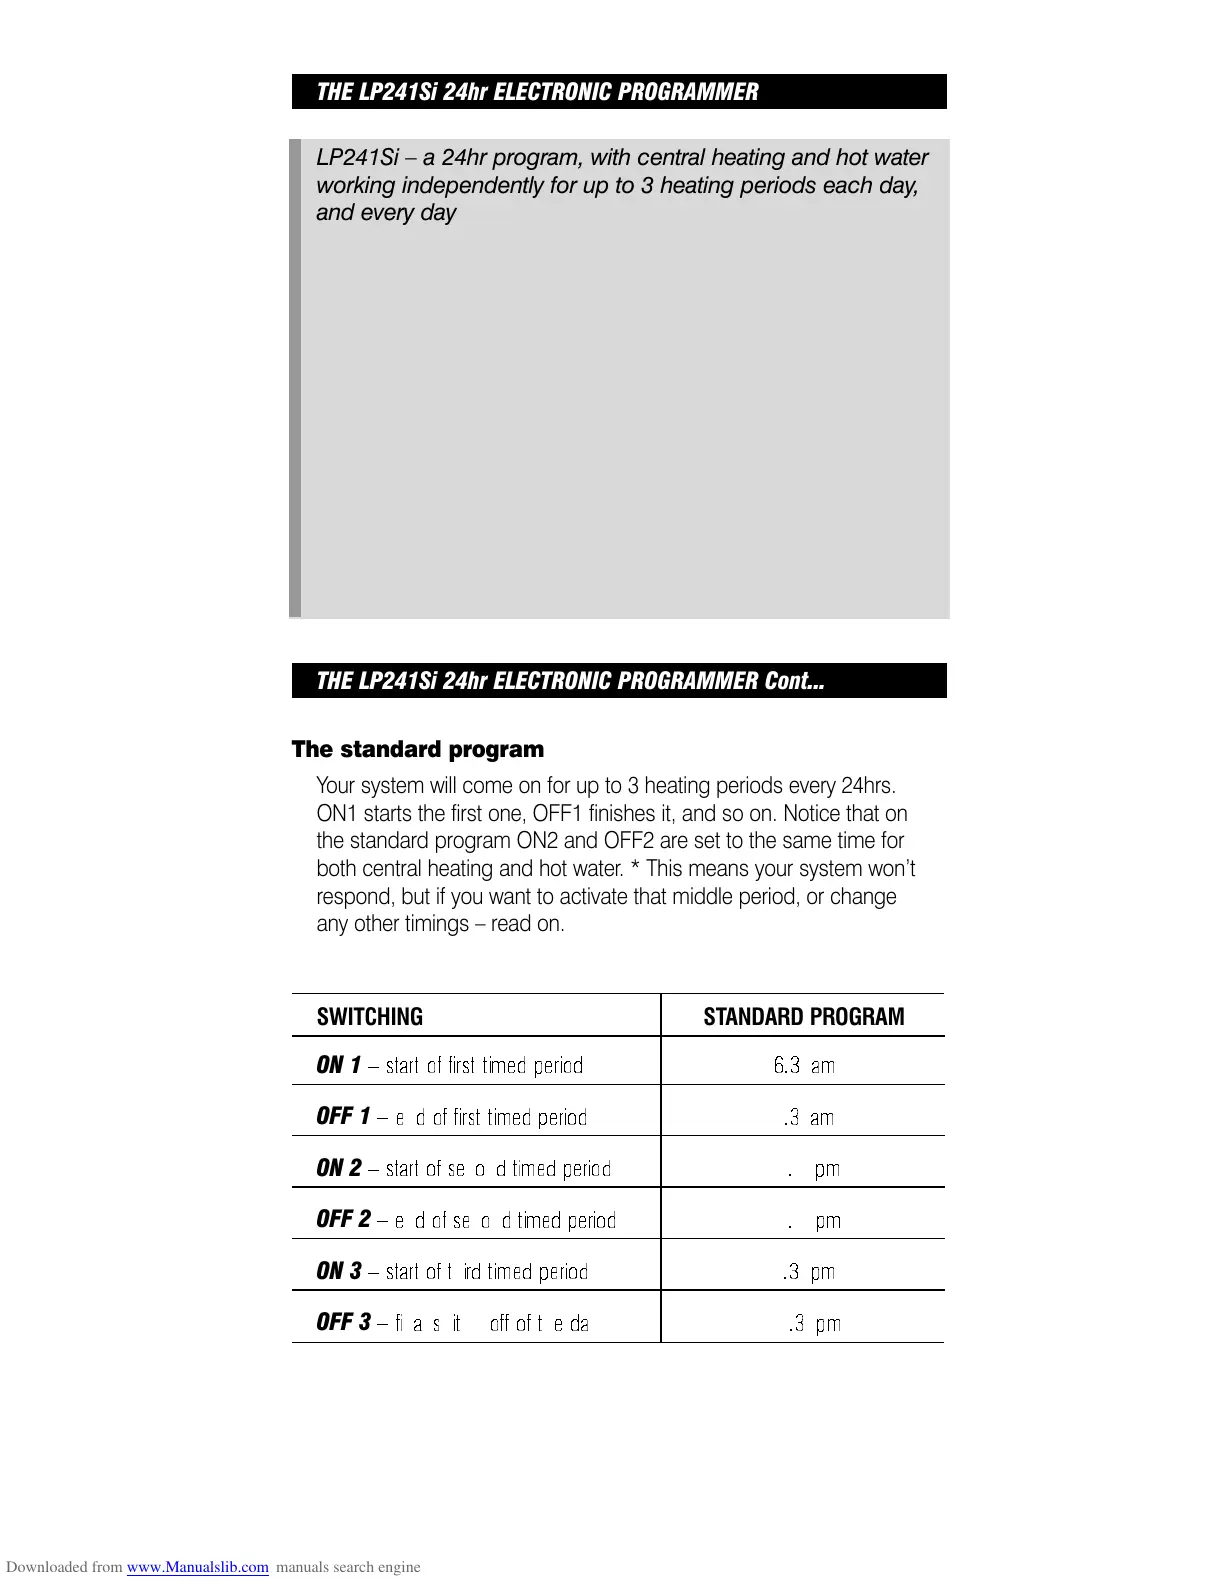
THE LP241Si 24hr ELECTRONIC PROGRAMMER
LP241Si – a 24hr program, with central heating and hot water
working independently for up to 3 heating periods each day,
and every day the same.
If the timings haven’t been set for you, then your programmer
will still be on the factory-set standard 24hr program, with
central heating and hot water operating together on the
same timings for every day of the week. But it’s easy to make
changes, and have heating and water working independently
– just follow the instructions.
Want to leave a timing as it is? Press SET? and move on to
the next one.
If you need to reset your timings to the standard program
and start again, press ‘SET’ and ‘+’ together to go back to
the pre-set program.
If you don’t press anything for two minutes, the programmer
automatically goes back to normal operation.
LP241Si, LP522Si & LP722Si PROGRAMMERS
L
P111Si & LP711Si TIMESWITCHES
V
oltage 230V AC +10% - 10% 50Hz
P
rogrammer Rating 2 (1) A 230V AC each switch
Timeswitch Rating 2 (1) A 230V AC
A
mbient temp Operating: 0º to 45ºC
Storage: -20ºC to 50ºC
Without mains power Display: blank
Time: always kept
P
rogram times: always preserved
Programming resolution 1 minute
W
iring Fixed wiring only, to comply with
current IEE regulations
Maintenance Must be maintained by a qualified
e
lectrician or heating engineer
INSTALLATION INSTRUCTIONS
PLEASE NOTE: INSTALLATION MUST ONLY BE
C
ARRIED OUT BY A QUALIFIED ELECTRICIAN OR
HEATING ENGINEER.
M
AKE SURE MAINS INPUT HAS A 3 AMP FUSE.
T
ECHNICAL DATA
Lifestyle Programmers and Timeswitches conform to the
essential requirements of these Directives:
8
9/336/EEC – Electromagnetic compatibility
73/23/EEC – Low voltage
Drayton Tempus 6, 7 (new models) N L 1 2 3 4
Lifestyle LP112, LP241, LP522, LP722 N L 1 2 3 4
Switchmaster 400, 600 N L 4 3 1
(no connection to terminal 4 on 600)
Switchmaster 805 N L 4 2 3 1
ACL MP (Towerchron) 2 1 6 10
ACL FP (Towerchron) 2 1 8 11 6 10
Drayton Tempus 3, 4, 6, 7 (old models) N L 1 2 3 4
Switchmaster 905, 9001 N L 4 2 3 1
D
anfoss Randall
C
P15, CP715, FP15, FP715 (Mk18
)
ENL12 3 4
Danfoss Randall 3020P, 3060 E 7 6 4 2
Danfoss Randall 4033 (link 1-6) E 7 6 5 3 4 2
Danfoss Randall 102, 102E, 102E5, 102E7 (link 6-3) E 5 6 1 2
Danfoss Randall 701 (link L-5 and 5-6) E N L 3 1
D
anfoss Randall 702 (link L-5 and 5-6) E N L 4 2 3 1
Danfoss Randall 922, 972 (link L-2 and 2-5) E N L 1 4 3 6
Danfoss Randall SET2, SET2E, SET3E, SET3M, FP975 E N L 3 6 1 4
SET5 (link L-2 and 2-5)
Grasslin Towerchron DP 72, QE2 N L 1 2 3 4
Honeywell ST 699/799 (link L-5 and 5-8) N L 7 4 6 3
Honeywell ST 6200, ST 6300, ST 6400, ST 6450 N L 1 2 3 4
Honeywell ST 7100 (link L-3 and 3-6) N L 7 4 8 5
Horstmann 525, 527, 425 Diadem, H21, H27, E N L 3 6 1 4
H121, Tiara (link L-2 and 2-5)
Horstmann Centaur Plus, C21, C27 N L 1 2 3 4
Landis & Staefa* RWB2, RWB2E, 20, 40, 102, 200, N L 1 2 3 4
252 & 270, RWB9
Myson Microtimer (link L-5 and 5-8) N L 7 4 6 3
Potterton Myson All EP2000’s, EP3000’s, EP6000’s N L 1 2 3 4
(link L-5 and N-N)
Potterton Myson* Mini Minder N L 1 2 3 4
Sunvic Select 207 N L 1 2 3 4
S
unvic SP50, SP100 (link L-3) N L 1 4 2 5
Drayton Tempus 1, 2 (new models) N L 1 3 2 4
Lifestyle LP111, LP711 N L 1 3 2 4
Switchmaster 300 N L 4 1
ACL TC (Towerchron) 2 1 4 7
Drayton Tempus 1, 2 (old models) N L 1 2 3 4
Switchmaster 980 N L 4 1
Danfoss Randall TS15, 75 (Mk18) E N L 1 4 2 5/6
Danfoss Randall TS715 E N L 1 4 2 3
Danfoss Randall TS975 E N L 5 4 6 1,2,3
Danfoss Randall SET1, SET1E E N L 5 4 6
Danfoss Randall SET4 E N L 5 4 6
Danfoss Randall 103, 103E, 103E5, 103E7 4 5 6 3 1 2
Danfoss Randall 911, 971 E N L 5 6 4 2
G
rasslin Towerchron QE1 N L 2 4 3
Grasslin Towerchron T2001, T2001Q E N L 7
Honeywell ST 6100A, ST 6100C N L 1 4 2
Honeywell ST 7000B L 3 2
H
orstmann Centaur SC1, SC7 N L 4 3
H
orstmann Centaur Plus, C11, C17 N L 2 4 3
Horstmann Emerald 423, Pearl Auto E N L 3 4
Horstmann 517, Coronet, H11, H17 E N L 5 4 6
Landis & Staefa RWB3 N L 4 3
Landis & Staefa RWB30, RWB50, 100, 152, 170 N L 2 4 3
Landis & Staefa RWB7 N L 2 4 3 1
Potterton Myson EP4000, 4001, 4002, 5002 N L 5 4 2
Sangamo M6 E 46312
Smiths Centroller Mk1, Mk2 N L 3 2
Smiths Centroller 30 1 2 4/5
Smiths Centroller 300, 980 N L 4 1
Sunvic Select 107 N L 1 3 2 4
Sunvic SP20, SP35 N L 3 5 4 S
Venner Vennerette N L LINE LOAD
DUAL
CHANNEL
L
P241Si, LP522Si, LP722Si
SINGLE
CHANNEL
SINGLE
CHANNEL
Timeswitch
DUAL
CHANNEL
Programmer
f
or heating OR hot water
L
P111Si, LP711Si
Invensys Controls Europe
Sales: 0845 1305522 / Technical Helpline: 0845 1307722
Email: customer.care@invensyscontrols.com / Web: www.draytoncontrols.co.uk
SERVICE INTERVAL
for heating AND hot water
Installation Instructions
06490050001 ISSC
User’s Instructions
TIMESWITCHES
User’s Instructions
PROGRAMMERS
BEFORE INSTALLATION
First, make sure the mains supply is switched off!
PROGRAMMER ONL
Y
The programmer must be set to the type of system it is to con-
t
rol. The link on the back of the unit has two settings – P and G.
P = a fully pumped and controlled system – allowing
heating and hot water to be set separately.
G = a gravity-fed hot water system – which does not allow
independent setting of heating without hot water, though
hot water can be controlled alone.
USING AN EXISTING WALL-PLATE
Loosen the securing screws on the old programmer and
unplug it. Check that there’s 70mm clearance to the right of
the wall-plate, and 25mm above it. Check the chart on the
next page to compare terminals and if necessary, change the
wiring of the wall-plate to suit. Now plug the Lifestyle unit into
the wall-plate and tighten the securing screws.
Check the 3A fuse, and switch on the mains.
FITTING A NEW WALL-PLATE
The ideal location is 1.4m above floor level, with reasonable
lighting, good access, no condensation, no extremes of
temperature, and a supporting surface that fully covers the
back of the unit.
Position with 70mm clearance to the right, 25mm above, and
sufficient room to access the securing screws underneath.
Fix, with terminals at the top, either direct to a flat wall using wall
plugs and No. 6 x 1” (25mm) woodscrews, or on a flush mount-
ing single conduit box type UA1 (BS4662) using M3.5 x 14 bolts.
DO NOT USE A SURFACE MOUNTING BOX.
T
IMESWITCH TERMINAL COMPARISONS
Earth
Neutral
Live
Common
On
Off
Spare
MAKE MODEL
Current Models
PROGRAMMER TERMINAL COMPARISONS
Current Models
Earth
Neutral
Live
H/W off
C/H off
H/W on
C/H on
MAKE MODEL
D
iscontinued/Competitors’ Models
* Can simply be removed from the backplate and replaced without any disturbance to the existing wiring.
Discontinued/Competitors’ Models
WIRING THE TIMESWITCH
Make the wiring connections as
above. Note that the output
c
ontacts are voltage-free, so
p
ower needs to be put on to
Terminal 1 either by linking from
Terminal L or from a separate
supply with a 3A fuse.
WIRING THE PROGRAMMER
Arrowed numbers relate to
the junction box.
Consult boiler handbook
for details of pump
overrun wiring.
Connection Charts
Wiring Colour Codes
GR Grey
Y Yellow
BK Black
BL Blue
BR Brown
RD Red
W White
OR Orange
YG Yellow/Green
C Common
H Call for Heat
S Satisfied
N Neutral
E Earth
L Live
*Thermostat Key
USING A DRAYTON SIMP-L-FIT, ALTHOUGH NOT
NECESSARY, WILL MAKE THIS INSTALLATION EASIER.
S
WITCHING
S
TANDARD PROGRAM
M
ON-FRI SAT-SUN
O
N 1
– start of first timed period 6. 30 am 7.0 0am
OFF 1
– end of first timed period 8. 30 am 9 .0 0 am
ON 2
– start of second timed period* 12 . 0 0 pm 1 2 . 0 0 p m
OFF 2
– end of second timed period* 12 .0 0p m 1 2 .0 0p m
ON 3
– start of third timed period 4.30p m 4.00pm
OFF 3
– final switch-off of the day 10.30pm 11.00pm
D
AY-TO-DAY VARIATIONS Cont...
Over-riding the program
A
t the side of the display there are four operating modes:
OFF = continuously off.
TIMED = on for up to 3 periods a day.
ONCE = on for 1 period a day, from the start of ON1
t
o the end of OFF3.
ON = continuously on.
U
se the SELECT button under the flap to change the mode.
This won’t alter the timings in your program, which you can
r
eturn to by selecting TIMED.
THE LP111Si 24hr ELECTRONIC TIMESWITCH
LP111Si – a 24hr program, up to 3 heating periods each day,
and every day the same.
Want to leave a timing as it is? Just press SET? and move on
t
o the next one.
If you need to reset your timings to the standard program
and start again, press ‘SET’ and ‘+’ together to go back to
t
he pre-set program.
T
he standard program
Your system will come on for up to 3 heating periods every
2
4hrs. ON1 starts the first one, OFF1 finishes it, and so on.
N
otice that ON2 and OFF2 are set to the same time.* This
means your system won’t respond, but if you want to activate
t
hat middle period or change any other timings – read on.
SWITCHING STANDARD PROGRAM
ON 1
– start of first timed period 6. 30a m
OFF 1
– end of first timed period 8.3 0 am
ON 2
– start of second timed period*
12.00pm
O
FF 2
– end of second timed period* 12 .0 0p m
ON 3
– start of third timed period 4.30pm
O
FF 3
– final switch-off of the day 10.30pm
Changing the timings
n Press the SET? button and you’ll see ‘SET PROG?’.
n Press the YES button, and you’ll see ON1, the start of your first
heating period. Adjust it in 1-minute steps using the – and +
buttons. If the – and + buttons are held down, the time changes
in 10-minute steps.
n
Press SET?, and you’ll see OFF1, the end of your first heating
period. Adjust this in the same way, press SET?, then repeat the
procedure for ON2, OFF2, ON3 and OFF3.
n When you press SET? after setting OFF3, the timeswitch will
return to normal operation.
THE LP711Si 7-DAY ELECTRONIC TIMESWITCH
LP711Si – a 7-day program, allowing for different
timings on each day of the week, up to 3 heating periods
each day.
Want to leave a timing as it is? Just press SET? and move on
to the next one.
If you need to reset your timings to the standard program and
start again, press ‘SET’ and ‘+’ together to go back to the
pre-set program.
The standard program
Your system will come on for up to 3 heating periods every
24hrs. ON1 starts the first one, OFF1 finishes it, and so on.
Notice that ON2 and OFF2 are set to the same time.* This
means your system won’t respond, but if you want to activate
that middle period or change any other timings – read on.
Lifestyle
DUAL
CHANNEL
LP241Si, LP522Si, LP722Si
SINGLE
CHANNEL
f
or heating OR hot water
LP111Si, LP711Si
Invensys Controls Europe
Sales: 0845 1305522 / Technical Helpline: 0845 1307722
Email: customer.care@invensyscontrols.com / Web: www.draytoncontrols.co.uk
for heating AND hot water
U
ser’s Instructions
06490050001 ISSC
THE LP711Si 7-DAY ELECTRONIC TIMESWITCH Cont...
Changing the timings
n
Press the SET? button and you’ll see ‘SET PROG?’.
Set all weekdays
F
irst you set the times that are going to be the same for each
weekday, then you can select each day individually and make
any further adjustments. If you want each day to be quite
d
ifferent, go straight to ‘Set each day’.
n
Press the YES button, and the display will ask ‘SET MON to FRI
PROG?’.
n Press YES and you’ll see ON1, the start of your first heating peri-
o
d. Adjust it in 1-minute steps using the – and + buttons.
If the – and + buttons are held down, the time changes in
1
0-minute steps.
n Press SET?, and you’ll see OFF1, the end of your first heating
p
eriod. Adjust this in the same way, press SET?, then repeat
the procedure for ON2, OFF2, ON3 and OFF3.
S
et each day
n
If, after you’ve set OFF3 you want to fine-tune one or more
w
eekdays, press SET? until you find the first day you want to
adjust – then go through the procedure, altering any time you
w
ish. Press SET? to move on to the next day. When you’ve
finished, press SET? until you see ‘SET SAT SUN PROG?’.
n
If you don’t want to alter any individual days, keep pressing
SET? until you see ‘SET SAT SUN PROG?’.
Set weekend
n
Press YES and alter ON1, OFF1, ON2, OFF2, ON3 and OFF3
times in the same way.
Set each day
n
If, after you’ve set OFF3 for both SAT & SUN, you want to fine-
t
une Saturday or Sunday, press SET? until you find the first day
y
ou want to adjust – then go through the procedure, altering any
time you wish. Press SET? to move on to the next day. When
you press SET? after setting your hot water for Sundays, the pro-
grammer will go back to normal operation.
n If you don’t want to alter either day, keep pressing SET?
until the programmer goes back to normal operation.
If the engineer has set your program and timings – you
won’t need to do anything else. Just keep this guide in a
safe place for future reference.
INTRODUCTION
Lifestyle Programmers will automatically switch your central
heating and hot water on and off at times that suit you.
Depending on your system, central heating and hot water
can either both come on and off at the same time, or work
independently. The red light on the front of the programmer
shows when each one is on.
INTRODUCTION
Lifestyle Timeswitches will automatically control your system
b
y switching it on and off at times that suit you. The red light
on the front of the timeswitch shows when it’s on.
n LP111Si – a 24hr program, up to 3 heating periods
e
ach day, and every day the same.
n LP711Si – a 7-day program, allowing for different
t
imings on each day of the week, up to 3 heating periods
each day.
If the engineer hasn’t set your timings for you, your timeswitch
will work with a standard program that has been set at the
factory. If this doesn’t suit you, it’s very easy to change it –
when you’ve read this introductory section, simply turn to
t
he page for your timeswitch model.
Remember:
n Make your changes using the SET?, YES/-, and + buttons.
n You can’t set ON1 as the last timing before midnight, but you
can set OFF3 after midnight – providing it’s not more than 23
hours and 59 minutes after ON1.
n You need to set the timings in sequence – i.e. ON1, OFF1, ON2,
OFF2, ON3, OFF3. If you get out of sequence, the display will
flash a warning.
SWITCHING
ON 1
– start of first timed period
OFF 1
– end of first timed period
ON 2
– start of second timed period
OFF 2
– end of second timed period
ON 3
– start of third timed period
OFF 3
– final switch-off of the day
S
INGLE
CHANNEL
Timeswitch
D
UAL
CHANNEL
Programmer
SERVICE INTERVAL
Lifestyle
Installer note: After installation, tear along perforations indicated and retain this section - only leave
t
he User instructions with the end user
Installer note: After installation, tear along perforations indicated and retain this section - only leave
the User instructions with the end user
DAY-TO-DAY VARIATIONS
S
ometimes you might need to change the way you use your
system temporarily – perhaps due to an exceptionally cold day.
H
ere’s how to do it – without affecting the timings in your
p
rogram.
Switching on and off
On the front of the timeswitch is an Advance button. It allows
y
ou to switch your system on or off, irrespective of the program.
Press Advance to switch it on, and it will stay on until the end
of the next OFF period. Turn it off, and it will stay off until the
b
eginning of the next ON period.
What is a programmer?
...an explanation for householders
Programmers allow you to set ‘On’ and ‘Off’ time periods.
Some models switch the central heating and domestic hot
water on and off at the same time, while others allow the
domestic hot water and heating to come on and go off at
different times.
S
et the ‘On’ and ‘Off’ time periods to suit your own lifestyle.
O
n some programmers you must also set whether you want
t
he heating and hot water to run continuously, run under the
chosen ‘On’ and ‘Off’ heating periods, or be permanently off.
The time on the programmer must be correct. Some types
h
ave to be adjusted in spring and autumn at the changes
b
etween Greenwich Mean Time and British Summer Time.
You may be able to temporarily adjust the heating pro-
gramme, for example, ‘Override’, ‘Advance’ or ‘Boost’. These
are explained in the manufacturer’s instructions.
T
he heating will not work if the room thermostat has switched
t
he heating off. And, if you have a hot-water cylinder, the
water heating will not work if the cylinder thermostat detects
t
hat the hot water has reached the correct temperature.
If the engineer has set your program and timings – you won’t
need to do anything else. Just keep this guide in a safe place
for future reference.
USERS NOTES
n Press the SET? button until you see SET CLOCK?.
Set the hour
n Press YES once, and then the hour will start to flash. Use the
– and + buttons to set the hour, checking for AM and PM.
Set the minute
n Press SET?, and the minutes will start to flash. Use the – and +
buttons to set the exact time.
n Press SET?, and ‘SET DATE?’ appears in the display.
If you don’t want to change the date press SET? to go back to
normal operation. If you do, go on to the next section.
SETTING THE DATE
The weekday is automatically calculated from the date, so if
the weekday is incorrect you’ll need to reset the date.
n Press the SET? button until you see SET DATE?.
Set the year
n Press YES and the year will start to flash. Use the – and + but-
tons to adjust.
Set the month
n Press SET? and the month will start to flash. Use the – and +
buttons to adjust.
Set the day
n Press SET? and the day will start to flash. Use the – and + but-
t
ons to adjust.
S
et the Day Light Saving
n Press SET? and the current DLS status will start to flash for day
light saving (British Summer Time). Use the – and + buttons to
turn on or off.
n Press SET? to go back to normal operation.
WEEKDAYS WEEKENDS
HW CH HW CH
ON 1
– start of first timed period 6.30am 6.30am 7.00am 7.00am
O
FF 1
– end of first timed period
8.30am 8.30am 9.00am 9.00am
ON 2
– start of second timed period* 12.00pm 12.00pm 12.00pm 12.00pm
OFF 2
– end of second timed period* 12 . 00 p m 12. 0 0p m 12.0 0 pm 12. 0 0 pm
ON 3
– star
t of thir
d timed period 4.30pm 4.30pm 4.00pm 4.00pm
O
FF 3
–
final switch-off of the day 10.30pm 10.30pm 11.00pm 11.00pm
SWITCHING
W
EEKDAYS WEEKENDS
HW CH HW CH
ON 1
– start of first timed period 6.30am 6.30am 7.00am 7.00am
OFF 1
– end of first timed period 8.30 a m 8 .3 0 am 9 . 00 am 9 .0 0 am
ON 2
– start of second timed period* 12.00pm 12.00pm 12.00pm 12.00pm
OFF 2
– end of second timed period* 12.00pm 12.00pm 12.00pm 12.00pm
ON 3
– start of third timed period 4.30pm 4.30pm 4.00pm 4.00pm
OFF 3
– final switch-off of the day 10.30pm 10.30pm 11.00pm 11.00pm
SWITCHING
WIRING THE PROGRAMMER Cont...
Connection Charts
M
ake the wiring connections, as above, for the appropriate system.
For surface wiring, snap out the cable entry strip on the bottom edge
of the wall-plate. Lifestyle units are double-insulated and need no earth
connection, but an earthing continuity (loop) terminal is provided for
c
onvenience.
After wiring, plug in the unit and tighten the securing screws.
Check the mains input has a 3A fuse, and switch on the mains.
Then set the timings as shown in the User’s Guide.
A
LWAYS SWITCH OFF THE MAINS BEFORE REMOVING
THE LIFESTYLE TIMESWITCH/PROGRAMMER – AND
NEVER FIT IT TO A LIVE WALL-PLATE!
SERVICE INTERNAL FEATURE
Applicable to all models.
If you wish to activate, or adjust, the settings for the ‘service interval’
feature then please refer to the instructions for the service interval
(LP Si) reset module [SOLD SEPARATELY]
Invensys Controls Europe
S
ales: 0845 1305522 / Technical Helpline: 0845 1307722
Email: customer.care@invensyscontrols.com / Web: www.draytoncontrols.co.uk
INSTALLERS/ENGINEERS NOTES
THE LP522Si 5/2-DAY ELECTRONIC PROGRAMMER Cont...
Changing the timings
n Press the SET? button and you’ll see ‘SET PROG?’.
Set the weekday central heating
n Press the YES button, and the display will ask ‘SET CH MON to
FRI PROG?’.
n Press YES and you’ll see ON1, the start of your first central heat-
ing period. Adjust it in 1-minute steps using the – and + but-
tons. If the – and + buttons are held down, the time changes in
10-minute steps.
THE LP241Si 24hr ELECTRONIC PROGRAMMER Cont...
The standard program
Your system will come on for up to 3 heating periods every 24hrs.
ON1 starts the first one, OFF1 finishes it, and so on. Notice that on
the standard program ON2 and OFF2 are set to the same time for
both central heating and hot water. * This means your system won’t
respond, but if you want to activate that middle period, or change
any other timings – read on.
Changing the timings
n Press the SET? button and you’ll see ‘SET PROG?’.
Set the central heating
n Press the YES button, and the display will ask ‘SET CH PROG?’.
n Press YES and you’ll see ON1, the start of your first central heat-
ing period. Adjust it in 1-minute steps using the – and + but-
tons. If the – and + buttons are held down, the time changes in
10-minute steps.
n Press SET?, and you’ll see OFF1, the end of your first central
heating period. Adjust this in the same way, press SET?, then
repeat the procedure for ON2, OFF2, ON3 and OFF3.
Set the hot water
n When you press SET? after setting OFF3 for the central heating,
the display will ask ‘SET HW PROG?’.
n Press YES, then set your times in the same way. Remember, in
this mode you can have different times to your central heating if
you wish.
n When you press SET? after setting OFF3 for the hot water, the
programmer will return to normal operation.
THE LP522Si 5/2-DAY ELECTRONIC PROGRAMMER
LP522Si – a 5/2-day program allowing for different
timings at the weekends, with central heating and hot water
working independently for up to 3 heating periods each day.
If the timings haven’t been set for you, then your programmer
will still be on the factory-set standard program. This means
t
hat central heating and hot water will operate together, with
the same timings for weekdays and different ones for the
weekend. But it’s easy to make changes, and have heating
a
nd water working independently – just follow the instructions.
W
ant to leave a timing as it is? Press SET? and move on to
t
he next one.
I
f you need to reset your timings to the standard program
and start again, press ‘SET’ and ‘+’ together to go back to
the pre-set program.
I
f you don’t press anything for two minutes, the programmer
automatically goes back to normal operation.
T
he standard program
Your system will come on for up to 3 heating periods every
24hrs. ON1 starts the first period, OFF1 finishes it, and so on.
N
otice that ON2 and OFF2 are set to the same time.* This
means your system won’t respond, but if you want to activate
t
hat middle period, or change any other timings – read on.
n Press SET?, and you’ll see OFF1, the end of your first central
heating period. Adjust this in the same way, press SET?, then
repeat the procedure for ON2, OFF2, ON3 and OFF3.
Set weekday hot water
n When you press SET? after setting OFF3 for the central heating,
the display will ask ‘SET HW MON to FRI PROG?’.
n Press YES, then set your times in the same way. Remember, in
this mode you can have different times to your central heating if
you wish.
Set weekend central heating
n When you press SET? after OFF3 for the weekday hot water,
the display will ask ‘SET CH SAT SUN PROG?’. Press YES to
confirm, and alter the times in the same way.
Set weekend hot water
n When you press SET? after OFF3 for the weekend central
heating, the display will ask ‘SET HW SAT SUN PROG?’.
Press YES, and follow the procedure.
n When you press SET? after OFF3 for HW SAT SUN, the
programmer will go back to normal operation.
THE LP722Si 7-DAY ELECTRONIC PROGRAMMER
LP722Si – a 7-day program allowing for different timings
on each day of the week, with central heating and hot water
w
orking independently for up to 3 heating periods each day.
If the timings haven’t been set for you, then your programmer
will still be on the factory-set standard program. This has central
heating and hot water operating together – with the option of
having different timings for each day of the week. But it’s easy
to make changes, and have heating and water working
independently – just follow the instructions.
Want to leave a timing as it is? Press SET? and move on to the
n
ext one.
If you need to reset your timings to the standard program and
s
tart again, press ‘SET’ and ‘+’ together to go back to the
pre-set program.
I
f you don’t press anything for two minutes, the programmer
automatically goes back to normal operation.
T
he standard program
Y
our system will come on for up to 3 heating periods every
2
4hrs. ON1 starts the first period, OFF1 finishes it, and so on.
N
otice that ON2 and OFF2 are set to the same time.* This
m
eans your system won’t respond, but if you want to activate
t
hat middle period, change any other timings – read on.
Changing the timings
n
Press the SET? button and you’ll see ‘SET PROG?’.
SERVICE INTERVAL FEATURE Cont...
You should contact your service engineer to arrange a service.
n When the ‘service’ is due it will display;
n An audible alarm will sound; push any button to snooze the
alarm for 24hrs
If you haven’t already arranged for a service, you should
contact your service engineer immediately.
SETTING THE CLOCK AND DATE
Applicable to all models.
SETTING THE CLOCK
The clock in your programmer has been set at the factory,
and automatically accounts for British Summer Time.
However, should you need to set the clock, read on.
n Press SET?, and you’ll see OFF1, the end of your first central
heating period. Adjust this in the same way, press SET?, then
repeat the procedure for ON2, OFF2, ON3 and OFF3.
LP722Si
7-DAY ELECTRONIC PROGRAMMER Cont...
n When you press SET? after setting OFF3 for the weekday central
heating, the display will ask ‘SET HW MON to FRI PROG?’.
n Press YES, then set your hot water times in the same way.
Remember, in this mode you can have different times to your
central heating if you wish.
Set each day
If, after you’ve set OFF3 for your hot water, you want to fine-tune
one or more weekdays, press SET? until you find the first day
you want to adjust – then go through the procedure, altering any
time you wish. Press SET? to move on to the next day. When
you’ve finished, press SET? until you see ‘SET SAT SUN
PROG?’.
If you don’t want to alter any individual days, keep pressing
SET? until you see ‘SET SAT SUN PROG?’.
Set weekend
n Press YES, and alter the central heating and hot water times in
the same way.
n When you press SET? after OFF3 for HW SAT SUN, the pro-
g
rammer will ask the question TEST? If you want to test your
program, see below, otherwise press SET? again. If you don’t
want to test your program, press SET? again – and you’ll be
asked the question SET H’DAY? If you want to set a holiday
switch off, see page 23, otherwise press SET? again.If you’re not
going to program in a holiday switch-off, then press SET? again
and your programmer will go back to normal operation.
SERVICE INTERVAL FEATURE
A
pplicable to all models.
I
f your installer has configured the ‘service interval’ feature,
t
hen your programmer will display the following information.
n 30 days before the next ‘service’ is due it will display;
n then
n
then
n and then revert to the normal time display.
The display will cycle continuously. When you see
t
his it means; SERVICE DUE ON 25
th
D
ECEMBER.
I
nstaller note: After installation, tear along perforations indicated and retain this section - only leave
t
he User instructions with the end user
Installer note: After installation, tear along perforations indicated and retain this section - only leave
the User instructions with the end user
Invensys Controls Europe
Sales: 0845 1305522 / Technical Helpline: 0845 1307722
Email: customer.care@invensyscontrols.com / Web: www.draytoncontrols.co.uk
THE LP722Si 7-DAY ELECTRONIC PROGRAMMER Cont...
Set all weekdays
First you set the times that are going to be the same for each
weekday, then you can select each day individually and make
any further adjustments. If you want each day to be quite differ-
ent, go straight to ‘Set each day.’
n Press the YES button, and the display will ask ‘SET MON to FRI
PROG?’.
n Press YES and the display will ask ‘SET CH MON to FRI
PROG?’.
n Press YES, and you’ll see ON1, the start of your first central
heating period. Adjust it in 1-minute steps using the – and +
buttons. If the – and + buttons are held down, the time changes
in 10-minute steps.
SWITCHING STANDARD PROGRAM
ON 1
– start of first timed period 6.3 0am
OFF 1
– end of first timed period 8. 30 am
ON 2
– start of second timed period* 1 2 . 0 0 pm
OFF 2
– end of second timed period* 12 . 00 p m
ON 3
– start of third timed period 4.30p m
OFF 3
– final switch-off of the day 10.30pm


 To Next Page
 Loading...