Maintenance Informatio
FOR YOUR
OW
N SAFETY. TURN
AWARNING
SWITC
H "OF
F'
.
AND
RE
MOVE PLUG
FROM
POWER SOURCE BEFORE LUBRICATING OR
DOING
ANY
MAINTE
NANCE
ON
YO
UR SA
W.
GENERAL
An occasional
coa
of
paste
wa
on the work table will
allow the
wo
od being
CUt
0 glide smoothly across the
work
surface.
ARM
BE
ARINGS
Lubricate the arm
Dear
gs I a er
10
hou
rs
of
use.
Re-
oil a
fter
eve
50
ours of use enever the
re
is a sque
ak
corning ro the bearings
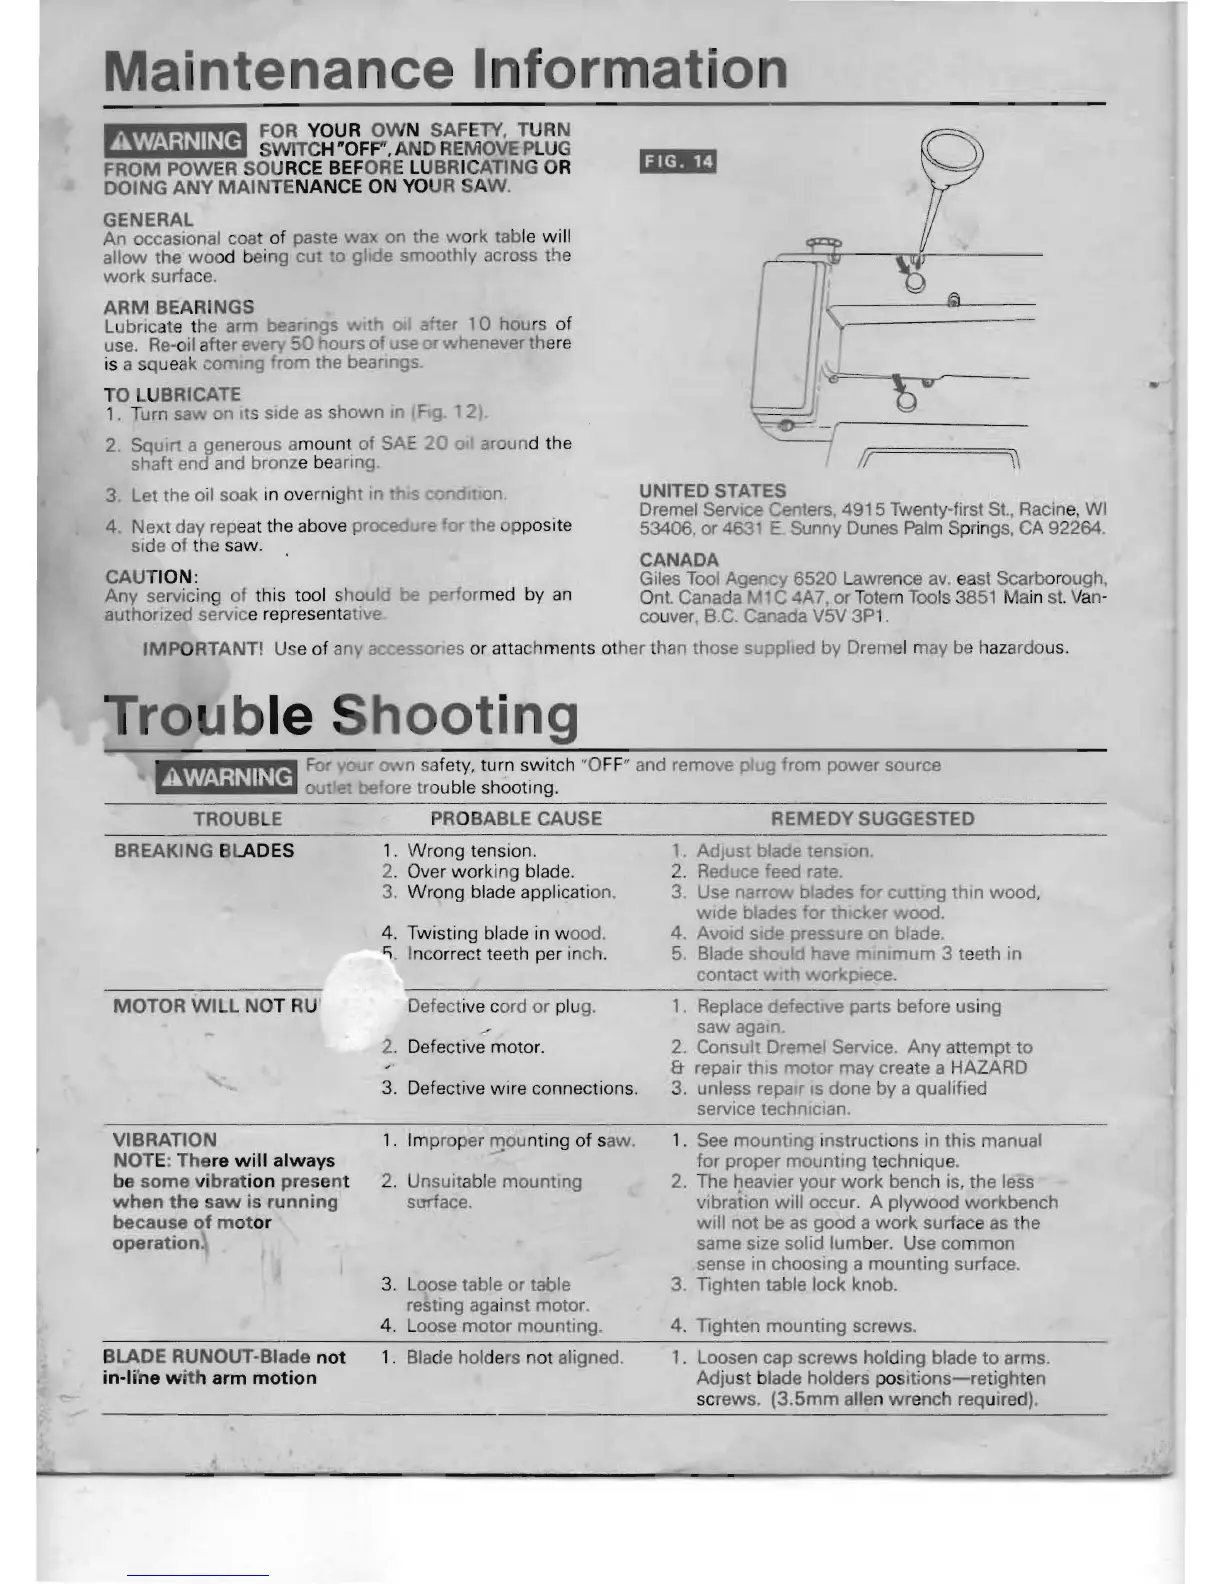
TO LUBRICATE
1.
Turn
sa
n Its side
as
shown
In
F 2).
2 SquIrt a generous amount
of
S around the
shaft end and bronze
be
aring.
3
let
the oil soak in over ight
In
4. Next day repeat the above proced
sIde of the saw.
CAUTION:
Any
servicing of this tool shaul
armed by
an
authOrized service representativ
••
(.C]
If
\\
UNITED STATES
Dremel SeNlee Centers, 491 5
Tw
enty-first St.. Racine,
WI
53406, or 463
E.
Sunny Dunes
Palm
Springs.
CA
92264.
CANADA
Giles
Tool
Agency
6520
Lawrence
avo
east Scarborough,
Ont. Canada C 4A 7,
or
Totem Tools 3
851
Ma
in
st.
Van-
couver B.C. Canada V5V 3P1 .
IM
PO
RTANT! Use
of
an a
es
or attach ments other than those
Su
piled by Dremel may
be
h
az
ardous.
rom power source
TROUBLE
PROBABLE CAUSE
AEMEDY
SUGGESTED
AWARNING
ooting
BREAKING
BLA
DES
MOTOR
WILL
NOT RU
1.
Wrong tension .
2. Over working blade.
3.
Wrong
blade application.
4. Twisting blade in wood.
~
.
Incorrect teeth per inch.
Defective cord or
pl
ug.
2. Defective motor.
3. Defective wire connections.
sawagam
2.
Consul' Dremel Service. Any a
tempt
to
& repair
thiS
'TIotor may create a HAZARD
3. unless repa r
IS
done by a qualified
service technICI
an
VIBRATION
NOT
E:
The
re
will
always
be
some
vi
bra
t
ion
pres
ent
when
the
saw
is
running
because
of
m
ot
or
operation
.
1.
Im
pr
per
lTlou
nting
of
saw.
2. Unsuitable mounting
smface.
3.
Loose table or table
resting
aga
i
nst
motor.
4. Loose motor mounting.
1.
See
mounting instructions in
this
manual
for proper mountIng techni
qu
e.
2. The
~eavler
your
work
bench is, the less
vibratIon
will
occur. A plywood workbench
will
not
be
as
good a
work
surface
as
the
same size solid
lum
ber. Use common
sense in choosing a mounting surface.
3.
Tighten table lock knob.
4.
Tighten mounting screws.
BLAD
E RUNOUT-Blade
not
1.
Bla
de holders not aligned.
1. Loosen cap screws holding blade
to
arms.
in-l
i'ne w
ith
arm
motion
Adjust blade holders
poS
Itions-re
t
ight
en
screws.
(3.5mm
allen
wr
ench required).