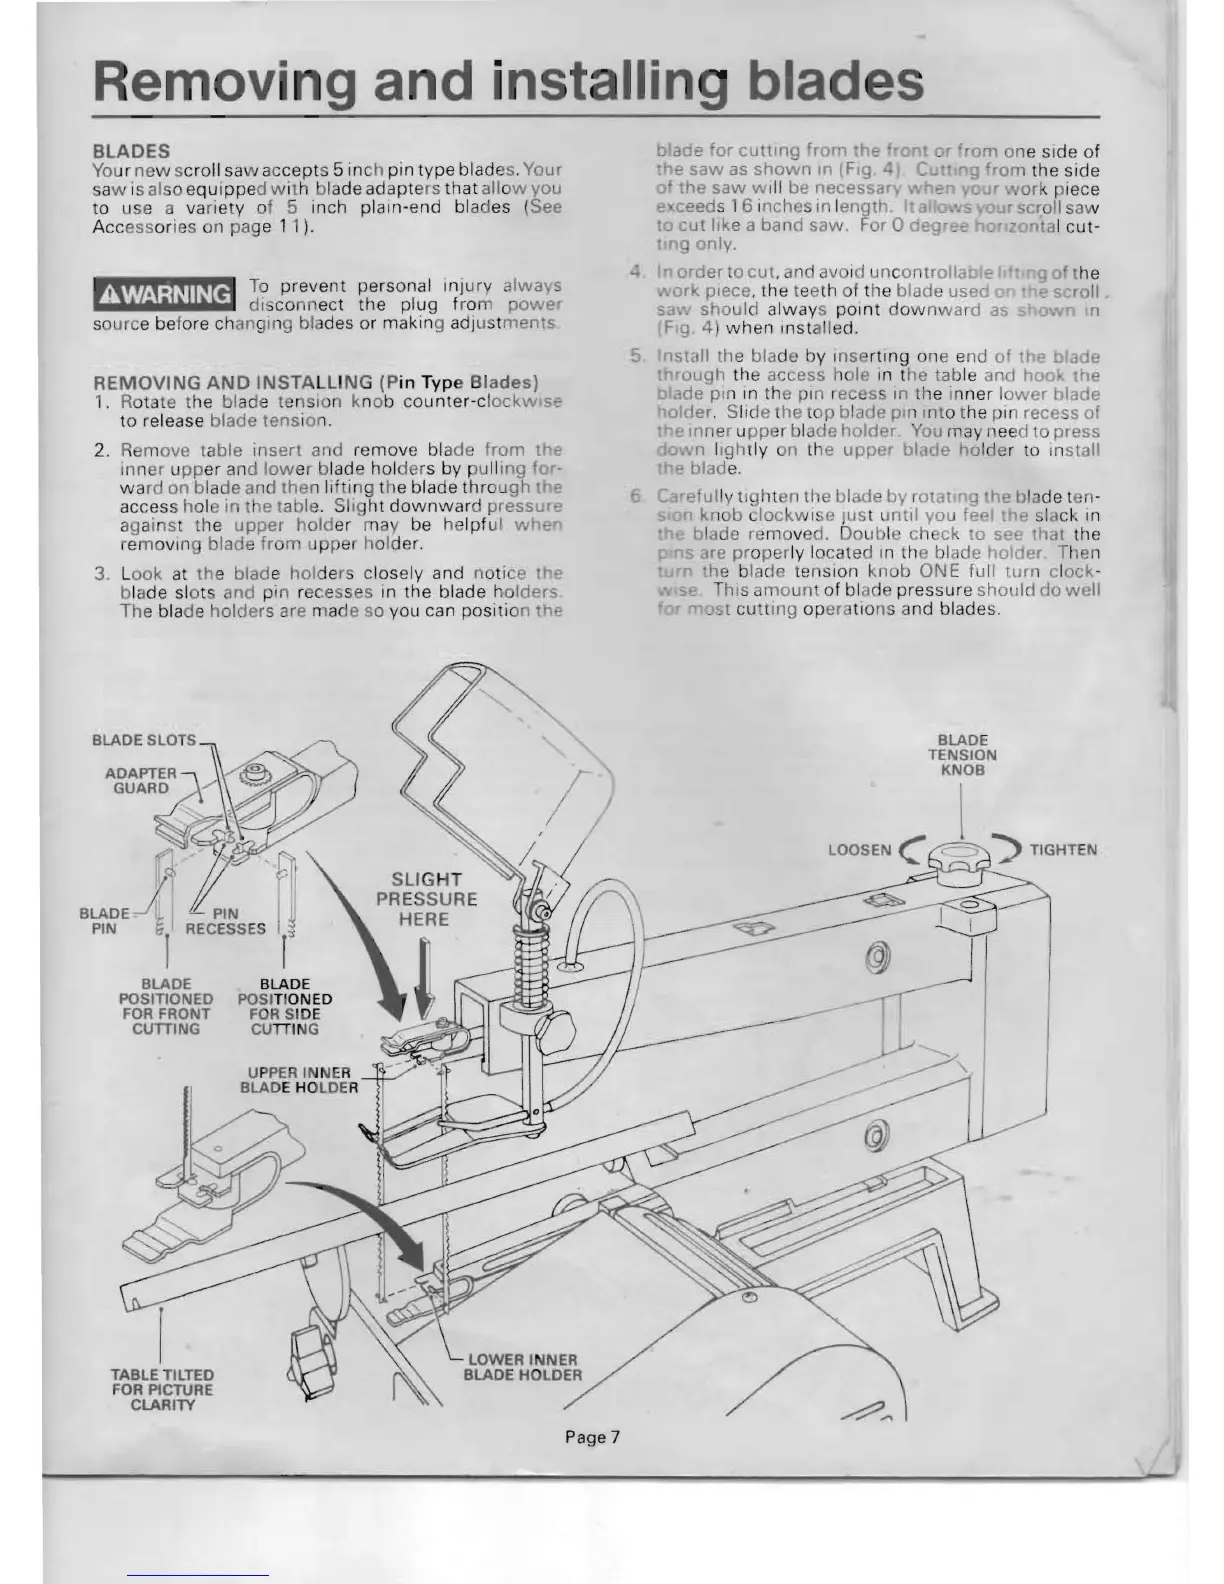
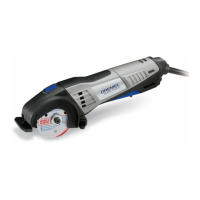
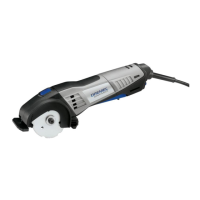
BLADE
POSITIONED
FOR
FRONT
CUmNG
TABLE TILTED
FOR PICTURE
CLARITY
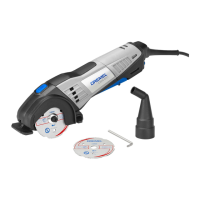
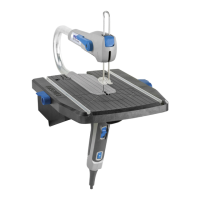
BLADE
POSITIONED
F
OR
SIDE
CU
TII
NG
UP
PE
R INNER
BLADE HOLDER
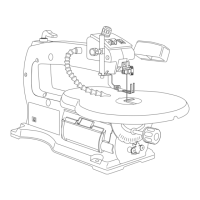
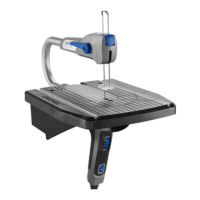
Removi 9 and installin
blades
Page 7
BLADES
Yo
u r new scroll
sa
w
ac
cept
s 5 inch pin
type
blades. Your
saw i al o
equippe
dw
it h
ladeadapt
ers
that
allo
wyou
to use a var
iety
of 5 inch
plain·end
blades (See
Acc
ess
or
ies 011 page 1 1
).
To
prevent
personal injury
alwa
s
AWARNING
di
can ect
the
plug
fro
powe
source before changing bl des or making adjust
ments
REMOVING
AND
INSTAL
LI
NG (P
in
Type
Bl
ades)
1.
A
ot
te the blade Ie si n knob c
ounter-c
l
ockw
s':?
to
release blade
tens
ion.
2. A move table
insert
and re
mov
e bl a
de
from t
inner u
pp
er and low er blade hol
der
s by u
il
ing
or-
wa
rd on b
la
de
and
the
n li
fting
t e blade
thr
o
ugh
t .
ac
cess hal in t e tabl
e.
Sli
ht
downwar
d
pressur
ag
ainst the
upper
hold
er m y
be
h
Ipf
ul
whe
remo
ving blade
fr
m pper holde
r.
3. L
ook
at
th
e blade
hol
der closely and notice t
bla
de
sl
ot and pin recesses in the blade h
old
ers
Th
e blade
ho
l
der
s are made so you can
positi
on tn!?
lade
or
cut
Ing
rrom
hE-
0
he
saw
as
shown
In
(Fig
o
the
saw
w i
ll
be necessar
_ ceeds
16 inches in l
ength
.
I'
s
o
cut
like a ba nd saw. For 0 deg"o't! 0 -
n nly.
der
to
cut.
an avoid unconlTO I
(t
he
piece, the teeth
of
the blade USE" roll .
should
a
lw
ays
point
down
w ard
as
..
nm.,,"'n
4;
when
Installed.
5
Insta
ll the blade
by
Inse
rting
one end 0
the
I e
rough
th access h
Ie
in the table and
hoo
ne
bade
pin
In
the pin leces in the i
nner
lo
wer
blade
older
. Slide the t
op
blade
pm
Int
o the pin recess
of
Inner uppel blade
hold
r.
Y u may need 0 press
o n li
gh
tly n the
upp
er
blade
ho
lder to Instal!
ad
e.
Ca
e u
lly
t
igh
t n the lade
by
rot t
he
ll
iade t n-
on
knob
c
lockwi
e
lus
t
unt
il
yo
u feel P slack
in
blade re moved. Doubl eh ck
to
se hat the
re
pr
o rly 10 ated in the blade
holder
Th n
r he blade tension
knob
ON
E fu ll turn cl
ock
-
_
'"
ThiS
amo
un of blad pressure ShOlll:!
(,jo
w
I!
~st
cutt
ing op
er
tion and blades.
BLADE
TENSION
KNOB