Installing Your Drinkpod
Installing Your Drinkpod 2-11
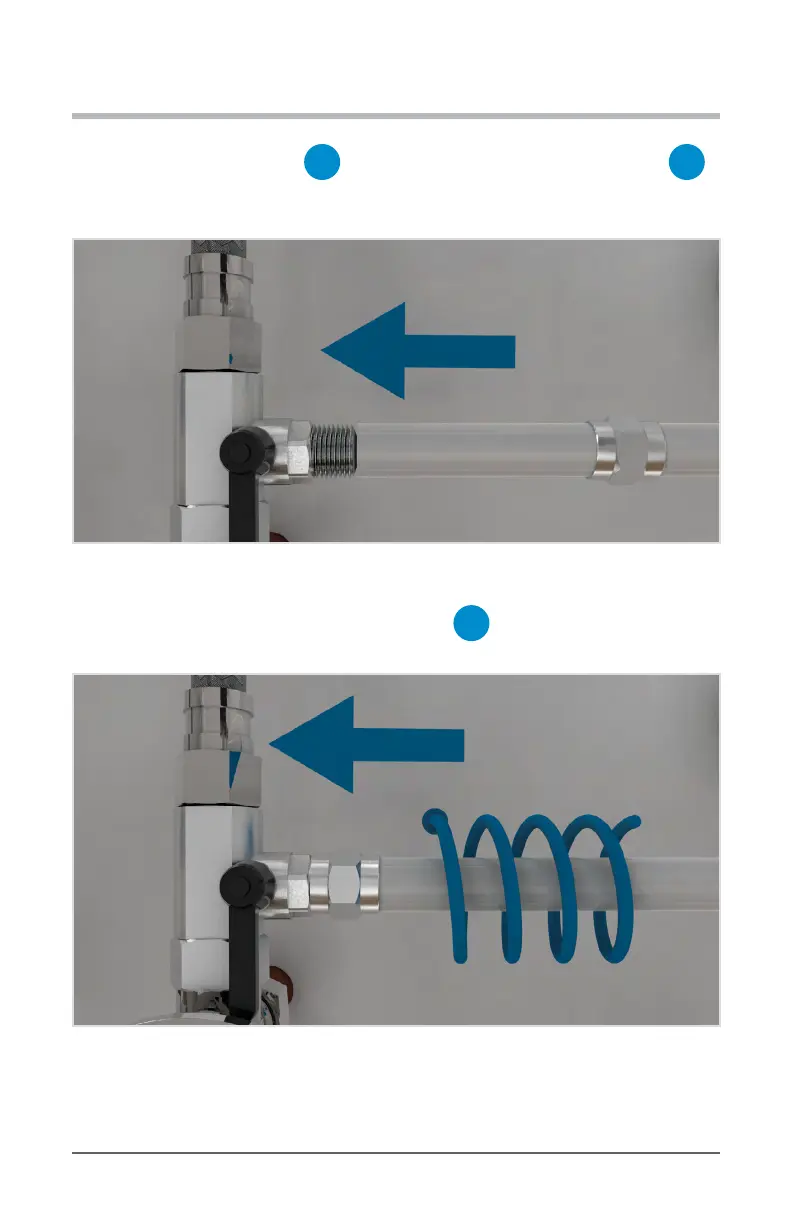
11. Now stretch the same end of
A
1/4 in. White PP Tubing over the ‘nipple’ of
F
3/8 in. Sink Adapter Valve’s side connection until it butts up against the threads. This
may require pressing very rmly and twisting back and forth.
Diagram 2.3(B).11 - Stretch/Press Tubing Over Sink Adapter Valve Compression Nipple
12. Using your hand to screw nut back onto threads of
F
3/8 in. Sink Adapter Valve,
then tighten with pliers, or 7/16 in. wrench.
Diagram 2.3(B).12 - Screw Compression Nut Back Onto Sink Adapter Valve
Congratulations! You’ve just completed the second most dicult part of your installation.
Now jump ahead to “Running Water Source Line Step #4” on page 2-23.