2
INTRODUCTION
Read this manual carefully before operating your security system. Have your installer instruct you on system
operation, and have your installer inform you of the features that have been enabled on your system. All
users of the system should be instructed in its use. Complete the System Information page and store this
manual in a safe place for future reference.
Fire Detection Equipment
This equipment is capable of monitoring fire detection devices such as smoke detectors, and of providing
a warning if a fire condition is detected. Good fire detection depends on having an adequate number of
detectors placed in appropriate locations. Fire detection equipment should be installed in accordance
with applicable standards and codes. Carefully review the Household Fire Safety and Family Escape
Planning sections of this manual. IMPORTANT NOTE: Your installer must enable the fire detection features
of this equipment for the functions to be operational.
Test Your System Regularly
To ensure that your system continues to function as intended, it is important that you test your system
weekly. Refer to the “Testing Your System” section of this manual, and read and follow the instructions
carefully. If your system does not function properly or if you have any questions about testing your system,
call your installing company for service or assistance.
Important Notice
A security system cannot prevent emergencies. It is only intended to alert you of an emergency
situation. Security systems are generally very reliable but they may not work under all conditions
and they are not a substitute for prudent security practices or life and property insurance. Your
security system should be installed and serviced by qualified security professionals who should
inform you of the level of protection that has been provided, and instruct you on system operations.
Glossary
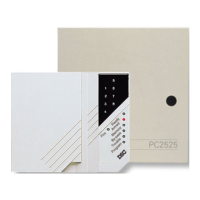
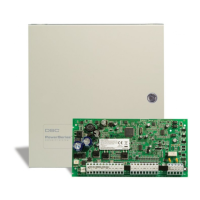
Your DSC PC2525 Security System has been designed to offer advanced security features and simple,
straight-forward operation. Described here are some terms that are used throughout this manual to explain
the operation of your system.
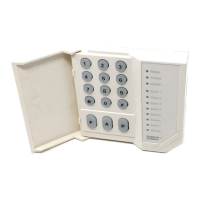
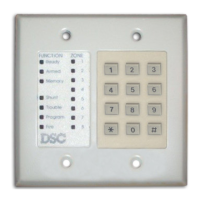
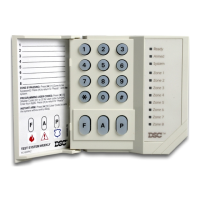
Keypad: Your system features one or more PC2550RK Keypads. The keypad is used to enter commands
to operate the system, and to view operating information about the system. Information about the system is
displayed on the Zone Lights, labelled 1 through 8. The keypad also features seven System Status lights:
“Ready”, “Armed”, “Memory”, “Bypass”, “Trouble”, “Program” and “Fire”. Commands are entered on the
keypad by pressing one key at a time.
Master Code: The Master Code is a 4-digit code used to arm and disarm the system, to program Access
Codes, to bypass zones, and to change certain operating features. Normally only one person should know
the Master Code.
Access Codes: Seven Access Codes in addition to the Master Code are available to allow users to arm
and disarm the system. Each person should keep their 4-digit Access Code secret to ensure system
security.
Entry Delay: The Entry Delay is the time allowed for someone to enter the premises and disarm the system
without causing an alarm.
Exit Delay: The Exit Delay is the time allowed for someone to leave the premises without causing an alarm
after they have entered an Access Code to arm the system.
Entry-Exit Door or Zone: The Entry-Exit Door or Zone is the door or zone designated by your installer to be
used for entering and leaving the premises when the system is armed.
Zone: A Zone is an area that is protected by a security device. For example, a room protected by a motion
detector may be “Zone 1”, while a window protected by a magnetic contact may be “Zone 2”.
Your installer
will inform you of where zones have been set up on your system.
TESTING AND MAINTENANCE
Bell Test
Entering this command will sound the siren and turn ON all the keypad lights for 2 seconds. To perform
a bell test, enter [
∗
][6][Master Code][8] on the keypad.
Weekly Testing
It is recommended that you test your system weekly.
1 Inform the monitoring station that you are testing your system.
2 Disarm the system and ensure that the “Ready” light is ON.
3 Perform a Bell Test by entering [
∗
][6][Master Code][8]. The bell or siren will sound for 2 seconds
and all of the lights on the keypad will come ON.
4 Activate each sensor on your system in turn. For example, open protected doors and windows, and
walk in areas protected by motion detectors. Each Zone Light should come ON when each zone is
activated. Each Zone Light will be shut OFF when the zone is restored to normal (when the door or
window is shut, or when motion stops in areas protected by motion detectors).
5 If they are programmed for operation, press the [F], [A], and [P] keys in turn. The [F] key will sound
the bell or siren in a pulsed mode. Enter an Access Code to silence the alarm. The [A] key is a silent
alarm; the [P] key may be programmed as silent or audible. If an alarm sounds, enter an Access
Code to silence the alarm.
6 If the system features a fire zone, activating the smoke detector or other fire detection device will
cause the bell or siren to sound in a pulsed mode.
CAUTION: CAUTION:
CAUTION: CAUTION:
CAUTION: Do not use an open flame or burning
materials to test a smoke detector. Contact your installer for instructions on safe methods of
activating a smoke detector.
7 Should the system fail to operate properly, call your alarm dealer for service.
8 When testing is complete, call and advise the monitoring station.
Maintenance
With normal use, your system requires a minimum of maintenance. The following points should be
observed:
1 Do not wash the keypad with a wet cloth, and do not use household cleaners, such as glass cleaners,
on the keypad. Light dusting with a cloth slightly dampened with plain water should remove normal
accumulations of dust.
2 For other system devices such as passive infrared, ultrasonic or microwave motion detectors,
glassbreak detectors or smoke detectors, consult the manufacturer’s literature for testing, cleaning
and maintenance instructions.
3 It is recommended that the back-up battery be replaced every three years. Contact your installing
company for information on replacing the battery.
11
 Loading...