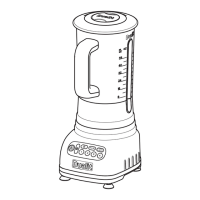
KNOW YOUR BLENDER (see page 3)
SETTING UP
DO NOT LET CORD HANG OVER EDGE OF TABLE OR COUNTERTOP AND
POSITION AWAY FORM THE EDGE
CORD TIDY
Unwind the required length of
cord. It is important to keep the
cord short. Wrap the excess
cord length round the cord tidy.
SECURE TO SURFACES
Place the blender on a level
surface and push down so the
sucker feet stick to the surface.
RINSE AND DRY
Rinse and dry the jar, lid and
blades before every use.
1.A
1.B 1.C
REMOVABLE BLADES
CAUTION: THE BLADES ARE VERY SHARP! ENSURE THE GASKET IS IN
PLACE BEFORE USING.
THE GASKET
Ensure the gasket is seated on
the collar of the blade correctly
before inserting in to the jar.
It can be placed on either way
round.
LOCKING BLADE
Align the blade assembly to base
of the jar. Using your
ngers, ROTATE
ANTI-CLOCKWISE
TO TIGHTEN then use the
tool to lock in to place.
REMOVING BLADE
To remove the blades use the
tool provided. Insert and rotate
the blades
CLOCKWISE TO LOOSEN.
Continue to unscrew and lift to
remove.
2.A 2.B 2.C
ASSEMBLING
CAUTION: NEVER USE THE BLENDER WITHOUT THE BLADES AND LID
CORRECTLY IN PLACE. NEVER RUN THE BLENDER EMPTY.
THE JAR
Position the jar with blade on
the main body. It can be located
in 8 positions. If not correctly
positioned the function lights
on the control panel will not
illuminate.
ADD INGREDIENTS
Add your ingredients to the
jar. Cut large items into evenly
sized 2cm chunks.
Do not ll above 2.0L. For ice,
warm or solid items do not ll
above 0.75L - 1L.
THE LID
Attach the lid by pushing down
while applying a slight twisting
action. Place your hand on the
lid to hold the blender steady.
Use a heat proof gloved hand
when blending hot items.
3.A 3.B 3.C
8