Do you have a question about the Duncan SH-8n Invader and is the answer not in the manual?
Step-by-step guide for installing a Seymour Duncan humbucker pickup.
Illustrates the standard wiring configuration for 4-conductor humbucker pickups.
Wiring diagram and explanation for single-conductor humbucker pickups.
Details on wiring for coil-splitting functionality in humbucker pickups.
Wiring configurations for series and parallel connections of humbucker pickups.
Instructions for wiring humbucker pickups to achieve phase switching.
This document provides comprehensive instructions and wiring diagrams for installing and configuring Seymour Duncan humbucker pickups, designed to enhance the sound of electric guitars. It caters to both novice and experienced users, offering detailed guidance for various wiring options to achieve different tonal characteristics.
Seymour Duncan humbucker pickups are designed to capture the vibrations of guitar strings and convert them into an electrical signal, which is then amplified to produce sound. Humbuckers are known for their ability to cancel out hum and noise, providing a clearer, fatter, and often more powerful tone compared to single-coil pickups. This manual details how to install and wire these pickups to achieve optimal performance and a variety of sonic textures.
The core function of these pickups is to provide a high-quality, noise-canceling signal for electric guitars. The wiring options presented in the manual allow users to customize the pickup's output to suit different musical styles and preferences. For instance, standard humbucker wiring delivers a full, rich tone, while options like coil splitting enable the pickup to mimic the brighter, snappier sound of a single-coil pickup. Series/parallel wiring offers further tonal variations, providing either a higher output and thicker sound (series) or a lower output and clearer sound (parallel). Phase switching introduces unique, often hollow or "out-of-phase" tones, expanding the guitar's sonic palette even further.
The manual outlines several key usage features through its detailed wiring diagrams and instructions:
Standard Humbucker Wiring (4-Conductor): This is the most common configuration, providing the classic humbucker sound. The red and white wires are soldered together and taped off, effectively creating a series connection for the two coils within the humbucker. The black wire typically goes to the volume pot (hot output), and the green and bare wires are connected to ground. This setup ensures noise cancellation and a robust, full-bodied tone. The diagram illustrates connections to a 3-way switch, volume pots (neck and bridge), tone pots (neck and bridge), and the output jack. This standard wiring is suitable for most musical genres where a powerful and articulate sound is desired.
Coil Splitting: This feature allows a humbucker to operate as a single-coil pickup. By using a push/pull potentiometer or a mini-toggle switch, one of the humbucker's coils can be bypassed, resulting in a brighter, lower-output, and more articulate tone, similar to a traditional single-coil. The diagram shows how to connect the red and white wires to a switch (e.g., a 500k push/pull volume pot) so that when the switch is engaged (pulled up), the pickup operates in split mode, and when disengaged (pushed down), it functions as a full humbucker. This versatility is highly valued by guitarists who need a wide range of tones from a single instrument, allowing them to switch between thick humbucker sounds and crisp single-coil tones on the fly.
Series/Parallel Wiring: This option provides another layer of tonal flexibility. In a series connection, the two coils of the humbucker are wired end-to-end, resulting in higher output, increased midrange, and a thicker sound. In a parallel connection, the coils are wired side-by-side, leading to a lower output, brighter tone, and more clarity, often described as a "thinner" humbucker sound that retains hum-canceling properties. The manual illustrates how to achieve this using a push/pull switch or an on/on/on mini-toggle. The wiring involves connecting the red, white, green, and bare wires to the switch in a specific configuration to select between series, split, or parallel modes. This feature is particularly useful for guitarists who want to fine-tune their humbucker sound beyond just splitting, offering distinct tonal variations while maintaining hum cancellation.
Phase Switching: This advanced wiring option allows users to reverse the phase of one pickup relative to another. When two pickups are in phase, their signals combine constructively, resulting in a full and strong sound. When they are out of phase, their signals combine destructively, leading to a thin, hollow, and often nasal tone, which can be musically expressive in certain contexts. The diagram shows how to implement phase switching using an ON/ON mini-toggle or a push/pull switch. The red and white wires are soldered together and taped off, while the green and black wires are connected to the switch. This allows the user to flip the phase of the pickup, creating unique sonic textures, especially when combined with another pickup. This feature is often explored by experimental musicians or those seeking distinctive, unconventional sounds.
Grounding: Throughout all diagrams, the importance of proper grounding is emphasized. "Solder = location for ground (earth) connections" is clearly marked. The bare wire from the pickup, the ground wire from the bridge, and the sleeve of the output jack are all connected to ground. This ensures noise reduction and proper operation of the electronics. Good grounding is crucial for minimizing unwanted hum and interference, contributing to a clean and professional sound.
Component Integration: The diagrams show how to integrate the pickups with standard guitar electronics, including volume potentiometers (500k), tone potentiometers (500k), capacitors (.047µF), and a 3-way selector switch. The instructions clarify where to connect the pickup wires to these components, ensuring a functional and versatile setup. The choice of 500k pots is typical for humbuckers, providing a good balance of brightness and warmth.
While the manual primarily focuses on installation and wiring, it implicitly addresses maintenance through best practices and recommendations:
Professional Installation Recommendation: The manual explicitly states, "If you have no experience handling red-hot soldering irons, we recommend having a qualified guitar tech install your pickup." This is a crucial maintenance-related recommendation, as improper soldering can lead to cold solder joints, intermittent connections, or even damage to components, all of which would require repair. Professional installation ensures longevity and reliable performance.
Proper Wiring Techniques: The detailed diagrams and instructions promote proper wiring techniques, which are fundamental to the long-term reliability of the guitar's electronics. Correctly soldering connections, taping off exposed wires (like the red and white wires in standard humbucker wiring), and securing connections prevent shorts, signal loss, and potential damage. For example, taping off the soldered red and white wires prevents them from accidentally touching other components and causing a short circuit.
Pickup Height Adjustment: The manual concludes with a maintenance tip: "Adjust the pickup height. Your pickup should be between 1/8" and 1/16" from the strings when the strings are pressed down at the highest fret." This adjustment is critical for optimizing the pickup's tone and output. Incorrect pickup height can lead to issues like weak signal, excessive output (causing distortion), or "strat-itis" (magnetic pull on the strings causing tuning instability and sustain issues). Regular adjustment ensures the best possible sound and playability.
Troubleshooting (Implied): By providing clear and correct wiring diagrams, the manual serves as an invaluable reference for troubleshooting. If a guitar experiences issues like no sound, weak output, excessive hum, or incorrect tonal behavior, comparing the guitar's internal wiring to the diagrams can help identify misconnections or faulty components. This diagnostic capability is a key aspect of long-term maintenance.
Component Longevity: Adhering to the recommended wiring practices helps ensure the longevity of the electronic components. Overheating components during soldering, creating poor connections, or allowing wires to short can significantly reduce their lifespan. The clear instructions guide users to make robust and durable connections.
In summary, this Seymour Duncan manual is a comprehensive guide for guitarists looking to upgrade or customize their instrument's sound. It not only facilitates the initial installation but also empowers users with the knowledge to explore a vast array of tonal possibilities and maintain their guitar's electronic integrity over time. The emphasis on clear diagrams and practical advice makes it an indispensable resource for achieving professional-grade guitar tones.
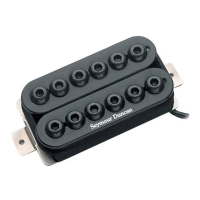
| Type | Humbucker |
|---|---|
| Wiring | 4 Conductor |
| Magnet | Ceramic |
| Output | High |
| Color | Black |
| Position | Bridge |
| Recommended For | Hard Rock, Metal |