250k
Volume
250k
Tone
P/N 501010-105 Rev. B
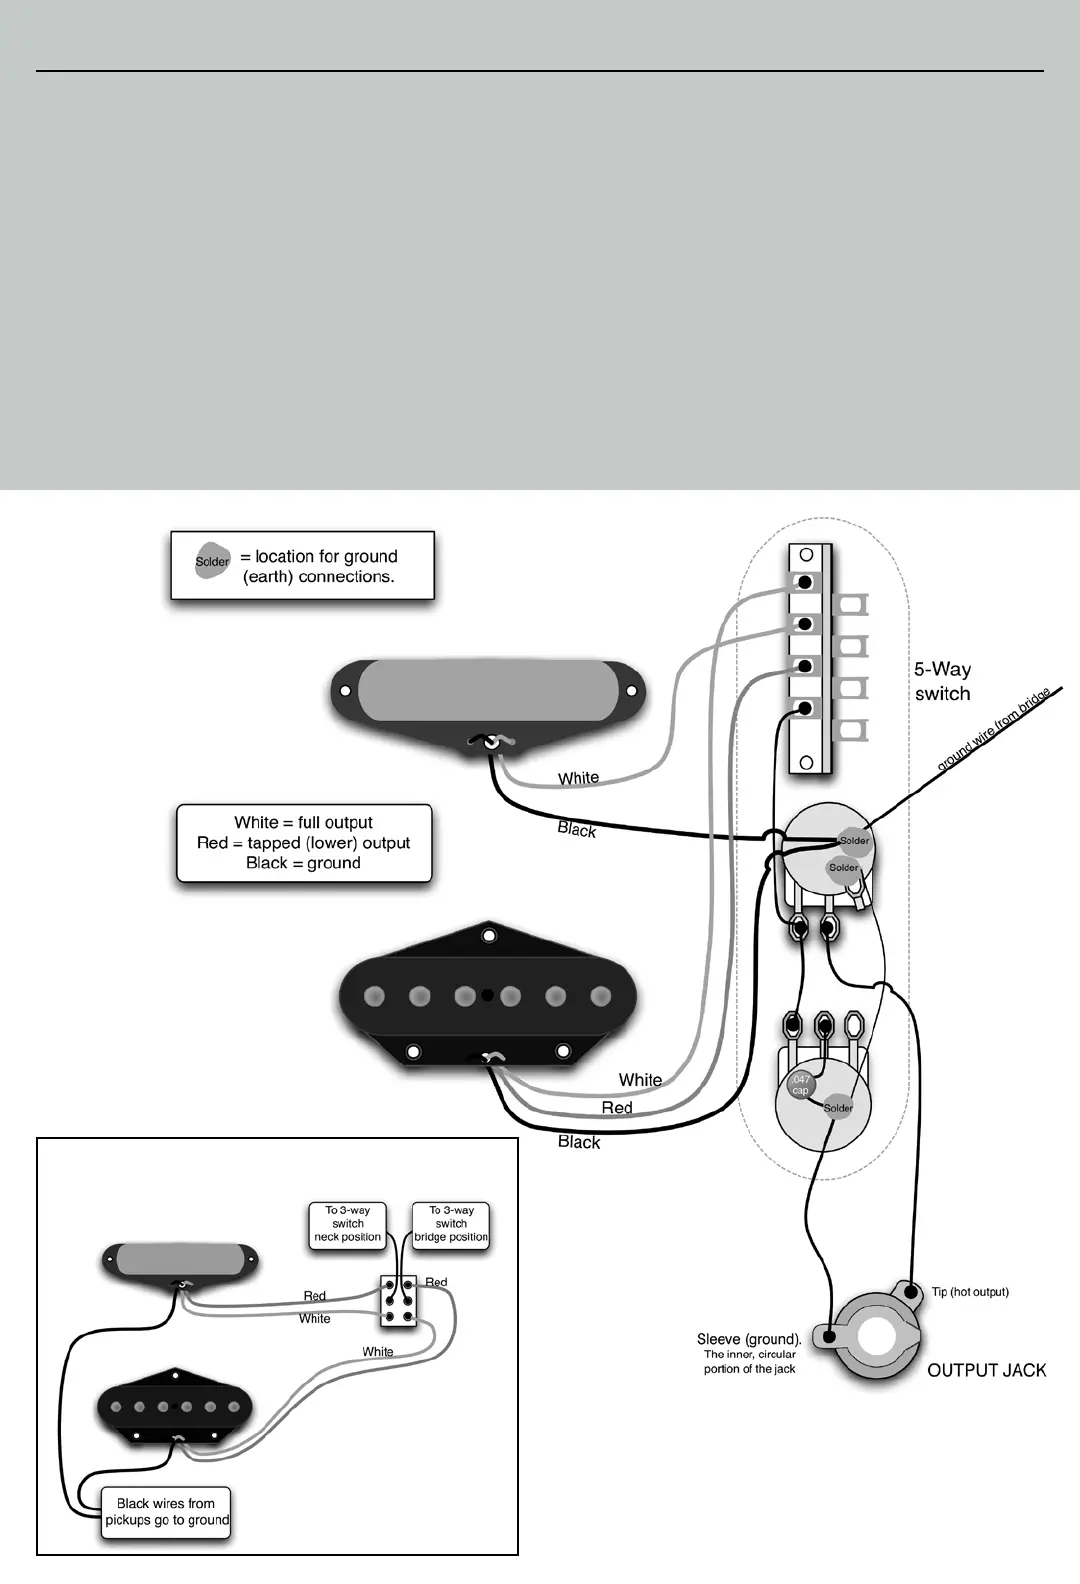
Switching two tapped pickups with one
push/pull pot or mini-toggle.
The basic steps for Rhythm Pickups include:
Vintage Tele
®
Guitars:
1. Remove the strings from your guitar.
2. Remove the control plate and flip it over.
3. Remove the pickguard and set it aside.
4. De-solder the original pickup’s wires from the controls, and
make sure to remember where they were connected.
5. Remove the original pickup from the body of the guitar.
6. Install your new Seymour Duncan pickup using the provided
wood screws and rubber spacers.
7. Tin the wires of your new pickup and solder them into place
(see Fig. 1 or 2).
8. Replace the pickguard and control plate.
9. Re-string your guitar and adjust the height of your new
rhythm pickup so that its output balances with the output of
your guitar’s lead pickup.
Modern Tele
®
Guitars:
1. Remove the strings from your guitar.
2. Remove the control plate and flip it over.
3. Remove the pickguard and flip it over, taking care not to
scratch your guitar’s finish.
4. De-solder the original pickup’s wires from the controls and
make sure to remember where they were connected.
5. Remove the original pickup from the pickguard.
6. Put the Seymour Duncan pickup into the pickguard using the
original mounting screws and spacers.
7. Tin the wires from your new pickup, and then solder them
into place (see Fig. 1 or 2).
8. Replace the pickguard and control plate.
9. Re-string your guitar and adjust the height of your new
rhythm pickup so that its output balances with the output of
your guitar’s lead pickup.
Wiring Diagram for Pickup Models: STL-2T, STL-3T, STR-3T
Visit seymourduncan.com for
additional wiring diagrams.
Fig. 2
Fig. 3