EasyManua.ls Logo

Dunelm Nautical - User Manual

Dunelm Nautical
17 pages
Print Icon
To Next Page IconTo Next Page
Loading...
Nautical 3 Drawer Cabinet Unit
45
Question and Answer IconNeed help?

Do you have a question about the Dunelm Nautical and is the answer not in the manual?

Summary

Product Overview and Safety

Assembly Instructions Overview

Provides product name, assembly requirements like time, people, and difficulty level.

Getting Started and Important Tips

Guides the user on the next steps, offers assembly tips, and lists essential safety/care advice.

Component Identification

Component Parts Supplied

Lists all physical parts included in the package with dimensions, visual representation, and quantity.

Fixtures and Fittings Supplied

Details all hardware, including screws and fixings, with dimensions, visual aids, and quantities.

Assembly Guide

Exploded View Diagram

A comprehensive 3D diagram illustrating how all components connect during assembly.

Step-by-Step Assembly

Detailed instructions covering all assembly stages, from initial preparation to final component attachment.

Furniture Care and Safety

Tip Kit Instructions for Wall Attachment

Crucial guidance on using wall attachments to prevent furniture tipping and ensure safety.

Wood Care Advice

Recommendations for cleaning, maintaining, and protecting the furniture's wood finish from damage.

Overview

This document is an assembly and care manual for the "Nautical 3 Drawer Cabinet Unit" from Dunelm.

Function Description

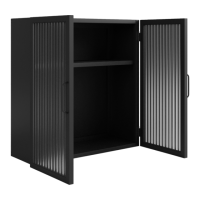
The Nautical 3 Drawer Cabinet Unit is a piece of furniture designed for storage, featuring three drawers and a cabinet section with a louvered door. It is intended for indoor use and provides organized storage space for various items. The unit's design suggests a nautical or coastal aesthetic, suitable for complementing specific interior decor styles.

Important Technical Specifications

  • Dimensions (Assembled): The manual provides dimensions for individual components, but not the overall assembled unit. However, based on the component list, the unit appears to be a compact cabinet.
    • Top Panel (1): 300x600mm
    • Bottom Panel (2): 279x591mm
    • Side Panels (3, 4): 280x685mm
    • Back Panel (5): 539x279mm
    • Drawer Side Panels (6): 264x263mm (x2)
    • Cabinet Door (10): 261x575mm
    • Drawer Fronts (13): 180x261mm (x3)
    • Drawer Base (15): 250x250mm (x3)
  • Assembly Time: Approximately 45 minutes.
  • Assembly Personnel: Recommended for 2 people.
  • Difficulty: Medium.
  • Materials: The unit is made of wood, as indicated by the "Wood care advice" section. Specific wood type is not mentioned.
  • Fittings: A variety of screws, cam-locks, cam-pillars, drawer stops, hinges, and other small fittings are supplied. These include:
    • Cam-locks (a): 20 units
    • Cam-pillars (b): 20 units
    • Screws (c): 4x40mm (4 units), 3x12mm (12 units), 4x20mm (3 units), 4x10mm (1 unit), 4x16mm (4 units), 3x25mm (24 units), 3x14mm (10 units)
    • Wooden dowels (d): 6x30mm (14 units)
    • Drawer stops (e): 3 units
    • Hinges (h): 1 unit
    • Magnetic catch (i): 1 unit
    • Drawer runners (j): 2 units
    • Handles (k): 4 units (3 for drawers, 1 for cabinet door)
    • Wall fixing strap (q): 4 units
    • Wall plugs (o): 8 units
    • Wall screws (n): 10 units
    • Door buffer (s): 1 unit
  • Safety Features: Includes a wall fixing strap to prevent accidental tipping, especially important for households with children.

Usage Features

  • Storage: The unit offers both drawer storage and a cabinet with a louvered door, providing versatile options for organizing items. The three drawers are suitable for smaller items, while the cabinet can accommodate larger objects.
  • Placement: Designed for indoor use. It is recommended to place the heaviest items in the lower drawers or shelves to enhance stability.
  • Assembly: The manual provides a step-by-step guide with clear diagrams for assembly. Key instructions include:
    • Spreading out all parts on a clean, level surface in the room of intended use.
    • Identifying all fittings and components before starting.
    • Specific instructions for cam-lock assembly, ensuring correct starting position and tightening until the shoulder is flush.
    • Ensuring plastic drawer stops are curved upwards.
  • Wall Attachment: A wall fixing strap is provided to secure the unit to the wall, preventing it from tipping over. Users need to source suitable wall fixings (screws and plugs) based on their wall type. Two types of wall fixings (plastic cable tie and metal L bracket) are described, with the user advised to use the correct type provided in their bag.

Maintenance Features

  • Cleaning: Only clean with a damp cloth and mild detergent. Avoid bleach or abrasive cleaners.
  • Dusting: Regularly dust with a soft, lint-free cloth or duster.
  • Spill Management: Remove any spills immediately to prevent staining.
  • Avoid Abrasive Polishes: The use of abrasive polish or silicon-based polishes is not advised as they can affect the polished finish and joints over time.
  • Regular Checks: Periodically check for loose fittings and re-tighten them as necessary.
  • Temperature and Humidity: As a natural wood product, the unit is affected by temperature and humidity. Avoid placing it directly in front of heat sources (radiators, fires) to prevent cracking or warping.
  • Sunlight Exposure: Strong direct sunlight can dramatically affect the color. Periodically move ornaments, coasters, and other items placed on the product to allow the color to mellow evenly.
  • Surface Protection: Always use mats and coasters to protect the surface from heat, liquids, and scratches. If items with rubber feet are placed on the surface, use mats to prevent marking.
  • Movement: Always lift the furniture when moving it; avoid dragging it across the floor to prevent damage to joints.
  • Floor Protection: If placed on wooden or laminate floors, ensure plastic or felt protectors are securely fitted to prevent floor damage.
  • Damage Repair: If the furniture becomes stained, scratched, chipped, or suffers other damage, professional help is recommended. Contact customer services for recommended agents.
  • Door Alignment: Uneven floors can cause doors to appear misaligned. Adjust hinges or pack a corner to level the item if necessary.

Dunelm Nautical Specifications

General IconGeneral
BrandDunelm
ModelNautical
CategoryIndoor Furnishing
LanguageEnglish

Related product manuals