BOLT CONFIGURATION
Page 6
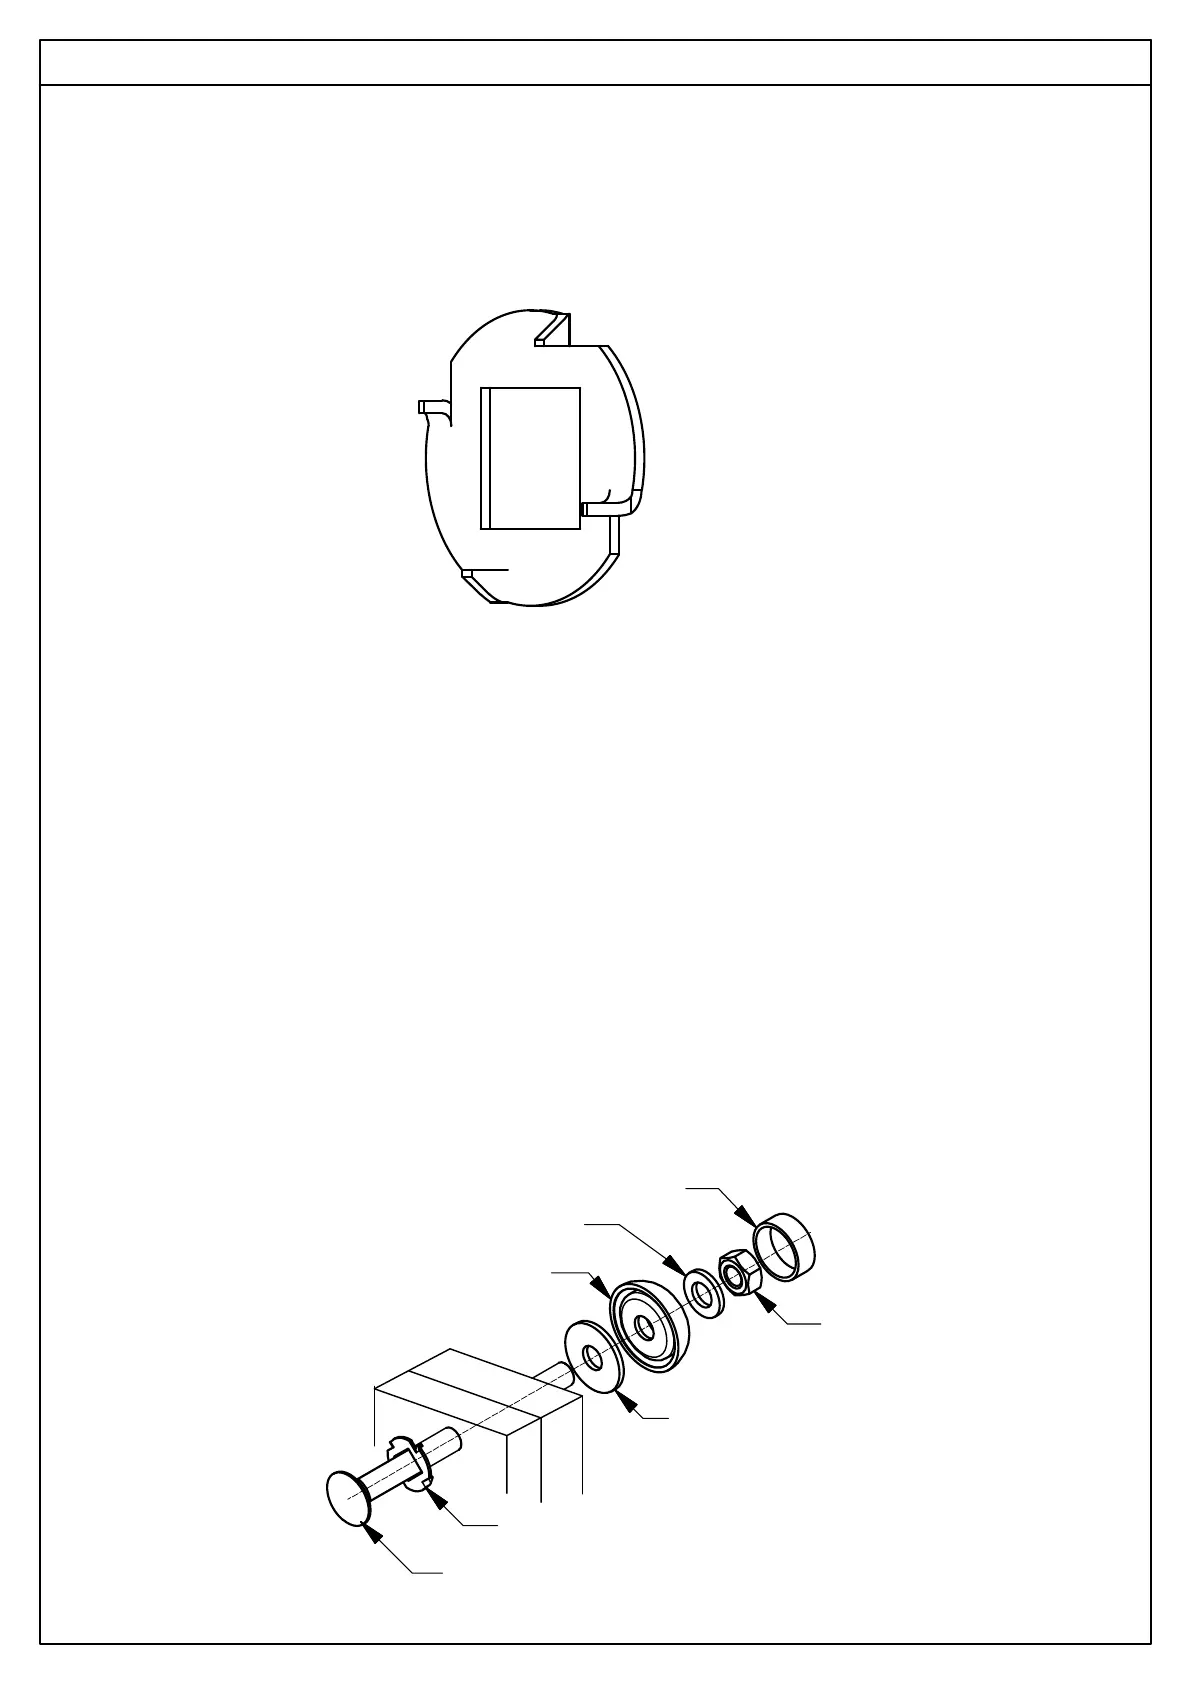
M10 Square Shoulder Coach Bolt
Claw Washer
Green 10mm Cap (Base)
M10x20mm Washer
M10 Nut
Green 10mm Cap (Top)
M10x30mm Washer
Please use this page to ensure that the fixings for your play system are installed correctly.
You must use these claw washers in every location where you are instructed to use
an M10 (10mm diameter) bolt. These pronged washers create a sleeve for the
square 'neck' of the bolt to fit into.
You must always use a nyloc nut wherever you are instructed to use an M10 nut.
Follow the steps below to install the configuration:
1. Place the claw washer onto the coach bolt. Ensure that the square hole of the washer passes
over the 'neck' of the bolt and insert it into the pre-drilled holes in the pieces of timber
that you wish to join together, passing it all the way through.
2. Using a hammer, firmly but gently tap the domed head of the bolt, knocking the claw washer
into the timber.
3. Place the rest of the components onto the bolt except for the green cap top.
4. Hold the bolt head against the timber with your hand whilst tightening the self-locking M10
(nyloc) nut with a 17mm socket or spanner.
a. As you tighten the nut, the claw washer gets pulled into the timber.
b. Do not over tighten the nut.
5. Push the cover onto the safety cap.
6. Regularly check the tightness of all of the screws and bolts on your climbing frame to
ensure that the structure remains rigid.
7. Continue to follow all of the warnings and maintenance instructions in your
Installation Manual for your specific climbing frame.
 Loading...