Note: Do not attempt to assemble your shed in windy weather because of risk of damage to panels, or personal injury.
When installed, the ribs of sheeting face outward for all panels. Pre-drilling not required when using self-tapping screws supplied.
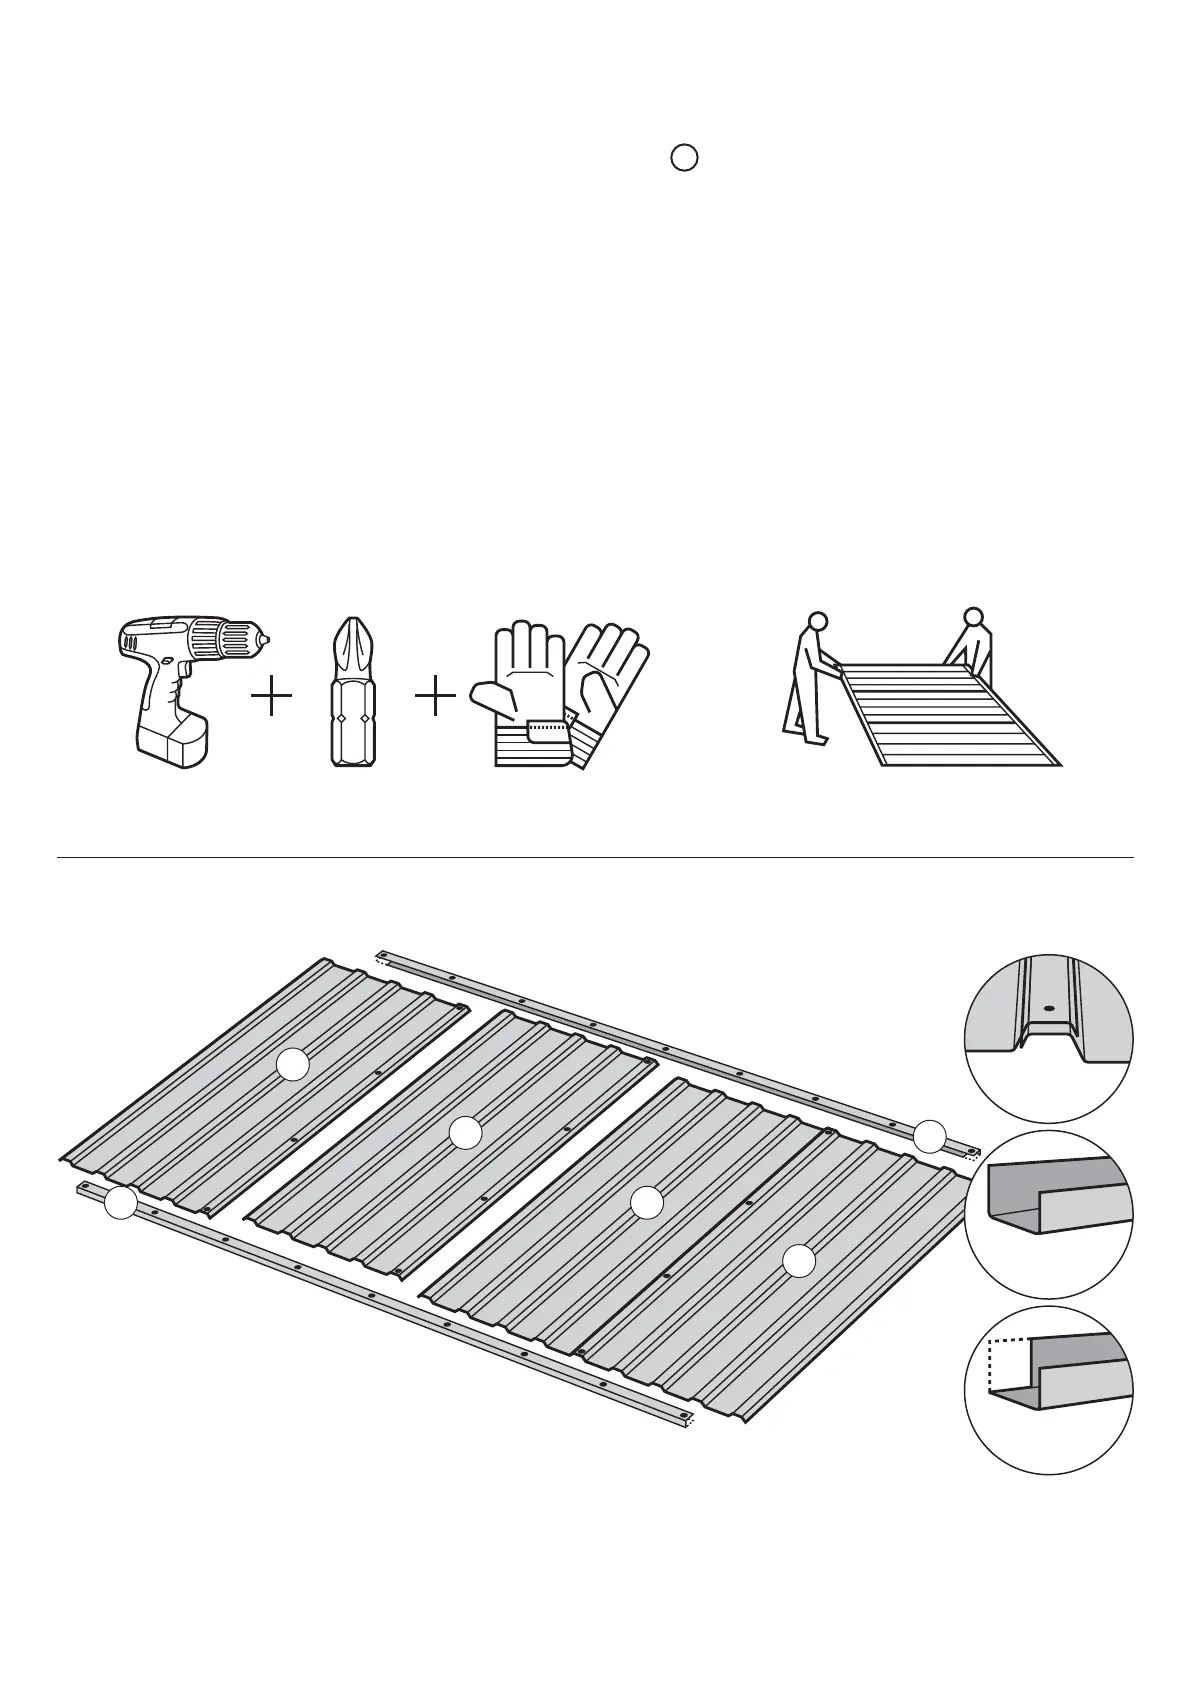
Back Panel Components • 4x Plain Sheets (A) 780 x 1800mm • 2x Cut-out Channel (D) 3000mm long
Step 1 Overlap one rib of each Sheet (A). Fix at four points. Step 2 Position Channel (D) on the top of the Sheeting with the
cut-out sections on the inside. Fix at the corners and at every second rib. Repeat for the bottom Channel (D).
Page 2.
Higher Channel
edge inside
Rib overlap and
fixing point
Assembled Sheeting to be the same
length as the Channel (D)
Optional Window can be positioned
in any Sheet (A)
1
Back Panel Assembly
D
A
A
A
A
EasySHED
5StepAssembly
Method of Assembly for 3.00m x 3.00m x 2.10m Gable Roof Shed.
This Gable Roof Shed is made up of five (5) modular panels - Front, Back, Roof and two (2) Gable Side panels. Each modular
panel is assembled by fixing the components supplied as per the drawings and instructions. Complete the assembly of the five
modular panels before beginning the installation of your shed.
Optional Extras. If your shed includes options, refer to the separate assembly instructions for the installation sequence.
R
D
The only tool required for assembling your Durabuilt EasySHED® is a Power Drill
with a Phillips Head attachment. Safety Gloves are recommended.
Two people are recommended when handling the
panels and some fixing operations.
 Loading...