5
Front Panel Assembly
Page 4.
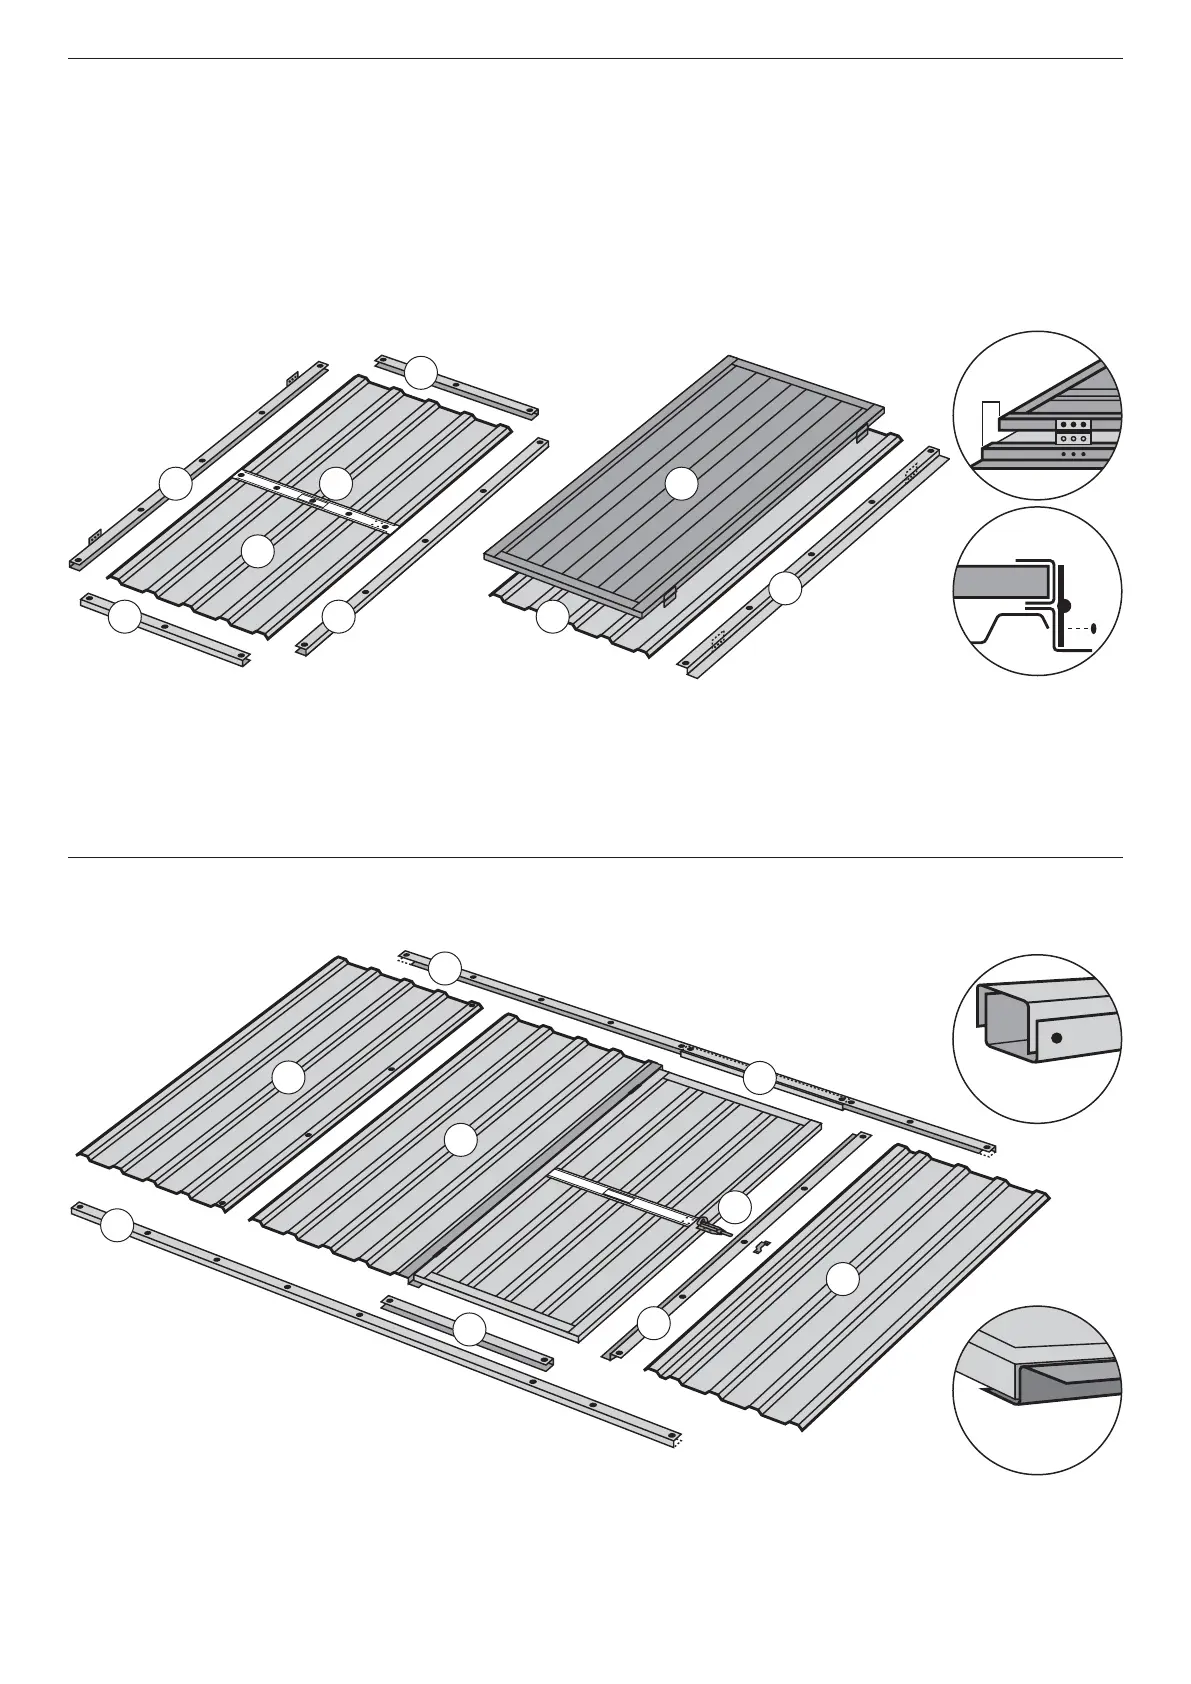
(4B) Components • 1x Plain Sheet (A) 780 x 1800mm • 1x Z Door Jamb (P) 1800mm • Plus Assembled Door (4A)
Step 1 Position Z Door Jamb (P) on the right side of the Plain Sheet (A). EdgeSAFE® to right side. Fix at five points.
Step 2 Lay Door (4A) face down on the Plain Sheet (A) and position approximately 30mm from the top and bottom.
Step 3 Fix the Hinges through side of Z Door Jamb (P).
The Door is now pre-hung for you to assemble your Front Panel.
(4A) Components • 1x Door Sheet (C) 780 x 1740mm • 2x U Channel (F) 780mm long • 1x U Channel (G) 1740mm long
• 1x Door Strap (N) 780mm • 1x U Channel with Hinges (O) 1740mm
Step 1 Position U Channel (F) on top of the Door Sheet (C). Fix at three points. Repeat for bottom U Channel (F).
Step 2 Centre the Door Strap (N) and fix to all ribs. Step 3 Position U Channel (G) on right side of Sheet. Fix at five points.
Step 4 Position U Channel with pre attached Hinges (O) on left side of Sheet. Fix at five points. Step 5 Turn Door over.
Fix at the corners and at the centre of the top and bottom U Channel (F).
(4A) DOOR ASSEMBLY (4B) HANGING THE DOOR
Front Panel Components • 1x Plain Sheet (A) 780mm • 1x Narrow Sheet (Q) 700mm • 2x Cut-out Channel (D) 3000mm
• 2x Door Space Channel (H) 793mm • 1x Z Door Jamb (P) 1800mm • Padbolt and Hasp (R) • Plus pre-hung Door (4B)
Step 1 Overlap one rib of the Plain Sheet (A) and the pre-hung Door Panel (4B). Fix at four points. Step 2 Position Z Door
Jamb (P) on Narrow Sheet (Q). Fix at five points. Step 3 Position Channel (D) (cut-out sections inside) on top of Sheeting (A,
4B and Q). Fix at every second rib. Repeat for bottom Channel (D). Step 4 Position top Door Space Channel (H) over Channel
(D) between Z Door Jambs (4B and P). Fix at two points. Repeat for bottom Channel (H). Step 5 Fix the Padbolt and Hasp (R).
Window positioned in Sheets
marked (A) (4B prior to hanging door)
4
Door Assembly/Hanging the Door
C
O
G
N
F
F
D
H
4B
A
Q
R
D
H
4A
P
A
Position EdgeSAFE® of Z Door Jamb (Q)
to door opening (left side).
Assembled Sheeting to be the same
length as the Channel (D)
P
 Loading...