Do you have a question about the DuraMax 10 Ft WoodBridge and is the answer not in the manual?
Details the placement of product labels on the shed for identification.
Provides initial steps and checks before starting the shed assembly process.
Essential safety instructions for tool usage and personal protective equipment during assembly.
Guidance on how to care for the shed to prolong its lifespan and maintain its condition.
Comprehensive list of all parts and accessories required for shed assembly.
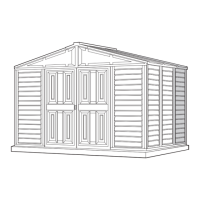
Diagram illustrating the shed components and their assembly order.
Instructions for building a wooden platform foundation for the shed, including lumber and plywood requirements.
Requirements for constructing a concrete pad or patio stone foundation for the shed, ensuring stability and drainage.
Detailed steps for assembling the base frame of the shed, including part identification and connections.
Attaching base components and initial wall panels, focusing on CDRA, B1RA, and SP↑ parts.
Assembling wall sections, horizontal supports, and the right wall using specified components.
Detailed instructions for assembling the left, back, and front walls of the shed.
Continuing assembly of left, front walls, and final wall components, including views.
Attaching roof connectors, brackets, and supports to the wall structure.
Assembling the front and back sections of the roof structure, connecting beams and members.
Assembling various roof support beams and members, including specific kits and brackets.
Connecting final roof structure members and ensuring structural integrity.
Attaching front and back roof panels using FPR, FPL, PPG, and PIN components.
Installing roof panels, applying silicone, and sealing panel edges for weather protection.
Optional silicone application around the base 'U' channel for heavy rain areas.
Guidance on ventilation kit placement, drilling holes, and tool requirements.
Completing the ventilation kit installation process with all components.
Anchoring the base U-channel and attaching side panels to the base for wind resistance.
Attaching side panels to the roof structure using screws for enhanced stability.
Optional kits for snow and wind reinforcement, including soil and concrete anchor options.
Optional kits for interior storage and natural lighting.
| External Depth | 10 ft |
|---|---|
| Material | Wood |
| Weather Resistance | Yes |
| Assembly Required | Yes |
| Door Opening Width | 6 ft |
| Type | Storage Shed |