EasyManua.ls Logo

DuraMax 10 Ft WoodBridge User Manual

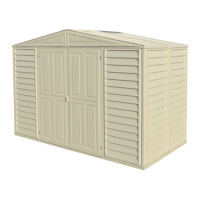
DuraMax 10 Ft WoodBridge
41 pages
To Next Page IconTo Next Page
Page #1 background imageLoading...
Page #1 background image
• All Weather Durable PVC
• Won’t Dent, Rust, Rot or Mildew
• Tall Walk In Shed
• Never Needs Painting
• 61 Inch Wide Double Doors
• Easy Assembly
• High Wind Tested
• Snow Load Tested 20lbs/sq. foot
• Pad Lock Ready (Lock not included)
• Wooden or Cement Foundation Needed
Call us for any missing or damaged parts.
Do not return to the store.
Your Total Solution To Maintenance Free Storage Sheds.
Available Kits
• Foundation Kit Available
• Modular 2.5 Ft Extension Kits Available
• 10 Ft x 8 Ft Window Kits Available
Ver: 4.0
Building Dimensions :
Approximate
Size
Storage
Exterior Dimension Interior Dimension
10 Ft x 8 Ft
79 Sq. Ft
480 Cu.Ft
Roof Edge to Edge
Base Dimension
Door Opening
3.2 m x 2.4 m
7.3 Sq.m
13.6 Cu.m
Width
Depth
Height
inch cm
125 3/8 318.4
inch cm
94 1/4
239.3
125 1/2
318.7
95 1/8
241.6
85 1/2
217.1
inch cm
123 3/8 313.3
inch cm
92 1/4
234.3
60 5/8
154
71 1/2
181.6
73
185.5
Wall to Wall
Area Volume
OWNER’S MANUAL /
Instructions for Assembly ‘10 Ft WoodBridge’
Size 10 Ft x 8 Ft / 3.2 m x 2.4 m
(Approx.)
Vinyl Garden Shed
Vinyl Garden Shed
A Product of
TM
ALL PURPOSE VINYL GARDEN SHEDS
Customer
Service Hotline
(800) 483-4674
www.duramaxbp.com
Patent #416.091
Question and Answer IconNeed help?

Do you have a question about the DuraMax 10 Ft WoodBridge and is the answer not in the manual?

DuraMax 10 Ft WoodBridge Specifications

General IconGeneral
External Depth10 ft
MaterialWood
Weather ResistanceYes
Assembly RequiredYes
Door Opening Width6 ft
TypeStorage Shed

Summary

Owner's Manual and Assembly Instructions

Duramax Garden Shed Limited Fifteen Year Warranty

Location of Product Labels

Details the placement of product labels on the shed for identification.

Safety and Precautions

Before You Begin

Provides initial steps and checks before starting the shed assembly process.

Assembly Safety Guidelines

Essential safety instructions for tool usage and personal protective equipment during assembly.

Important Information and Care

Care and Maintenance

Guidance on how to care for the shed to prolong its lifespan and maintain its condition.

Parts List and Views

Parts List

Comprehensive list of all parts and accessories required for shed assembly.

Exploded View

Diagram illustrating the shed components and their assembly order.

Foundation Installation

Wooden Platform Foundation

Instructions for building a wooden platform foundation for the shed, including lumber and plywood requirements.

Concrete Platform Foundation

Requirements for constructing a concrete pad or patio stone foundation for the shed, ensuring stability and drainage.

Base Frame Assembly

Step 1: Assemble Base Frame

Detailed steps for assembling the base frame of the shed, including part identification and connections.

Wall and Columns Assembly

Initial Wall Panel Connections (Steps 1-4)

Attaching base components and initial wall panels, focusing on CDRA, B1RA, and SP↑ parts.

Mid-Assembly of Wall Sections (Steps 5-10)

Assembling wall sections, horizontal supports, and the right wall using specified components.

Left, Back, and Front Wall Assembly (Steps 11-22)

Detailed instructions for assembling the left, back, and front walls of the shed.

Final Wall Assembly Steps (Steps 23-30)

Continuing assembly of left, front walls, and final wall components, including views.

Roof Structures Assembly

Roof Connector and Bracket Installation (Steps 1-3)

Attaching roof connectors, brackets, and supports to the wall structure.

Front and Back Roof Beam Assembly (Steps 4-10)

Assembling the front and back sections of the roof structure, connecting beams and members.

Roof Support Member Assembly (Steps 11-16)

Assembling various roof support beams and members, including specific kits and brackets.

Final Roof Structure Components (Steps 17-23)

Connecting final roof structure members and ensuring structural integrity.

Roof Panels Installation

Front and Back Roof Panel Attachment (Steps 1-4)

Attaching front and back roof panels using FPR, FPL, PPG, and PIN components.

Roof Panel Installation and Sealing (Steps 5-15)

Installing roof panels, applying silicone, and sealing panel edges for weather protection.

Door Assembly

Optional Silicone Application for Door

Optional silicone application around the base 'U' channel for heavy rain areas.

Ventilation Kit Installation

Ventilation Kit Placement and Drilling

Guidance on ventilation kit placement, drilling holes, and tool requirements.

Finalizing Ventilation Kit Installation

Completing the ventilation kit installation process with all components.

High Wind Area Installation Instructions

Base Anchoring and Side Panel Attachment

Anchoring the base U-channel and attaching side panels to the base for wind resistance.

Side Panel to Roof Structure Attachment

Attaching side panels to the roof structure using screws for enhanced stability.

Additional Accessories Available

Super Support and Anchor Kits

Optional kits for snow and wind reinforcement, including soil and concrete anchor options.

Shelf and Sky Light Kits

Optional kits for interior storage and natural lighting.

Related product manuals