4SI-188 (8•07)
KEY MODEL MODEL
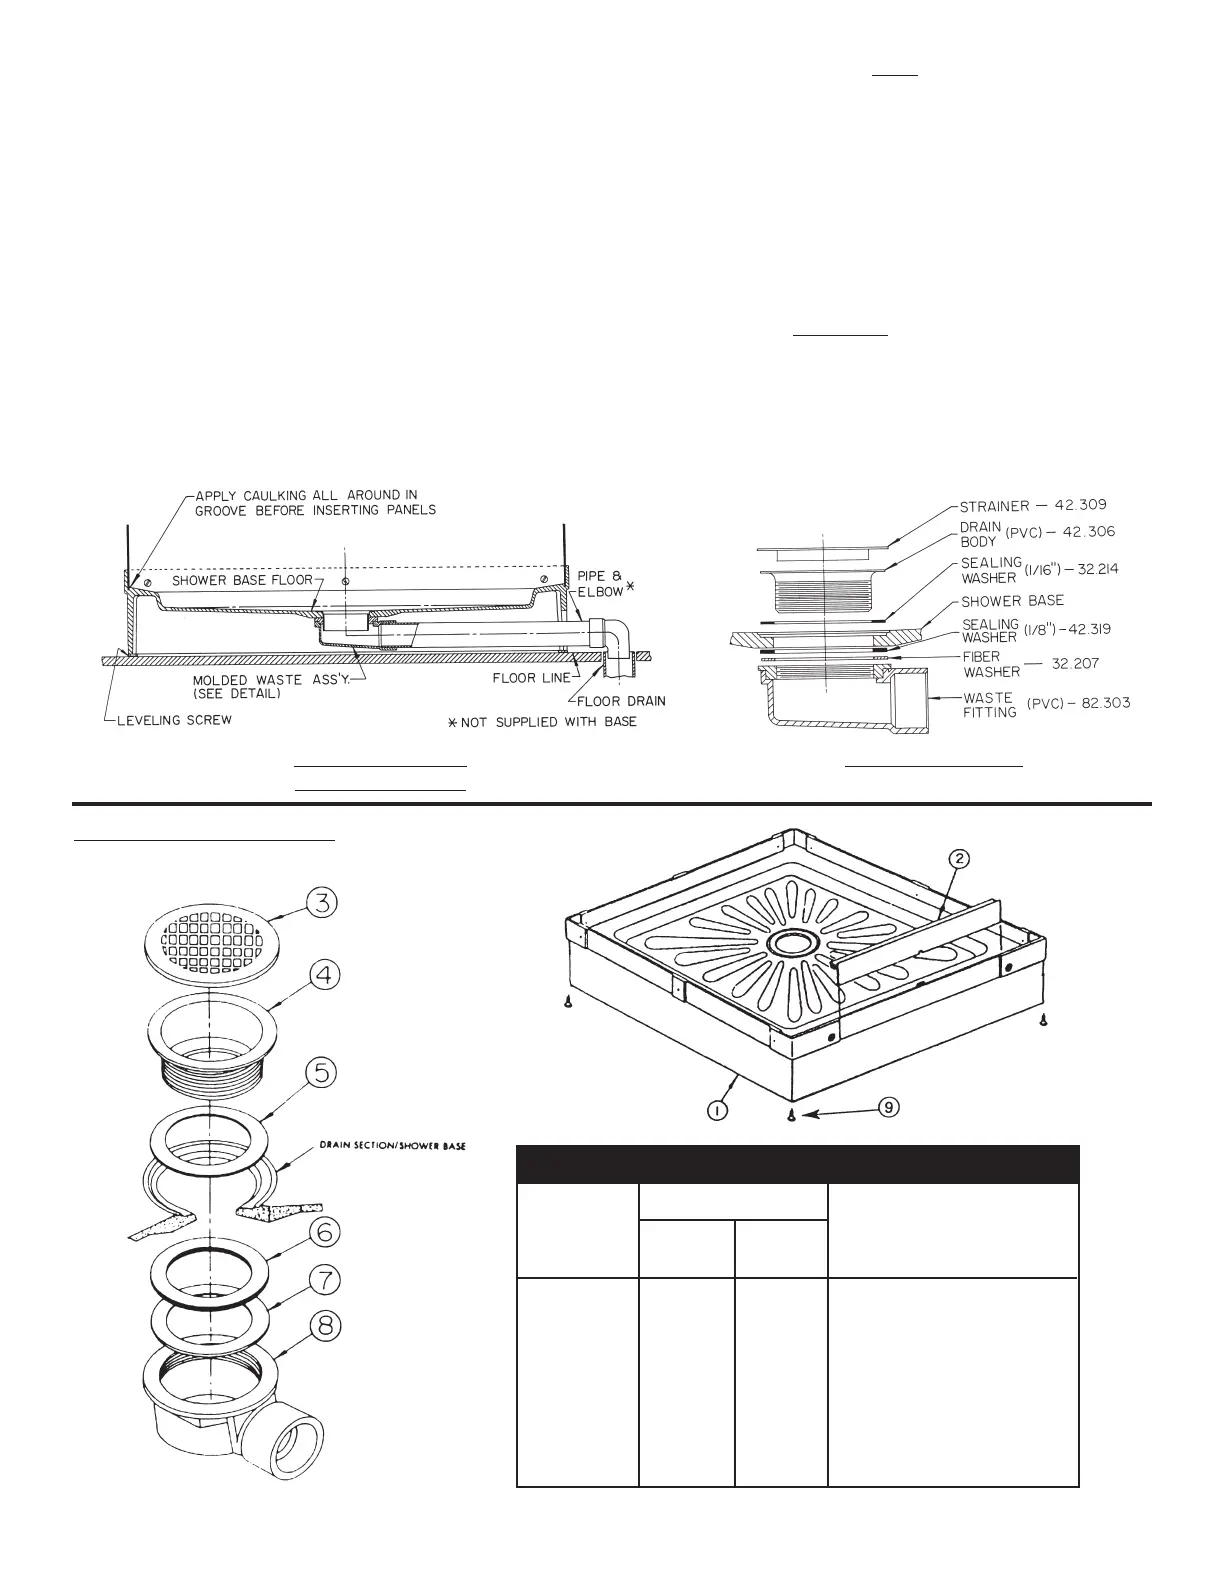
NUMBER 82 142 DESCRIPTION
1 72.101 42.1020 Shower Base
2 70.207 40.210 Threshold
3 42.309 42.309 Strainer
4 42.306 42.306 Drain Body
5 32.214 32.214 Sealing Washer - 1/16”
6 42.319 42.319 Sealing Washer - 1/8”
7 32.207 32.207 Fiber Washer
8 82.303 42.313 Molded Waste Fitting
9 72.803 72.803 Leveling Screw (4-Req’d.)
PARTS LIST
PART NUMBER
P
ARTS ILLUSTRATION
EXTENDED BASE
A. Check shower base carefully making sure it is not damaged. Refer to the “rough-in” drawing and
determine location of shower base.
B. Assemble drain to shower base (see illustration) using all washers provided. Do not use any putty or thread
sealant on either drain body or waste fitting. Tighten drain fitting so outlet points in direction of floor drain
when base is set in desired location.
C. Determine point where 1-1/2” (Drain Kit 82.400A) or 2” (Drain Kit 42.400A) plastic pipe extension (Schedule
40 PVC-DWV not furnished) will go through base side wall and cut opening in side wall as required. Base
material may be drilled out or cut with fine tooth sabre saw or hacksaw. CAUTION
: When cutting opening for
plastic pipe be careful not to cut into shower floor area.
D. Assemble 1-1/2” plastic pipe extension to drain fitting using plastic pipe cement obtainable through your
local plumbing or hardware supply store.
E. Set base on floor with leveling screws in place. Level unit and connect to floor drain using a plastic
elbow or similar connector.
SECTIONAL VIEW
EXTENDED BASE
DRAIN ASSEMBLY
NOTICE: Extended Base is for use with Mustee free-standing cabinets only! NOT for “built-in” alcoves!