Do you have a question about the DuraVent DuraTech and is the answer not in the manual?
Maintain minimum 2-inch clearance between chimney pipe and combustible materials.
Contact local building or fire officials for permits and inspections.
Key considerations for a safe, efficient, and convenient installation.
System tested for various residential appliances and fuels per UL/ULC standards.
List of tools and materials required for installation.
Determine correct chimney diameter based on appliance outlet size.
Follow NFPA standards for chimney extension above roofline and building portions.
Consider avoiding structural modifications when locating the chimney.
Enclose chimneys passing through occupied spaces for safety.
Position the appliance according to manufacturer's instructions.
Prepare ceiling framing for the support box installation.
Secure the Round Support Box to the framed ceiling opening.
Frame openings for Firestop Radiation Shield and Attic Insulation Shield.
Create roof opening ensuring 2-inch clearance around chimney.
Install shield at floor penetrations in multistory installations.
Connect chimney sections securely using provided screws.
Prevent debris and insulation from contacting chimney in attic.
Install flashing to seal the chimney penetration at the roof.
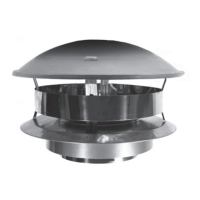
Apply sealant and install storm collar and chimney cap.
Connect 30° elbows to chimney sections for offsets.
Mount brackets and legs for chimney support above roofline.
Install chimney through exterior walls using tee support.
Use Table 4 to select the correct chimney diameter for fireplaces.
Secure anchor plate to the masonry flue opening with sealant.
Ensure damper plate swings freely after anchor plate installation.
Mount lintel hook to provide tension for the damper chain.
Connect the first chimney section to the anchor plate.
Complete installation following ceiling-supported steps and safety guidelines.
Understand creosote formation and its risks.
Inspect chimney monthly and clean if creosote builds up.
Use appropriate brushes to clean chimney sections and caps.
Action plan for chimney fires: close inlets, call fire dept.
| Brand | DuraVent |
|---|---|
| Model | DuraTech |
| Category | Ventilation Hood |
| Language | English |