15
TEE-SUPPORTED INSTALLATIONS
Tee-Supported installations are used when
passing through a wall to an outside chimney.
Tee-Supported installations are available for
DuraTech chimney 10” through 24" diameters.
The Tee Support can hold a maximum of 30
feet of DuraTech Chimney. The required parts
and general conguration are as shown in
Figures 18 and 19.
1. Place Appliance: Position the appliance
according to the manufacturer’s instructions. It
is a good idea to try to position the appliance
so it will allow the chimney to line up centered
between studs.
2. Locate, Cut & Frame Opening:
Determine the location where the chimney will
pass through the wall. The chimney should
pass through the wall, centered between
two studs. The height of the penetration
can be determined by positioning sections
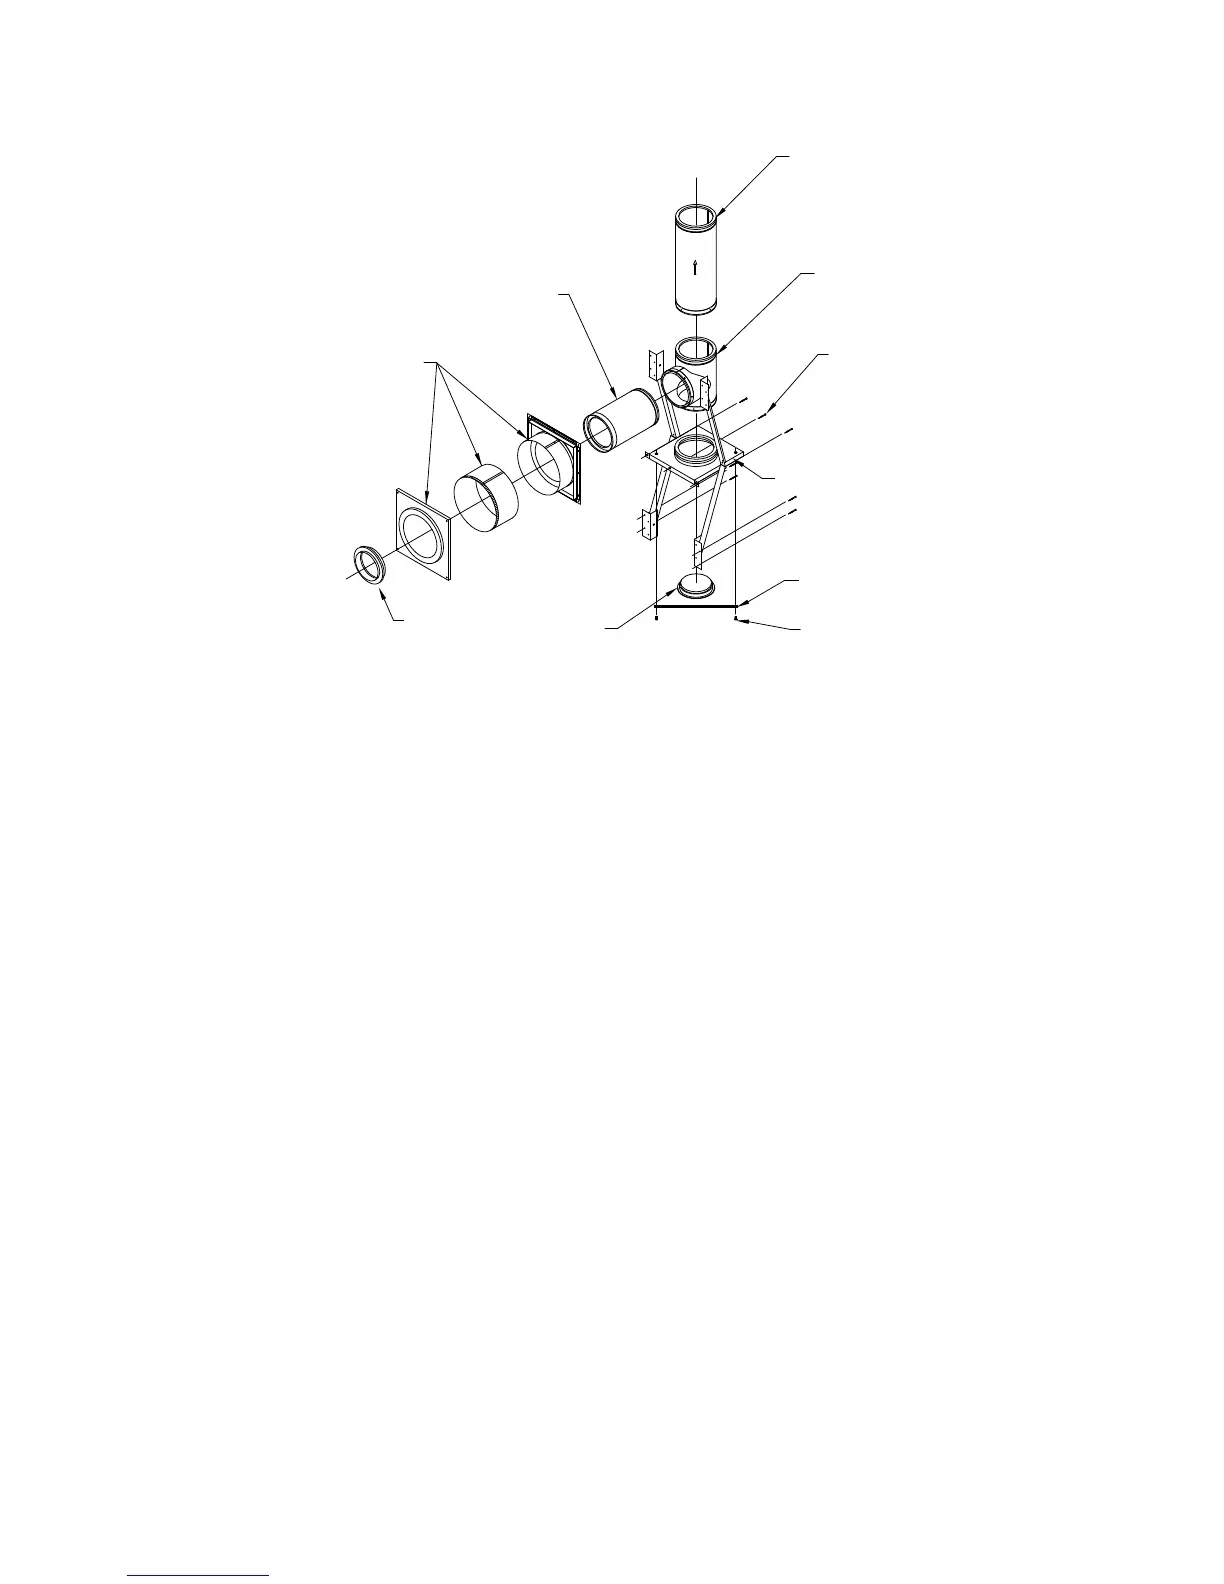
Figure 19
UP
TEE BRANCH
(MUST PENETRATE
A MINIMUM OF 6
INCHES INTO
ROOM)
WALL THIMBLE
ASSEMBLY
FINISHING
COLLAR
CHIMNEY
SECTION
CHIMNEY TEE
1/4"X2" LAG
SCREWS (3
REQUIRED)
TEE CAP
RETAINING BAR
BOLTS FOR
RETAINING BAR
of connector pipe until you have the
desired conguration (refer to the appliance
manufacturer’s installation instructions for
restrictions on connector pipe). Cut and frame
an opening in the inner and outer walls at this
location. Refer to Table 2 for the appropriate
framing dimensions.
3. Install Wall Thimble: The Wall Thimble is a
three piece unit which includes the cover plate,
sleeve extension, and the back portion with
shield. On the outside wall, install the back
portion of the Wall Thimble. Center the back
portion of the Wall Thimble (with shield inside
wall) in the framed opening of the outside wall.
Be sure to seal the ange of the Wall Thimble
around the wall by using a non-hardening
waterproof sealant. Attach the back portion
of the Wall Thimble to the outside wall using
at least (4) 8-penny nails or (4) 1-1/2” wood