WWW.DYEPAINTBALL.COM WWW.DYEPAINTBALL.COM
12 13
INSTALLING THE LENS
INSTALL THE LENS IN THE GOGGLE FRAME
1 Insert new lens into lens frame.
2 Make sure lens is fully seated and logo block is placed firmly into frame receiver.
[See Figure 1]
3 Make sure bottom edge of lens is fully seated within lens ribs.
4 While holding the lens and frame firmly at top logo area, insert frame hook into large
hole at top of nose on mask.
[See Figure 2]
5 Once hook is in place, roll lens/frame towards mask and push down.
6 Make sure frame is flush with mask and fully seated at nose area.
7 Align DYE
®
Switch™ Goggle System lock holes and replace Switch™ Goggle locks in
opposite manner removed.
[See Figure 3]
8 Replace strap under retainer clips.
Tip: DYE
®
replacement lenses come with a protective film on the inside of the thermal lens.
Leave the protective film on during installation. Remove the protective film before use.
1 2 3
WARNING: If the lens is not completely seated in hard goggle frame, the
lens may separate during use and cause injury.
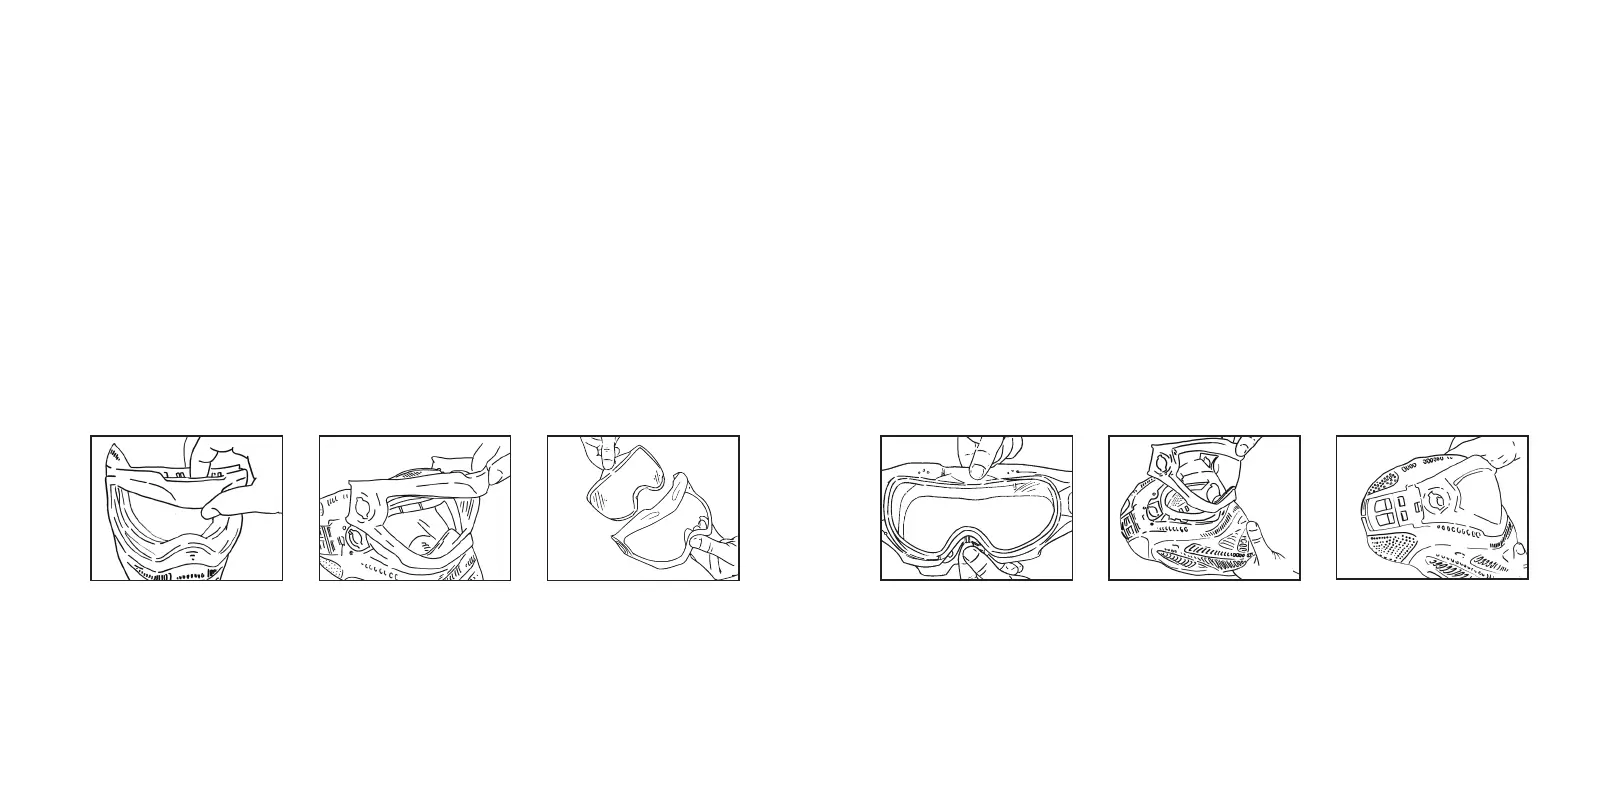
REMOVING THE LENS
REMOVE THE MASK
Remove strap from mask strap retainer. [See Page 11]
REMOVE THE LENS FROM GOGGLE FRAME
1 With both DYE
®
Switch™ Goggle System lock tabs fully removed, place finger between
frame and hard goggle at top center, and pivot frame forward at nose.
2 After pivoting forward, lift lens and frame out of mask.
3 Pop lens out of frame.
Lens replacement is easier if the visor is first removed from the goggle frame.
Tip: Replace your lens at least once each year. Factory applied protective coatings on each
lens surface will wear o even with gentle cleaning.