2 Double-click the Installer icon and follow the instructions. See Figure 5.
3 When the Printer Setup Utility opens, add this printer as follows:
a. Click Add.
b. Select the DYMO LabelPoint 350 printer from the list and click Add.
5. Connecting the Printer to your Computer
Your printer connects to your computer using the USB connection located on the top of the printer.
To connect the printer to your computer
1 Plug the USB cable into the USB port on the top of the printer. See Figure 6.
2 Connect the printer to your computer as follows:
• Windows: Plug the USB cable into a USB port ONLY when prompted
during the software installation.
• Mac OS X: Plug the USB cable into a USB port on your computer prior
to installing the software.
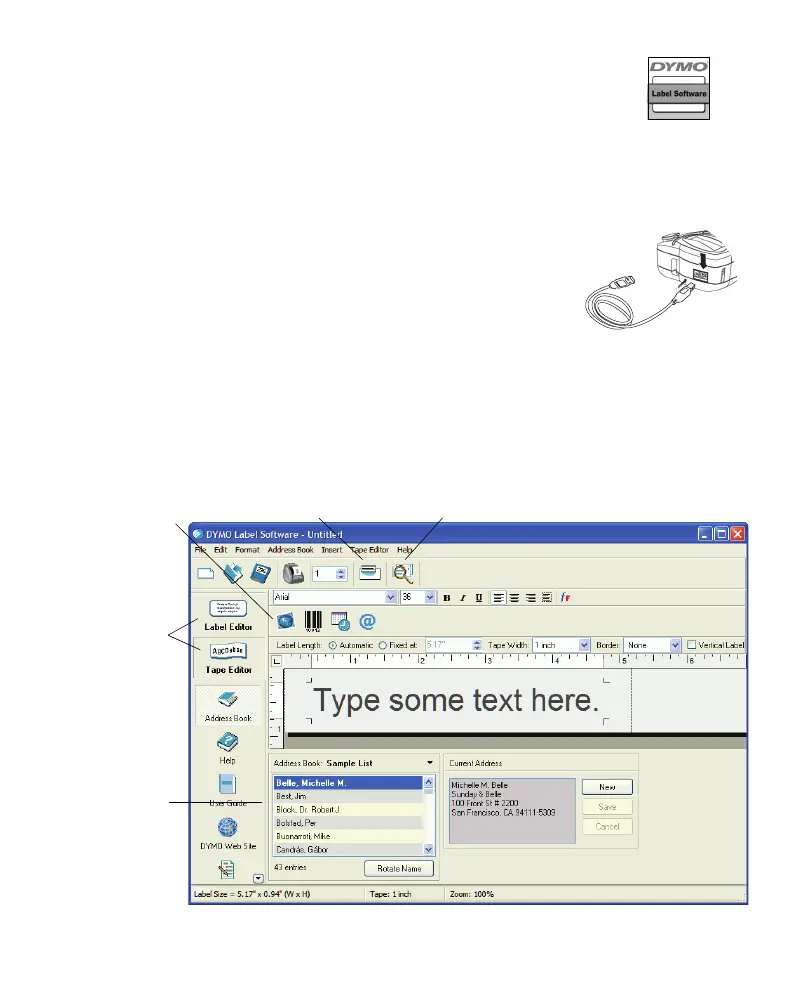
6. Printing Labels with DYMO Label Software
The following figure shows some of the many features available in DYMO Label Software.
For complete details on how to use the software, refer to the DYMO Label Software User Guide, located on
the DYMO Label Software CD-ROM, and the online Help.
DYMO Label
Software Installer
Figure 5
Figure 6
Insert a picture, barcode,
date, or symbol.
Insert text you’ve copied
to the Clipboard.
Store your favorite
addresses in the Address
Book and automatically
insert them on your label.
If you also have a
LabelWriter printer, two
buttons allow you to easily
switch between the label
editor and tape editor.
Verify and correct addresses as you
add them to the Address Book.
 Loading...