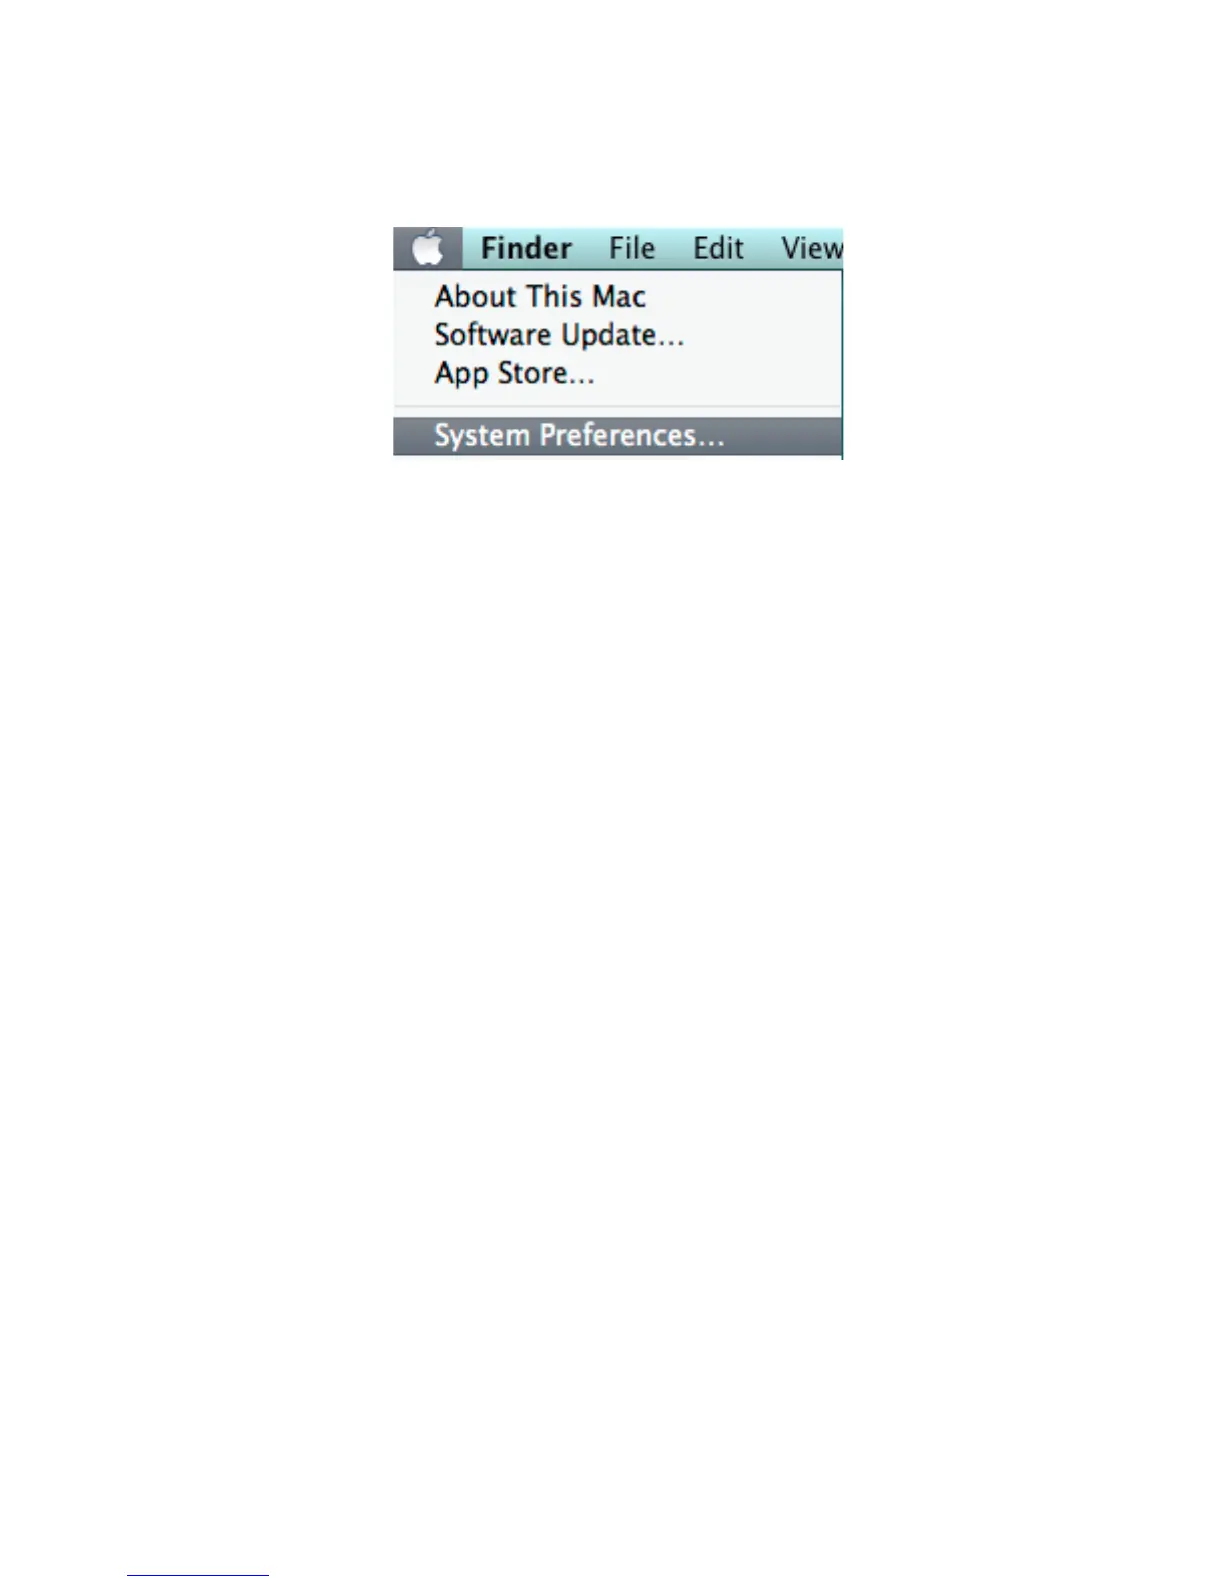
selecting System Preferences from either the dock icon or from Apple drop down
menu (Image 10). Proceed to the KeepnTrack Configuration section.!
!
!
Image 10!
!
NOTE: IN SOME VERSIONS OF OSX IT MAY BE NECESSARY TO SELECT TO ‘ADD A
PRINTER’ FOLLOWING INSTALLATION OF THE SOFTWARE. IF THE PRINTER IS NOT
LISTED IN PRINT AND FAX SETTINGS CLICK THE ‘+’, CHOOSE THE APPROPRIATE
MODEL OF DYMO LABELWRITER FROM THE LIST AND CLICK ‘ADD’.!
!
NOTE: IT IS ESSENTIAL THAT THE NAME OF THE PRINTER REMAIN AS IT WAS WHEN
INSTALLED. DO NOT CHANGE IT. SUPPORTED NAMES ARE:!
DYMO LabelWriter 400, DYMO LabelWriter 450, DYMO LabelWriter Twin Turbo!
!
KeepnTrack Configuration!
!
You will need to make a couple of changes in the KeepnTrack software to start
printing badges or student slips. Begin by logging in to KeepnTrack Administration.!
!
•
To configure settings for the facilities in your account:!
Click on Preferences -> Account. In the Classification section you will see options
for Volunteer, Student, Sta", Vendor, and Visitor. For all the types of people that
you wish to print badges for, check the “Show Print Badge checkbox in Kiosk” box
then click Save (Image 11).!
!

 Loading...