Do you have a question about the Dyna-Glo DGN405SNC and is the answer not in the manual?
Covers essential safety guidelines including cautions and warnings for assembly and use.
Provides legal notification regarding chemicals in the product and their potential health effects.
Lists and illustrates all parts included in the grill package for easy identification.
Details all required hardware with actual size diagrams for accurate assembly.
Outlines estimated assembly time, required tools, and pre-assembly checks.
Steps 1-3: Assembling the base, axle, wheels, casters, and cart braces.
Steps 4-6: Attaching cart braces, storage basket, and the main lid/firebox assembly.
Steps 7-9: Securing the lid/firebox, installing dampers, and damper handles.
Steps 10-12: Attaching side shelf supports, side shelves, and the charcoal access door.
Steps 13-15: Installing the ash tray, ash tray handle, and smoke stack assembly.
Steps 16-17: Attaching the temperature gauge and the main lid handle.
Steps 18-23: Installing crank handle, charcoal tray, grates, and warming rack.
Lists all replaceable parts with descriptions and part numbers for ordering.
Visual representation of all parts, referencing their corresponding numbers.
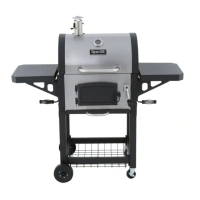
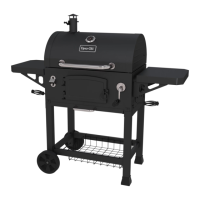
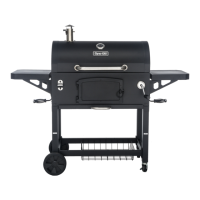
This document describes the assembly, operation, and maintenance of a heavy-duty charcoal grill, specifically models #DGN405SNC and #DGN405SNC-D, manufactured by Dyna-Glo. The manual is designed to guide users through the entire process, from initial setup to safe use and care, and is also available in French and Spanish.
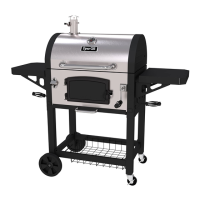
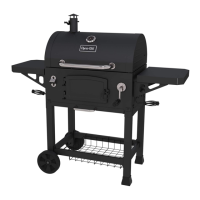
The Dyna-Glo heavy-duty charcoal grill is an outdoor cooking appliance designed for grilling food using charcoal as its fuel source. It provides a robust and versatile platform for various grilling techniques, allowing users to achieve desired cooking results through adjustable heat control and ample cooking space. The grill is equipped with features that facilitate easy charcoal management, temperature monitoring, and convenient storage, making it suitable for backyard barbecues and outdoor entertaining. Its primary function is to cook food by radiant heat from burning charcoal, imparting a distinct smoky flavor characteristic of charcoal grilling.
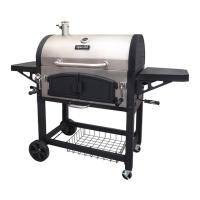
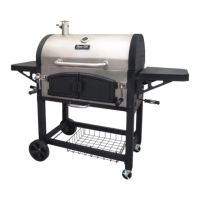
The grill offers several features aimed at enhancing the user's grilling experience. It includes a lid and firebox assembly that houses the cooking grates and charcoal tray. The lid is equipped with a temperature gauge, allowing users to monitor the internal temperature of the grill without lifting the lid, which helps maintain consistent heat and prevents heat loss. A lid handle assembly provides a secure grip for opening and closing the lid.
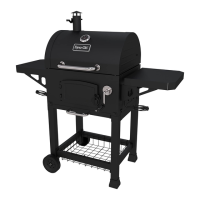
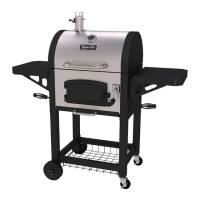
Charcoal management is made convenient with a charcoal tray and a charcoal tray adjustment arm assembly. This system allows users to raise or lower the charcoal tray, effectively adjusting the distance between the charcoal and the cooking grates. This direct control over the heat intensity is crucial for cooking different types of food that require varying temperatures. The crank handle facilitates this adjustment smoothly. An ash tray and ash tray handle are integrated for easy removal and disposal of ashes after grilling, simplifying the cleanup process.
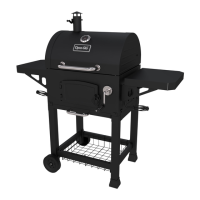
The grill provides a substantial cooking area, featuring two cooking grates for placing food and a warming rack. The warming rack is ideal for keeping cooked food warm, toasting buns, or slow-cooking delicate items away from direct heat. Side shelves are included on both sides of the main cooking chamber, offering convenient space for food preparation, holding utensils, or resting platters. These shelves are supported by side shelf supports, ensuring stability.
Airflow and temperature control are managed through multiple dampers. The smoke stack assembly, located on the lid, includes a damper that allows users to regulate the exhaust of smoke and heat. Additionally, side dampers (left and right) are integrated into the firebox, providing further control over the air intake, which directly impacts the charcoal's burn rate and the grill's internal temperature. Damper handles are provided for easy adjustment.
For mobility, the grill is designed with wheels and casters. Two wheels are attached to an axle on one leg assembly, while two casters are attached to the other leg assembly. This combination allows for easy movement of the grill across outdoor surfaces when needed, and the casters can be locked to secure the grill in place during use. A storage basket is located beneath the main cooking chamber, offering additional space for storing grilling accessories, charcoal bags, or other items.
Maintaining the Dyna-Glo charcoal grill is straightforward, with several design elements facilitating easy cleaning and upkeep. The removable ash tray is a key feature for maintenance, allowing users to easily slide out and dispose of cold ashes. This prevents ash buildup, which can impede airflow and affect grilling performance. The manual explicitly advises allowing the unit to cool completely before disposing of ashes and provides instructions for safe ash disposal, including wrapping them in heavy-duty aluminum foil and soaking them with water if immediate disposal is necessary.
The cooking grates and warming rack are designed to be removable, making them easy to clean after each use. Regular cleaning of these surfaces helps prevent food residue buildup and maintains hygiene. The interior of the firebox and lid can also be cleaned once the grill has cooled down.
The construction of the grill, with its various components, suggests that parts can be individually cleaned or replaced if necessary. The replacement parts list provided in the manual is a valuable resource for identifying and ordering specific components, ensuring the longevity of the grill. This includes parts like the smoke stack, lid assembly, temperature gauge, handles, and various structural supports.
The manual emphasizes safety precautions for maintenance, such as allowing the unit to cool completely before cleaning or performing any routine maintenance. It also advises wearing protective gloves when handling parts that may have sharp edges, ensuring user safety during assembly and cleaning. The overall design focuses on user-friendly access to components that require regular cleaning or inspection, contributing to the grill's durability and sustained performance over time.
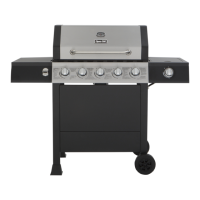
| Type | Gas Grill |
|---|---|
| Burners | 4 |
| Total BTU | 36, 000 |
| Cooking Area | 405 sq. in. |
| Material | Stainless Steel |
| Grate Material | Porcelain-coated cast iron |
| Fuel Type | Propane |