9
ASSEMBLY INSTRUCTIONS
Hardware Used
HH
II
JJ
8
TT
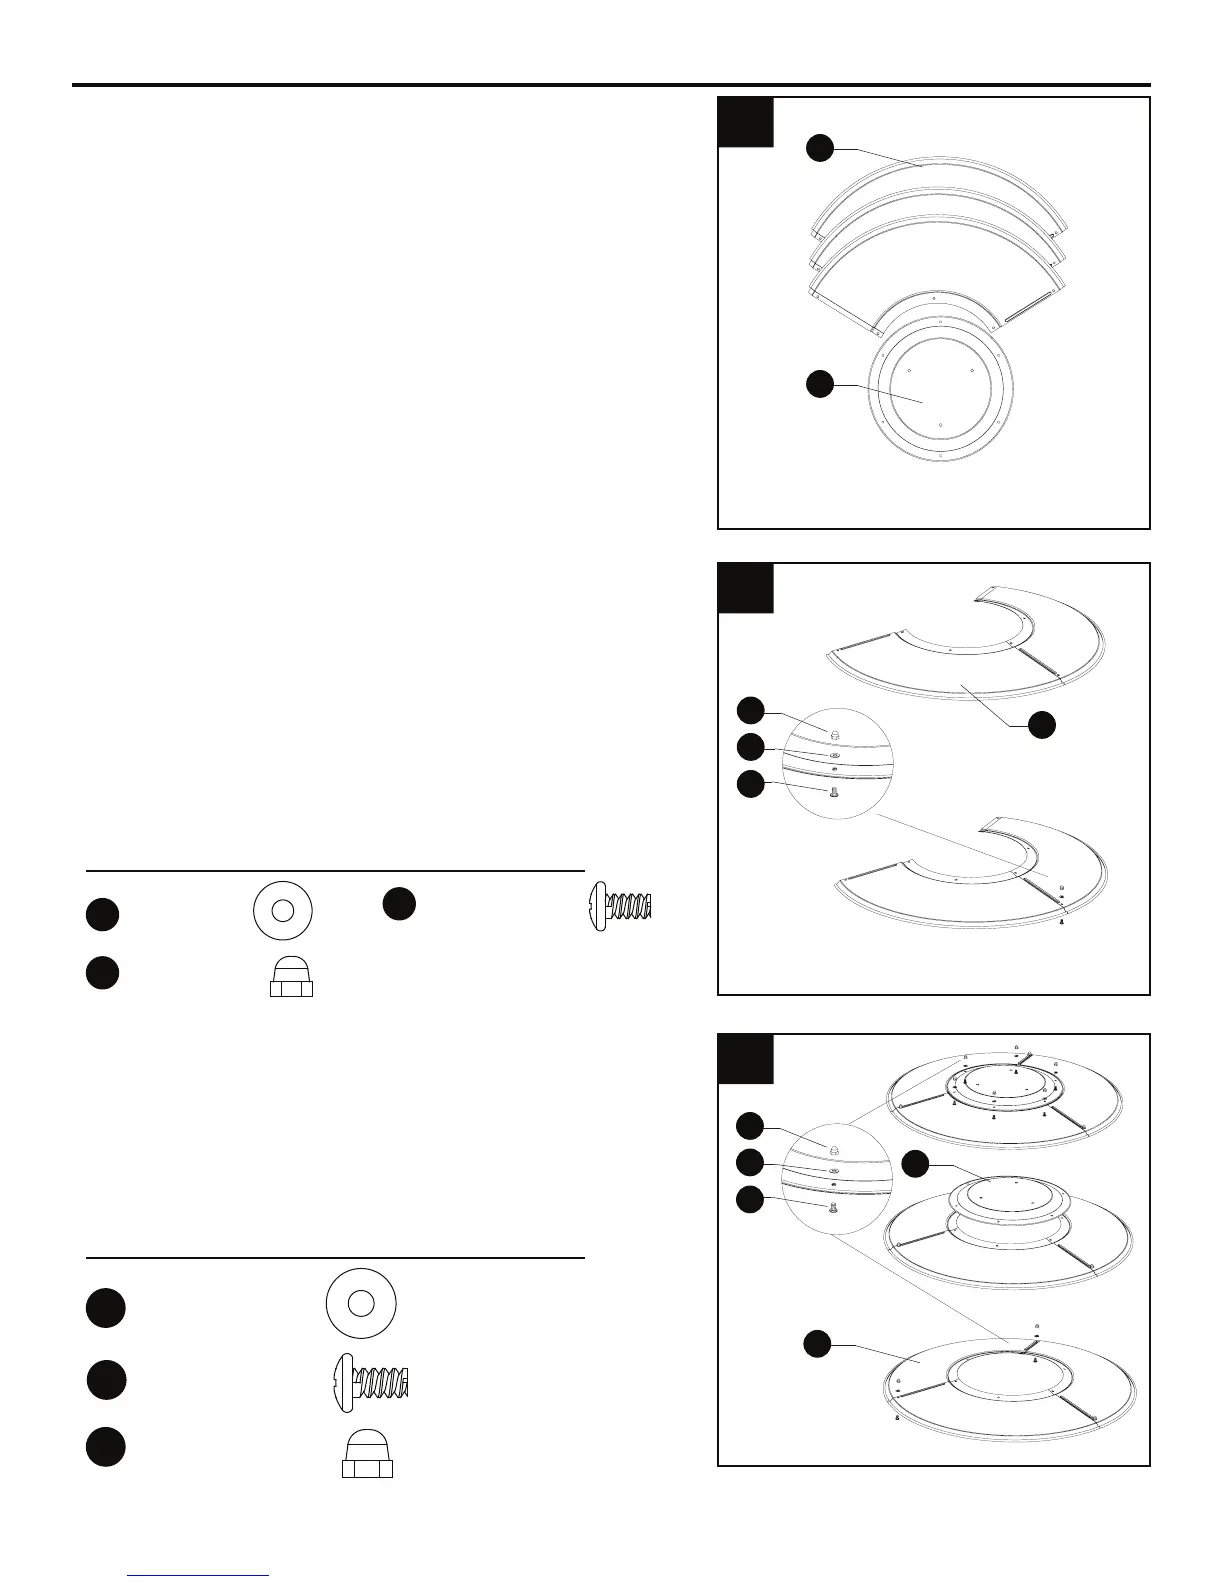
8. Remove reflector panels (A) and reflector plate (B) from
packaging.
WARNING: Remove protective plastic cover before
assembling.
9. Slide two reflector panels (A) together.
Insert one screw M6 X 10 (II). Slide one washer Φ 6(HH)
over threaded end of screw M6 X 10 (II) and screw on
M6 cap nut (JJ) loosely. Attach the third panel on both
sides to the two already joined panels using two more
M6 x 10 screws (II), two more Φ6 washers (HH), and
two more M6 cap nuts (JJ). Note: For proper alignment
of reflector panels, keep bolts loose until all parts are
together and then tighten.
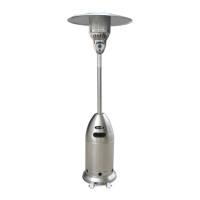
10. Slide reflector plate (B) onto reflector panels (A).
Insert one screw M6 X 10 (II). Slide one washer
Φ6 (HH)
over threaded end of screw M6 X 10 (II) and screw on
M6 cap nut (JJ) loosely. Repeat procedure to complete
the assembly of all four sections. Fully tighten all of
the screws in the rolled edge.
x 3
x 3
x 3
Washer Φ 6
Screw M6 X 10
B
JJ
HH
II
A
B
A
M6 Cap nuts
Hardware Used
HH
II
JJ
x 6
x 6
x 6
Washer Φ 6
Screw M6 X 10
M6 Cap nuts
JJ
HH
II
9
10
A