these
transformers.
Any
other
type
of
instrument
will
dam-
age
the
tuning
slugs, requiring
replacement
of
the
trans-
former.
When
using
the
plastic
tool,
all
adjustments
are
to
be
made
using
the
end
which
has
a
shoulder
to
prevent
inserting
the
tool too far.
BE
CAREFUL
IN
HANDLING
THE
CHASSIS
DUR-
ING
ALIGNMENT.
THERE
IS
SOME
SHOCK
HAZ-
ARD
BECAUSE
OF
THE
EXPOSED
WIRING.
It
is suggested
that
you
read
these
instructions
com-
pletely
before proceeding, to familiarize
yourself
with
the
general
procedure.
The
tuner
is
to
be
connected
to
an
amplifier
and
speaker,
turned
on,
and
the
antenna
attached
as
for
normal
use.
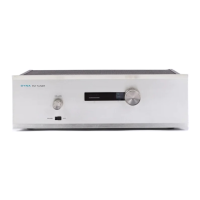
The
alignment
of
the
FM-3
is
carried
out
in two stages.
First,
the
main
tuner
portion
(PC-7
and
PC-8)
is aligned,
and
then
the
multiplex
section.
Pull
the
volume
control
knob
"OUT"
to disable
the
multiplex
circuit
and
eliminate
its
effects during
alignment
of
the I.F. stages, discriminator,
and
the front end.
For
these sections,
the
alignment
instruc-
tions will refer to
the
lower
(tuning
eye)
beam
of
V8,
where
Dyna's
exclusive reference grid will simplify locat-
ing
the
precise peaks.
Alignment
of
the
I.f.
Stages
These
adjustments
require
the
insertion of
the
plastic
alignment
tool
into
the
threaded
slugs
inside
the
aluminum
I.F.
transformers,
and
the
rotation
of
these
slugs
until
they
are
in
a position, easily
determined,
which
represents
cor-
rect
alignment.
If
the
tuner
has
been
built
correctly,
it
will
not
be necessary
to
make
more
than
a
small
adjustment
to
reach
the
right
point.
IF
A
SLUG
MUST
BE
TURNED
MORE
THAN
ONE
FULL
TURN,
YOU
WILL
PROBABLY
BE
COMPENSAT-
ING
FOR
SOME
FAULT
IN
WIRING
OR
COMPONENTS,
AND
YOU
SHOULD
STOP
TO
CHECK
BEFORE
PROCEEDING
FURTHER.
The
end
of
the
alignment
tool
with
the
shoulder
should
always
be used,
with
the
tool
inserted
until
the
shoulder
stops
it.
IF
THE
CORE
SLUG
STOPS
TURNING,
DO
NOT
ATTEMPT
TO
FORCE
IT
BEYOND
THIS
POINT.
There
are
two slugs
in
each
I.F.
transformer,
and
it
is possible,
particularly
if
the
slugs have been
turned
too much, for
them
to
touch
each
other.
If
an
attempt
is
made
to
turn
them
further,
the
slugs
are
likely
to
break,
requiring
replacement
of
the
entire
transformer.
Two
points
require special
attention.
Never
use
any
tool
or
instrument
to turn the slugs except
the
alignment
tool
supplied
or one
exactly
like
it. A conventional
metal
tool
may
break
the
slug.
When
working from the·
underside
of
the
chassis
with
the
tuner
on,
you
must
constantly
bear in
mind
the hazard
of
possible shock from exposed wiring.
If
you
wish,
the
bottom
plate
can
be
installed
during
align-
ment
of
the
LF.
stages.
4 (
\)
Turn
the
tuning
knob
until
you
find a
place
where
no
station
can
be
heard
(only
hissing).
Insert
the
end
of
the
plastic
alignment
tool
into
the
top of
LF.
transformer
T4,
and
slowly
rotate
the
slug
until
the
hissing is loudest.
As
this
and
the
following
steps
proceed,
the
hissing
will become louder,
and
the
loudness
peak
will
become
sharper
and
easier to locate.
If
the
hiss
becomes
annoyingly
loud,
adjust
the
level
with
the
volume control;
the
lower
half
of
the
eye
tube
V8
will
usually
begin to close
as
the
noise increases
after
the
first
step
or
two,
and
this
should
be used,
rather
than
the
sound, for
the
remainder
of
the
adjustments.
If
it
is difficult to
make
the
adjustment
because
of
lack
of hiss, use a
station
to
make
this
series of ad-
justments.
Then
repeat the procedure while
tuned
between stations, using hiss
as
an
audible
signal
until
there is sufficient deflection of
the
tuning
eye
lowel'
bar
to use
this
as
an
indication. Always follow
t
the
sequence described.
5( )
Adjust
the
bottom
slug of
T4.
6( )
Adjust
the
top slug of
T3.
7
(J>
Adjust
the
bottom
slug
of T3.
8 (
J)
Adjust
the
top slug of
T2.
9 (
1>
Adjust
the
bottom
slug of
T2.
10(
V)
Adjust
the
top slug of
Tl.
11 (
\Jf
Adjust
the
bottom
slug of
Tl.
Alignment
of
the
Discriminator
The
alignment
of
the
discriminator
determines
the
dis-
tortion
and
noise rejection of
the
tuner,
and
is therefore a
critical
adjustment.
The
Dynatuner
provides a positive
method
of
adjusting
the
discriminator
to
exactly
the
right
point.
12
<.
J)
Tune
a
station
which gives a good
clean
mono
signal
clearly
indicated
by
a definite
tuning
peak.
Ideally,
it
should
not
be a
very
weak
or
a
very
powerful signal,
and
it
should
be
separated
from
adjacent
channel
stations
by
normal
interstation
hiss
as
you
tune
through
it.
These
precautions
will in-
sure
against
imperfect
alignment
through
using
an
atypical
signal.
The
accuracy
of
alignment
depends
on
the correctness
of
this tuning.
Be
sure that
you
do
not
disturb
the
tuned
setting
during
the
following
steps.
While
they
are
being
performed
the
tuning
eye
will be used to show
other
effects.
13(J)
Unscrew
(counter-clockwise)
the
top
slug of
the
discriminator
transformer
T5,
using
tl1e
shoulder
end
of
the
plastic
alignment
tool,
until
the
top
of
the
slug
is
flush with
the
top of
the
transformer.
This
detunes
the
secondary
winding of
the
dis-
criminator
transformer,
essential in
order
to
obtain
the
optimum
adjustment
of
the
primary
winding,
done
in
the
next
few steps.
The
tuning
eye
is used
as
an
indicator
for
this
adjustment,
by
connecting
it
to
another
part
of
the
circuit
than
that
to which
it
is now connected.
If
you
are very careful,
it
is possible
to
do
the
neces-
sary
unsoldering
and
resoldering of connections
without
turning
off
the
tuner. However,
YOU
MUST
BEAR
IN
MIND
THE
HAZARD
OF
POS-
SIBLE
SHOCK
FROM
EXPOSED
WIRING.
Care
and
deliberation
can
eliminate
this
hazard,
but,
if
you
wish to avoid all risk of shock,
turn
the
tuner
off before
making
the
new connections,
and
turn
it
on
again
to
make
the
adjustments.
If
you
do this,
it
is essential
that
you
allow
the
tuner
to
warm
up
for a few
minutes
each
time before
making
an
adjustment,
even if
it
has
been off for less
than
a minute.
NOTE:
It
a
VTVM
Is
available.
discriminator
alignment
can
be
considerably
simplified
by
skipping
Immediately
10
step
24
be-
low.
The
VTVM
should
be
of
a
type
which
has
at
least
a 1
megohm
resistor
in
the
DC
probe
to
Isolate
the
probe
and
lead
capacity
from
the
measured
circuit.
17
 Loading...