Setting Limits
DYNACO USA, INC, 5 The Leader in Door Safety & Design
2.1 Setting/Adjusting Limits after Initial Power Up
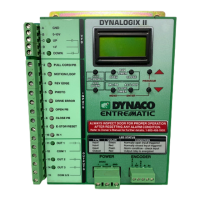
Figure 2.0-5: JOG UP/RESET Button
JOG
UP/RESET
JOG
DOWN
OPEN CLOSE
MC/PB AC/LOOP
PROGRAM
CLOSE
TIMERS
RUN
TIMERS
MENU
ENTER
Press the
JOG UP/RESET
button to bring
door up
12. Press and release the ENTER button to save limit setting. Display will
change to: PhtLimit_Set—OK.
13. Press and release either red arrow buttons to scroll to the OpnLimit.
14. Press and release ENTER button. Display will change to:
JogToOpn_Enter.
15. Use the JOG UP/RESET button to bring door up desired open position
(roughly a inch and a half above the reintroduction point).
16. Press and release ENTER button to save limit setting. Display will change
to: OpnLimit_Set--OK
17. Press and release the MENU button twice. Display will change to: Ready.
See figure: 2.0-6.
MESSAGE DISPLAY / COUNTER
JogToPht
Enter
Figure 2.0-6: Menu Button
JOG
UP/RESET
JOG
DOWN
OPEN CLOSE
MC/PB AC/LOOP
PROGRAM
CLOSE
TIMERS
RUN
TIMERS
MENU
ENTER
Press and
release the
MENU button
twice to exit
program
mode
MESSAGE DISPLAY / COUNTER
Ready
###
STOP
For first time users it is recommended not to use section 2.1. Please go back to
section 2.0 and go through the step by step procedure.
 Loading...