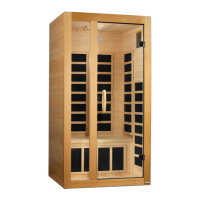
FIG 6 Assembling Roof Panel
7. Connect all the wires and connectors to the corresponding outlets on the Roof
Panel. Be sure that all the plugs are connected snug and tight. (see FIG-7)
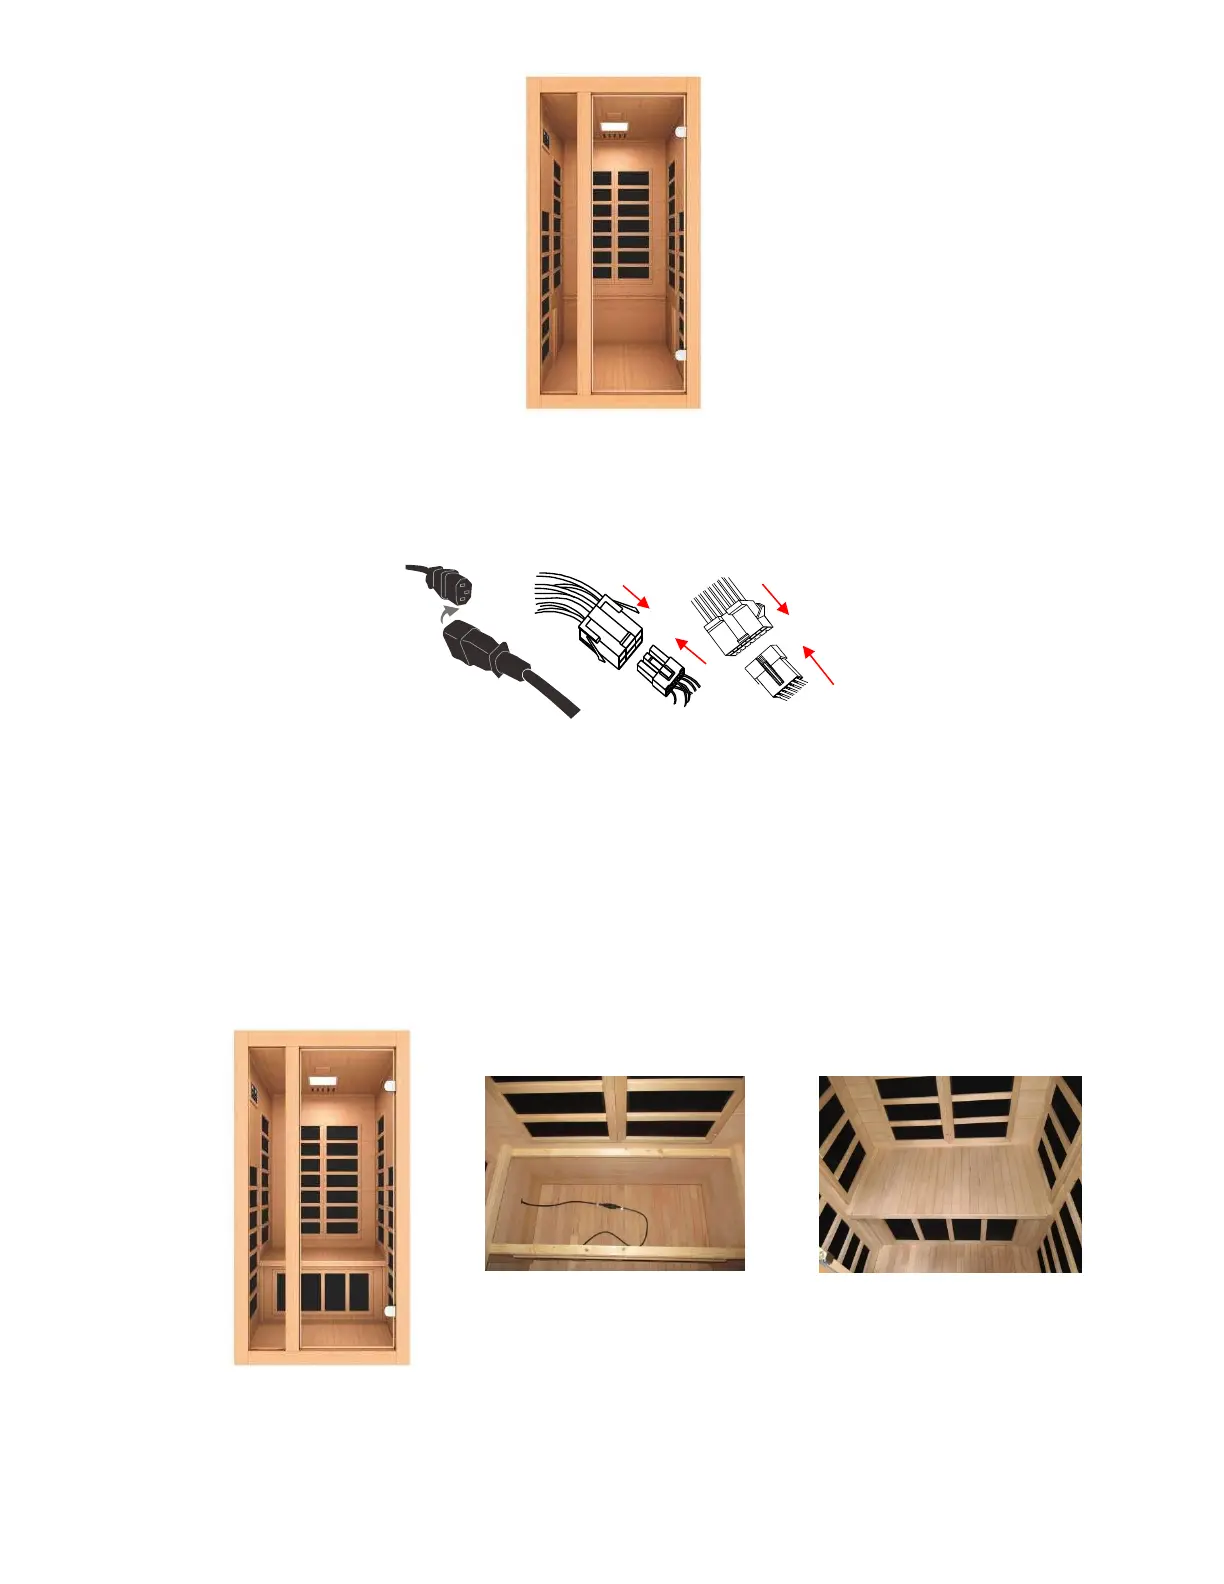
FIG-7 Connecting cords/wires connectors
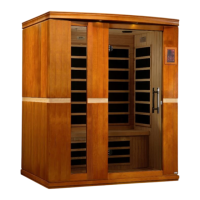
6. It is now time to install the door handle, bench heat emitter panel and bench. Locate
the door handle and screw it to the glass door. Next, slide the bench heat emitter
panel vertically downward. Be sure that the heat emitter panel slides downward into
the slots on the side wall panels. After installing the bench heat emitter panel, you
can connect the heater cord. Next, you can slide the bench over the top of the
bench heat emitter panel. Be sure to slide the bench all the way back against the
rear panel. Use the provided screws to secure the bench in place. (see FIG-8)
FIG-8 Assembling Bench Heat Emitter Panel & Bench
Page 10