____________________________________________________________
ASSEMBLY
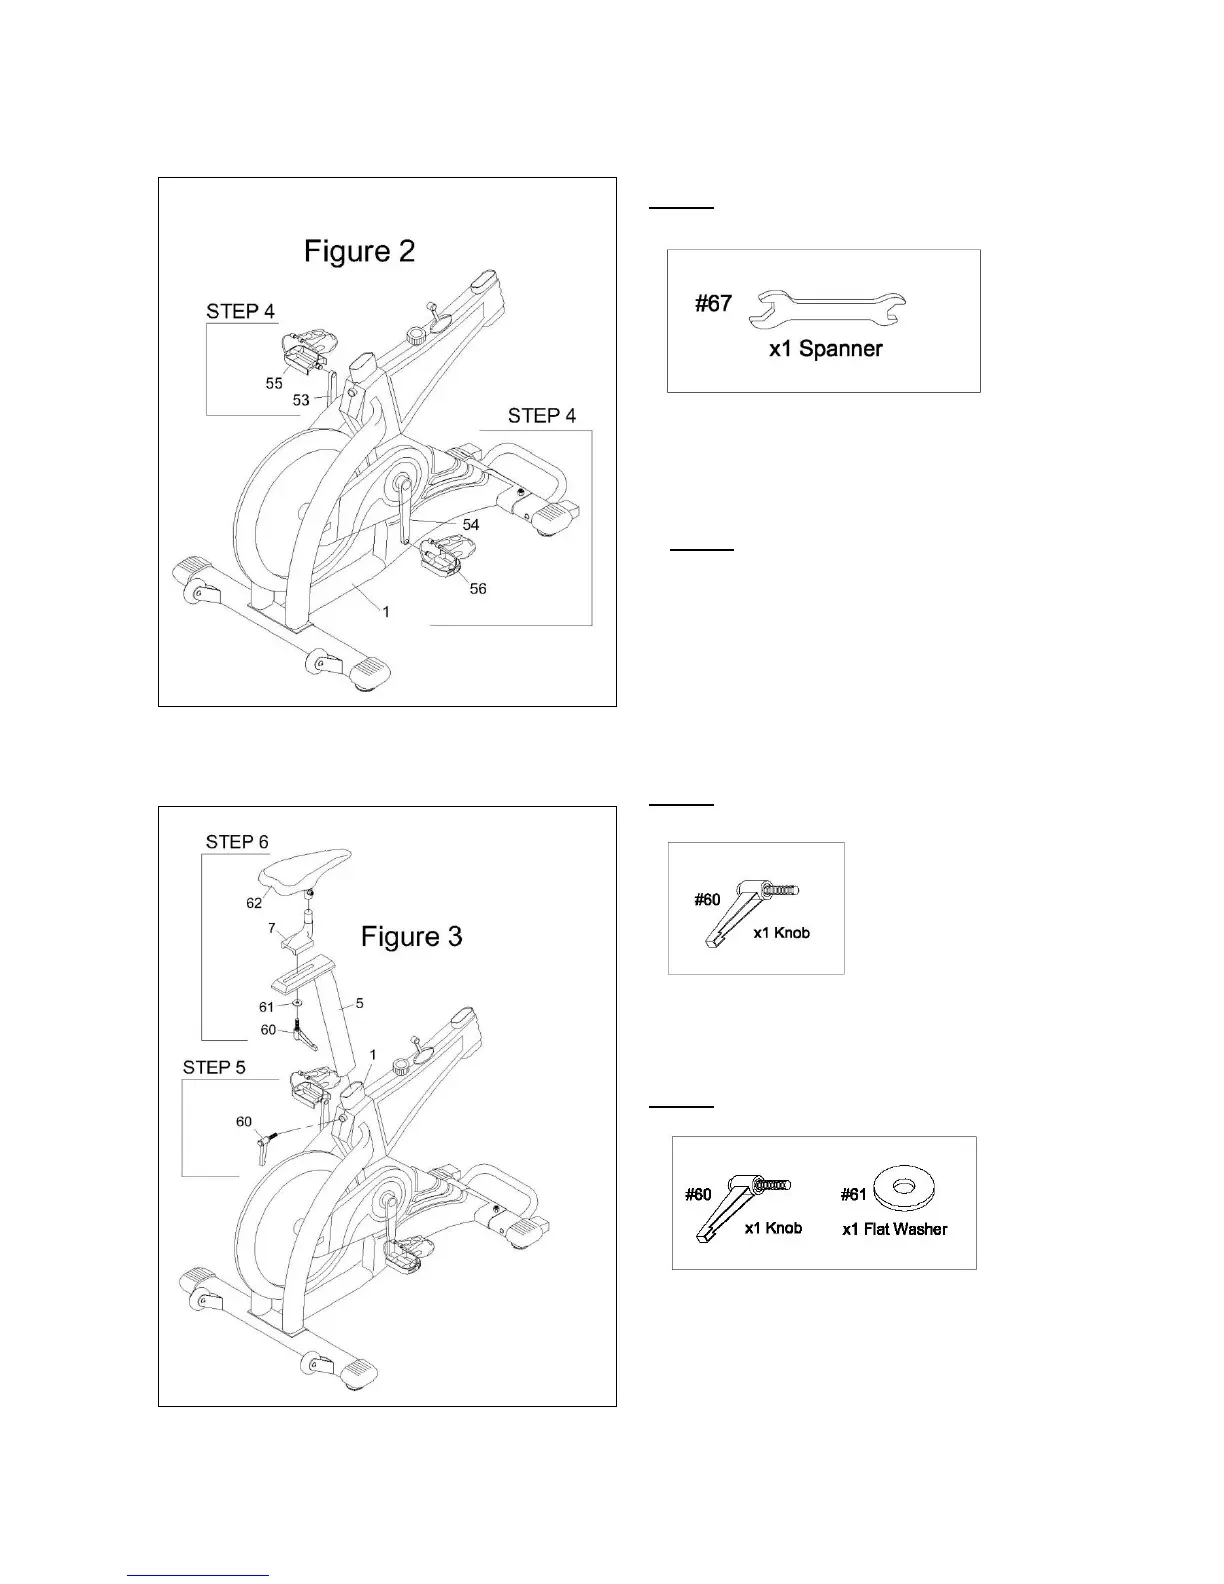
STEP 4
Attach the Left Pedal (55) and Right Pedal (56) to
the Left Crank (53) and Right Crank (54) as
shown in Figure 2.
** Tighten the Left & Right Pedals used in
STEP 4 with the Spanner Tool (67).
STEP 5
Insert the Seat Post (5) into the tube of the Main
Frame (1) with Knob (60) as shown in Figure 3.
** Hand tighten ONLY.
STEP 6
Affix the Seat (62) on the bar of the Seat Slider (7).
Next, slide this set onto the Seat Post (5) with Flat
Washer (61) and Knob (60) and then tighten as
shown in Figure 3.
** Hand tighten ONLY.