____________________________________________________________
ASSEMBLY
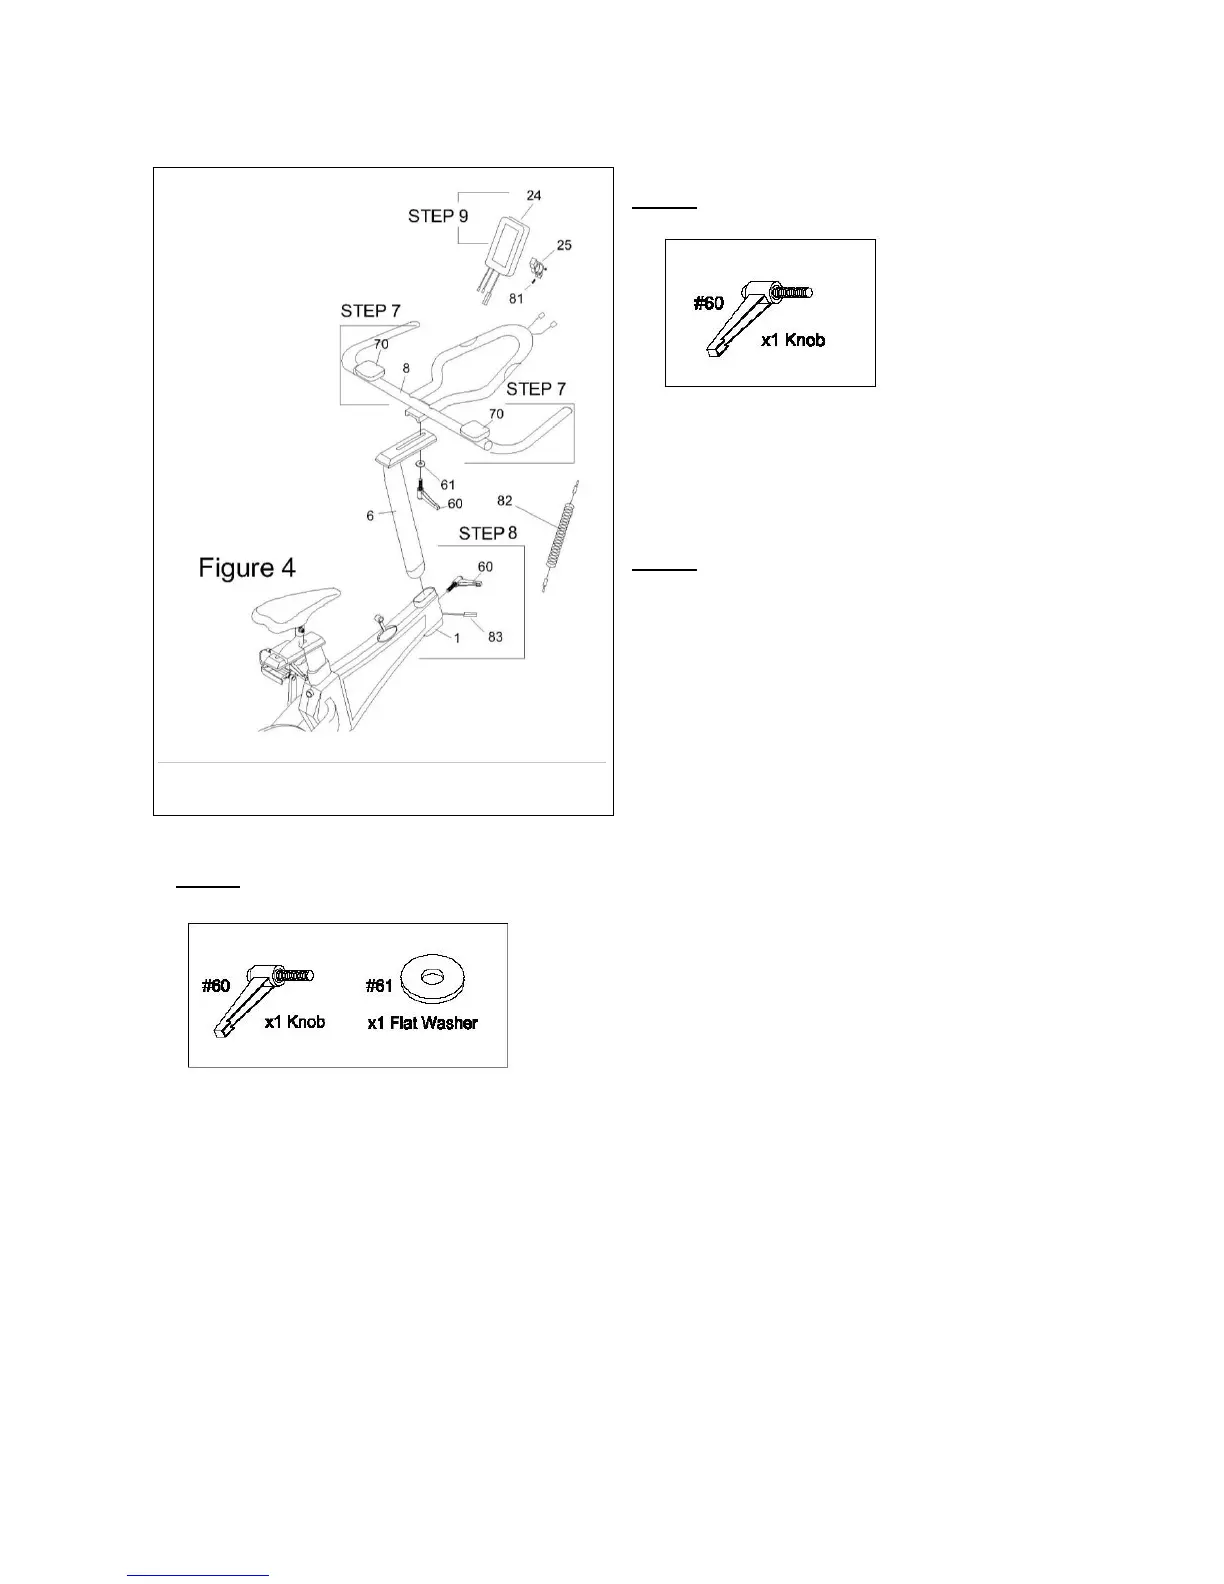
STEP 7
Attach the Handle Bar (8) onto the Handle Post (6)
with one Flat Washer (61) and Knob (60) as
shown in Figure 4.
** Hand tighten ONLY.
STEP 8
Insert the Handle Post (6) into the tube of the Main
Frame (1) with Knob (60) as shown in Figure 4.
** Hand tighten ONLY.
STEP 9
Affix the Bracket (25) on the Handle Bar (8) with
screw (81) and Table frame nut (87).
IMPORTANT NOTE:
Please make sure all Screws, Nuts, Bolts,
Pedals and Seat are tightened in correct
position.
Product Assembly Size: 66.9”x25.6”x50.4”