Do you have a question about the DYNATEK DS1-1 and is the answer not in the manual?
Remove the points cover, 10mm nut/bolt, and hex washer holding the spark advance assembly.
Remove screws holding the points plate, disconnect wires, and remove the entire point/plate assembly.
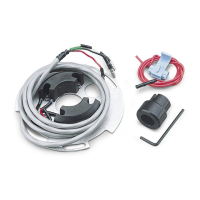
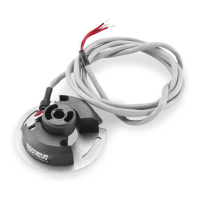
Remove points cam, pin (if applicable), and install DYNA S rotor onto the advance assembly shaft.
Install the advance/rotor assembly and the DYNA S unit onto the engine, routing the cable.
Connect blue/yellow wires to original points receptacles and red wire to switched 12V source.
Connect a 12-volt test light and rotate engine to align advance marks for cylinders 1-4.
Loosen screws to adjust DYNA S plate or module position to align timing marks.
Connect test light to yellow wire, verify 2-3 timing marks, and adjust module as needed.
Recheck and adjust timing using a strobe light at approximately 2500 RPM.
Bright test light indicates bad wiring connection; ensure 12 volts at red wire.
Probable cause is loss of 12 volts to coils or red wire, not the DYNA S unit itself.
Check for bad DYNA S module by reversing output wires or verify coil/wiring issues.
| Brand | DYNATEK |
|---|---|
| Model | DS1-1 |
| Category | Accessories |
| Language | English |