34
Operation
Before first use
● Carefully clean up the ceramic hob. Ceramic hobs should be treated like glass surfaces,
● Operate the hob observing the specified safety instructions and rules set forth in the Manual.
Switching on a ceramic hob cooking zone without a pot with dish already put on the cooking zone is
strictly forbidden.
Switching on cooking zones and power adjustment
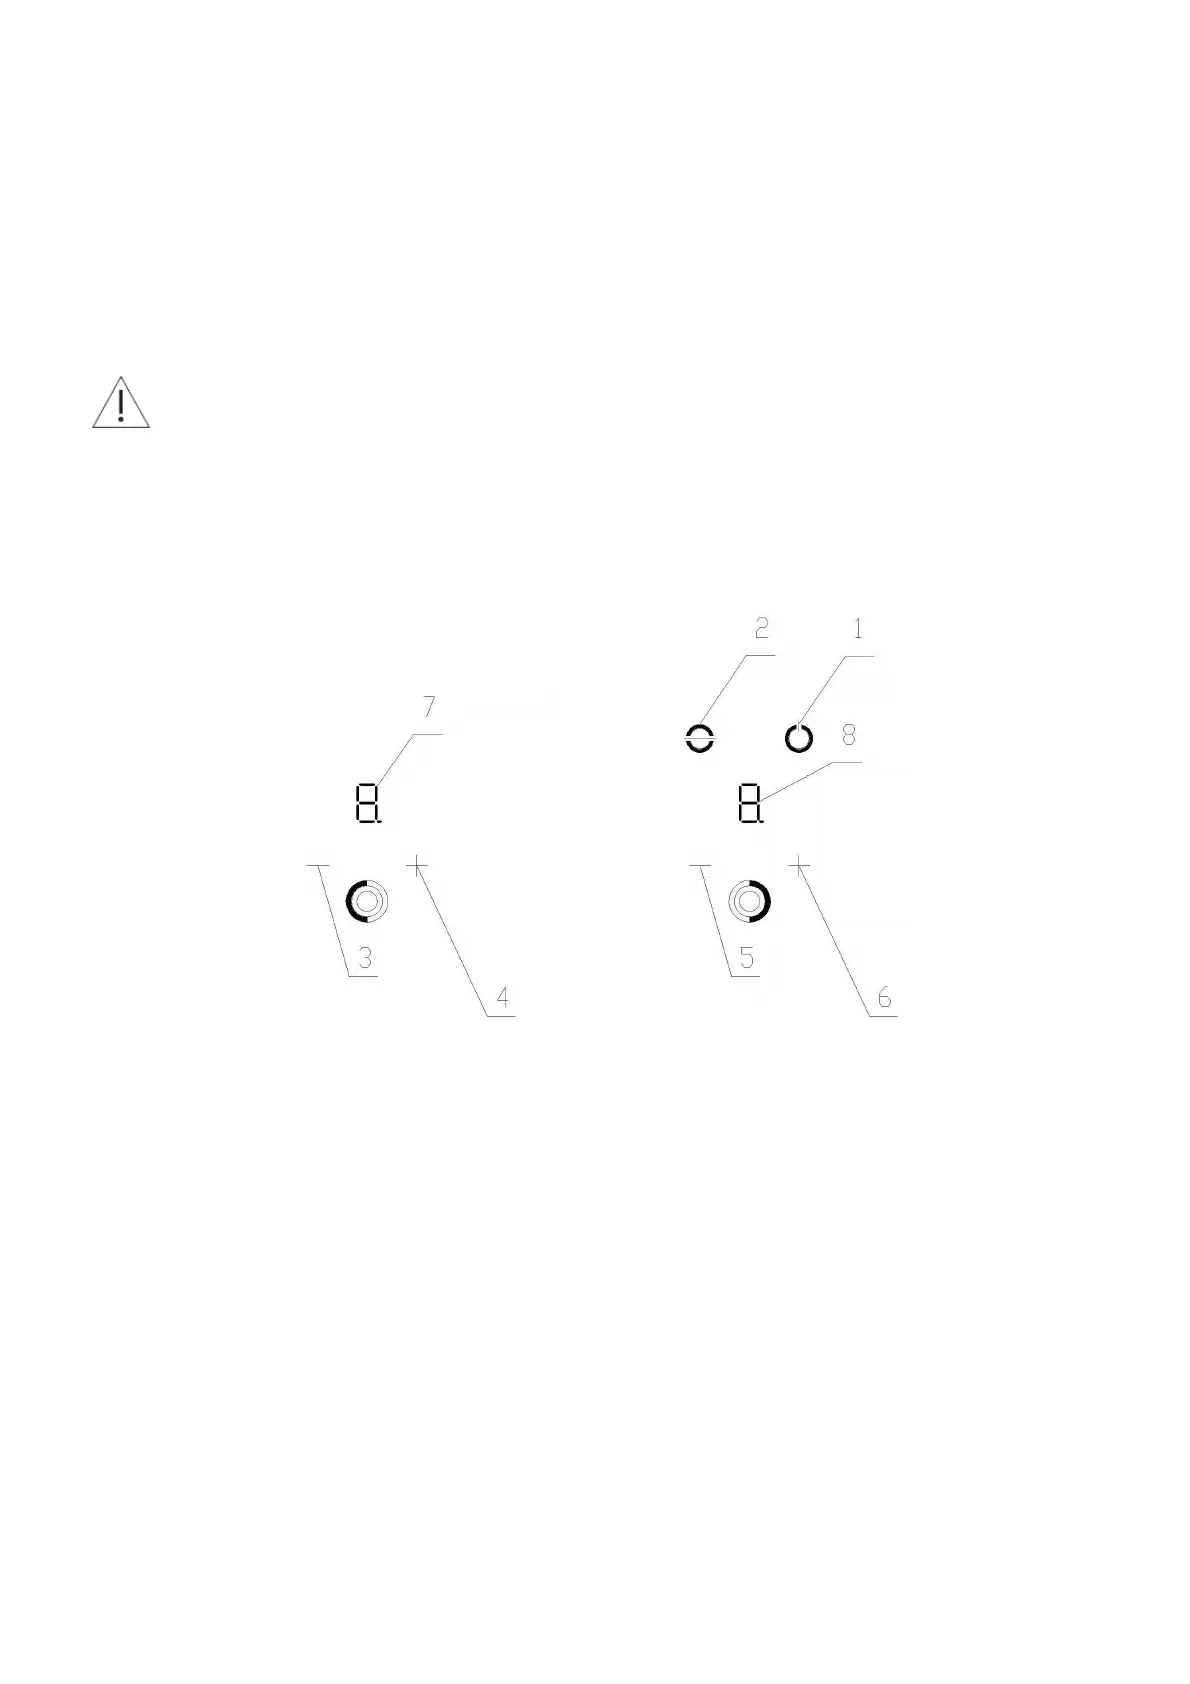
Fig. 2 Control panel of GCH 5.01.SD/2 hob (item 5, Fig. 1)
1 – Main ON/OFF switch
2 – Lock
3,5 – Cooking zone power reducing sensor
4,6 – Cooking zone power increasing sensor
7 – 1
st
cooking zone power indicator
8 – 2
nd
cooking zone power indicator
1. Each sensor
[ + ]
and
[ - ]
is assigned to the respective cooking zone.
1 – the lowest heating power
9 – the highest heating power
2. To switch on cooking zone / zones, proceed as follows:
- Put a filled pot on the selected cooking zone,
- Touch the sensor of the main switch (ON/OFF) with a finger, Item 1 Fig. 2 (0 digits are displayed on the
displays – items 7, 8 Fig. 2),
- Within 10 seconds touch sensor
[ + ]
with a finger: it sets the heating power of the cooking zone to “1”,
- Within 10 seconds touch sensor
[ - ]
with a finger: it sets the heating power of the cooking zone to “
9.
”,
3. Every next touch of:
-
[ + ]
sensor increases the heating power up to “
9.
”,
-
[ - ]
sensor reduces the heating power down to “1” and then switches over the hob into a stand-by mode,
with “0” digit displayed.