47
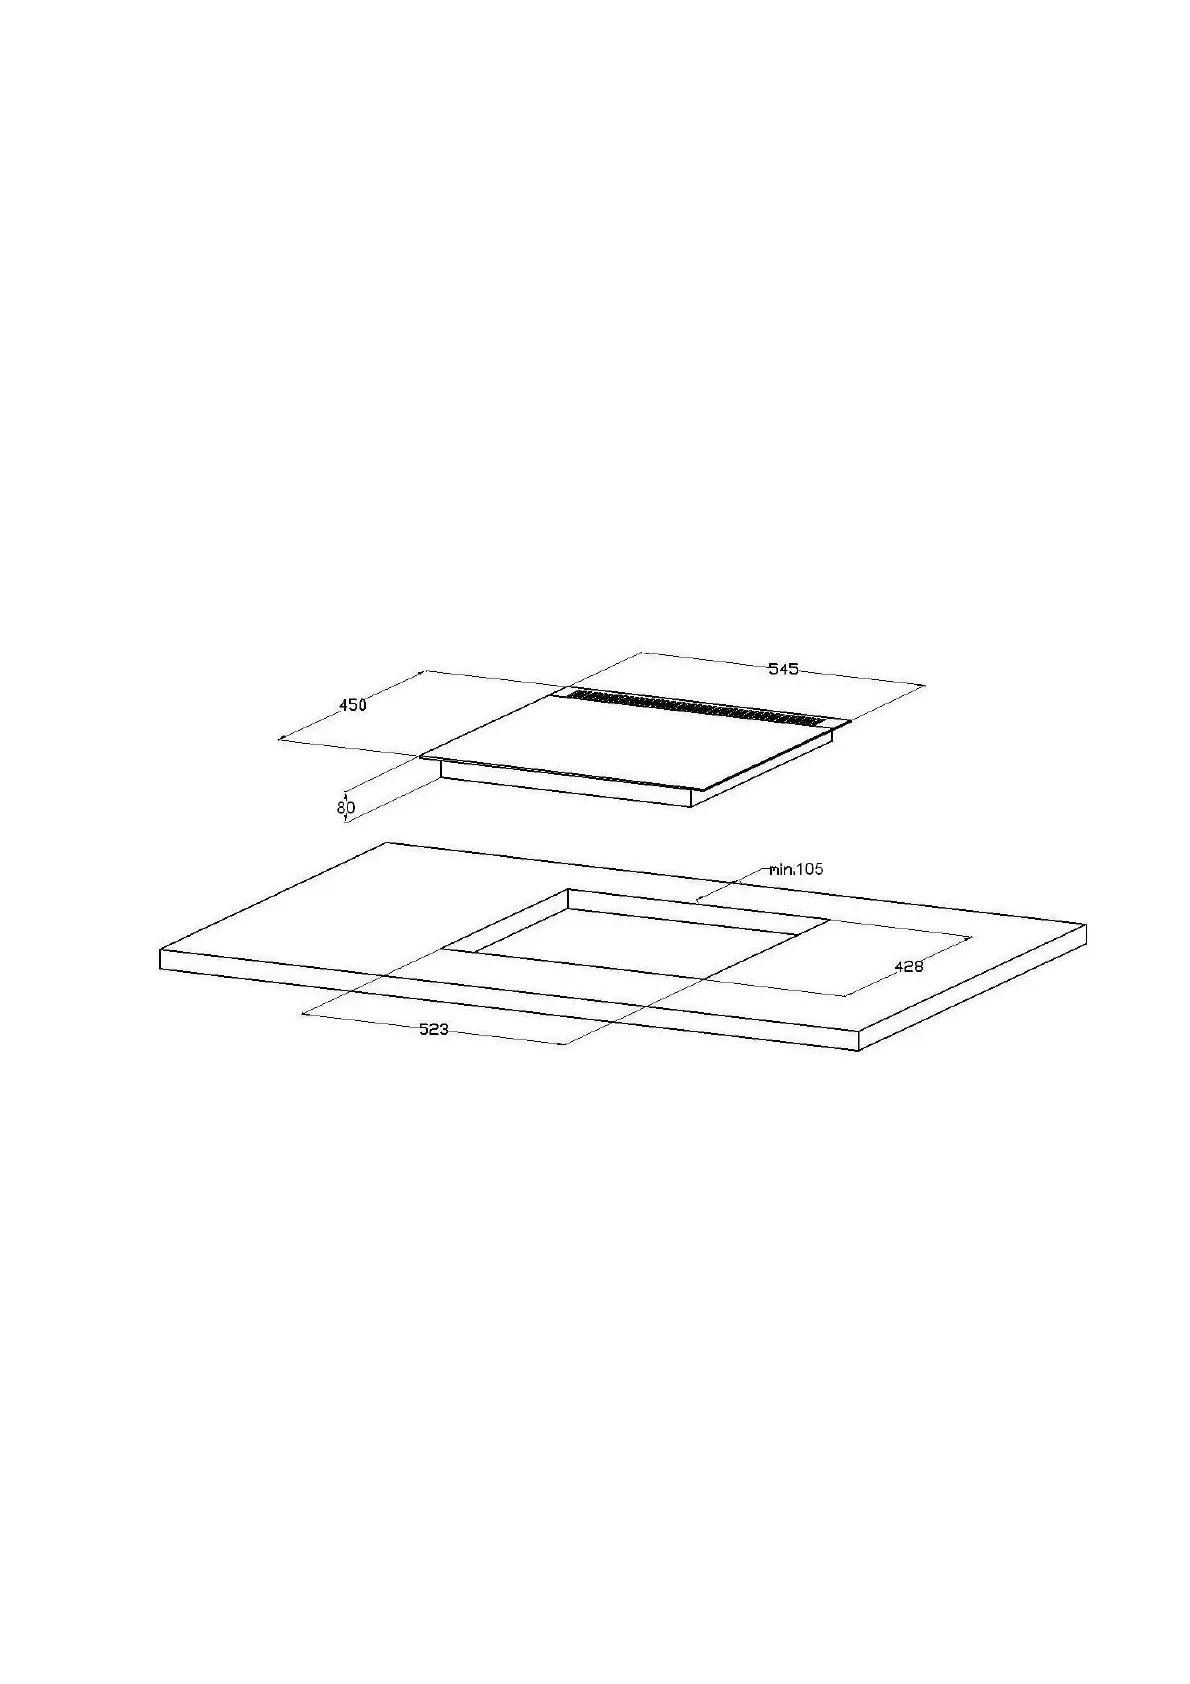
• Depending on the situation, prepare a place (opening) in the worktop of a cupboard according to the
installation drawing (Fig. 5; 6),
• The veneer and glues used in the cupboard must be resistant to the temperature of 100°C. Failure to meet
the condition may result in surface deformation or ungluing of veneer,
• The worktop the gas hob is fitted in must be permanently screwed to the cupboard or permanently joined
with the segment of furniture,
• If the ceramic hob is to be fitted into a top of a carrying cupboard, ensure that it is correctly ventilated by
meeting requirements described in Fig. 7 or Fig. 8,
• If the ceramic hob is to be fitted into a top of a carrying cupboard over an oven, ensure that it is correctly
ventilated by meeting requirements described in Fig. 9,
• Connect the hob to the gas and power supply systems in accordance with the ceramic hob installation
manual,
• Clean the hob from dust, put it into the opening and press against the top (Fig. 10),
• Put in the hob assembly grips (Fig. 11) in the body of the ceramic hob and slightly tighten,
• Once the hob is fitted into the top, verify its operation,
• The position of the hob should ensure easy access to the control panel
• Ventilation holes (fresh air inlets) can be located, depending on the installation circumstances, at the side, on
the front, on the back or on the bottom of the cupboard the appliance is fitted in.
Fig. 5