5
1.4 Instrument Configuration
• Remove the instrument from case.
• Press and hold FUNC button while re-inserting instrument into case.
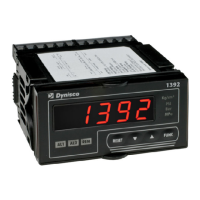
• Continue to hold FUNC button.The display will show 1392, then the Software Version, then
after 2 seconds, the display will show COnF.
• Press the FUNC button once. The display will show iP J
• Use the UP/DOWN arrows to select the appropriate input type (eg. 4-20mA, 0-10Vdc, etc).
• Note: If 0-20mA or 4-20mA is selected, be sure to install the supplied 2.49 ohm resistor
across the V+ and V- terminals.
• Press the FUNC button to store the Input type setting and advance to the next parameter.
• Using the UP/DOWN arrows set the appropriate display units.
• Press FUNC to store the Display Units setting and advance to the next parameter.
• Using the UP/DOWN arrows set the appropriate Decimal Point position.
• Press FUNC to store the Decimal Point setting and advance to the next parameter.
• Display will alternate between F.S.U. and 10000, use the UP/DOWN arrows to set the
appropriate Full Scale Units as specified on the Sensor.
• Press FUNC to store the FSU setting and advance to the next parameter.
• If further settings need to be modified, refer to Chapter 7 for a full description.
• Hold the FUNC button until display returns to Normal Operation.
• To set Alarm 1 and 2 thresholds, press the FUNC button until 1.Har is displayed.
• Modify the Alarm 1 threshold by using the UP/DOWN arrows until desired value is reached
then press FUNC to store and proceed to Alarm 2 threshold.
• Repeat for Alarm 2 threshold and press FUNC to store when done.
• Secure the instrument in the case by pushing firmly in the bezel until it clicks into the
retaining tabs.
• The Indicator is now ready for use.