44
desired value from -10000 to the
CO.HI
value. (if no
CO.HI
value has been set, you may need to
return to this step. When finished, press the FUNC key to lock in the value. The lower display will
show
CO.HI
, and the upper display will show the default value (100.0). Using the ▼ or ▲ keys,
select the desired value from 0 to 10000 for the
CO.HI
value. When finished, press the FUNC key
to lock in the value. The lower display will show
CO.DP
, for the decimal point position, and the
upper display will show the default value (100.0). Using the ▼ or ▲ keys, select the desired decimal
point position. When finished, press the FUNC key to lock in the value, and A/M to return to the
main screen.
6.5 SETTING THE SECURITY CODES
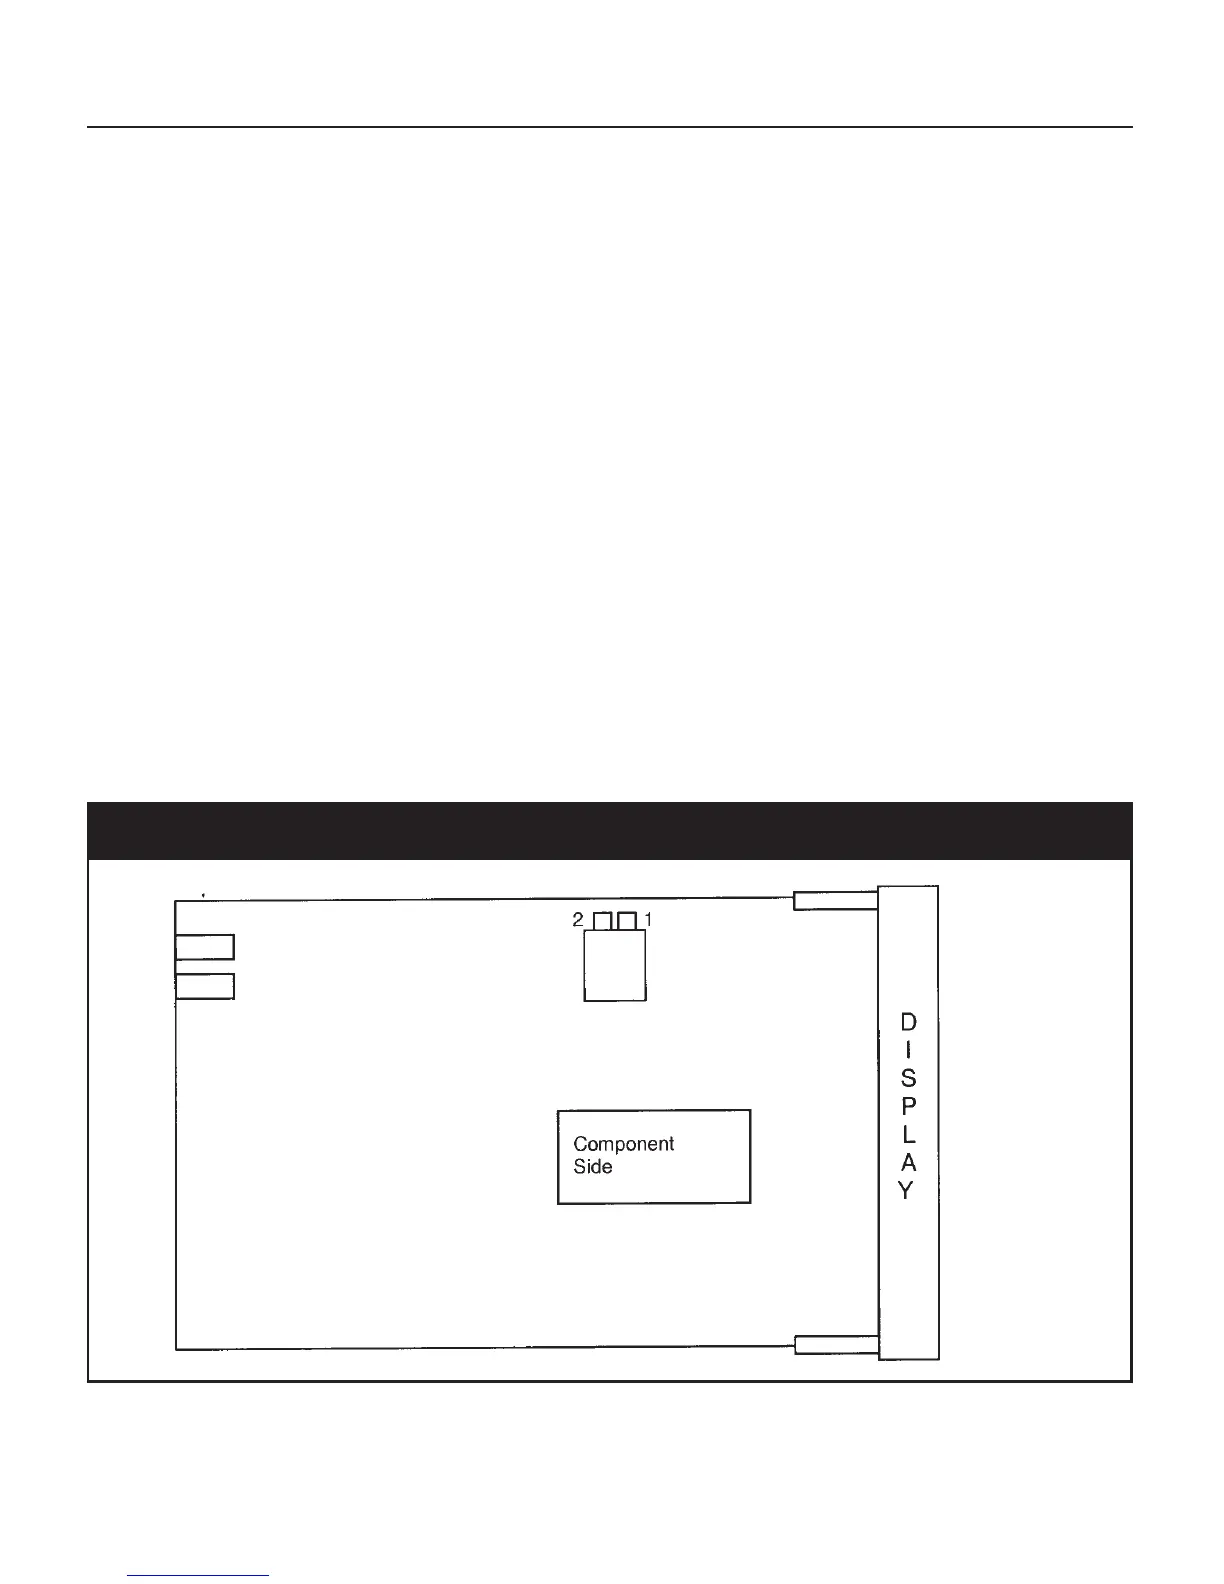
The security code setting is accessible by setting an internal dip switch (see Figure 12 below). There
are three Security levels. When each level has been assigned a code access to the parameters will be
available as follows:
• Level A: Allows access to parameters in Group 1 Only
• Level B: Allows access to parameters in Groups 1 and 2 Only
• Level C: Allows access to parameters to all Groups 1 - 5
To enter the security mode, remove the instrument form its case and reconfigure the internal dip-
switch settings to the Security Mode by placing SW1 and SW2 in the ON position.
Fig. 12 CPU Board DIP Switch Locations
When the instrument is re-inserted into its case, the upper display will show
CodE
and the lower
display will show
ATC
.