3. Hold the legs of the front fork with your fingers, and use your palm to press on the quick release lever to lock
into place. The CLOSE mark should face outwards, and the lever should be ahead of the legs or parallel to them
(as indicated below).fork leg, as show in the diagram below.
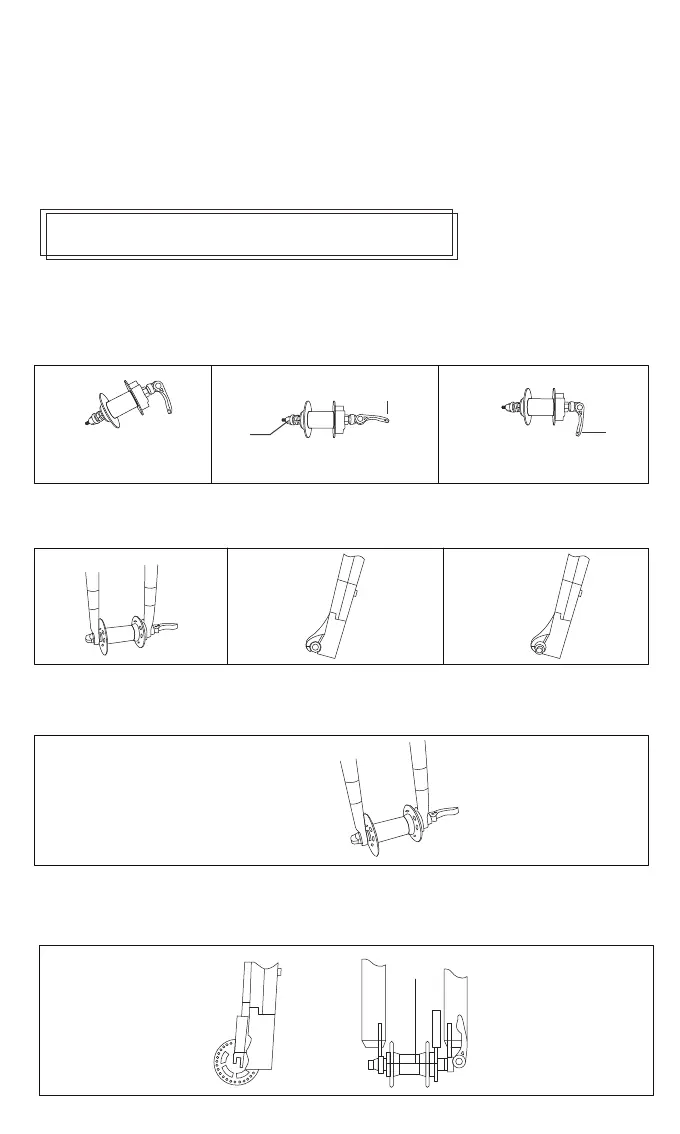
INSTALLING THE FRONT WHEEL
I. Basic mechanical principle with the quick release lever
Turn the adjusting nut clockwise to increase clamping, and counter-clockwise to decrease.
For the quick release lever to be in the CLOSE position, turn the adjusting nut clockwise. As the nut screws
inwards, the wheel is clamped onto the frame and locked into the correct position.
II. How to install
1.Open the quick release lever, and insert the front wheel all the way into the dropouts of the front fork.
2. TWith your left hand, turn the adjusting nut clockwise to fasten up, and with your right hand, close the quick
lease lever. Continue to turn the adjusting nut till the lever runs parallel to the hub (as indicated below) and
resistance from the lever is felt.
1. Insert the pedal marked “R” into the crank. Hold the pedal with your hand, and turn it clockwise for a few
rounds. Then clamp the pedal shaft with the spanner in the package, and turn it clockwise until fastened. Find the
L pedal and repeat the above steps (but rotate counterclockwise).
2. If you feel resistance when turning the pedal shaft, immediately remove the pedal to avoid possible damage.
Attach the pedal again and make sure the pedal shaft is perpendicular to the threaded hole on the crank. Proceed
with the rest of the steps.
Screw in the right pedal clockwise, and the left counter-clockwise.
Stronger
Adjusting
Nut
Weaker
Quick
Release
Lever
Adjusting
Nut
OPEN Position
Adjusting
Nut
CLOSE
Position
Correct Wrong
1/8 of a circle
for each turn of
the adjusting nut