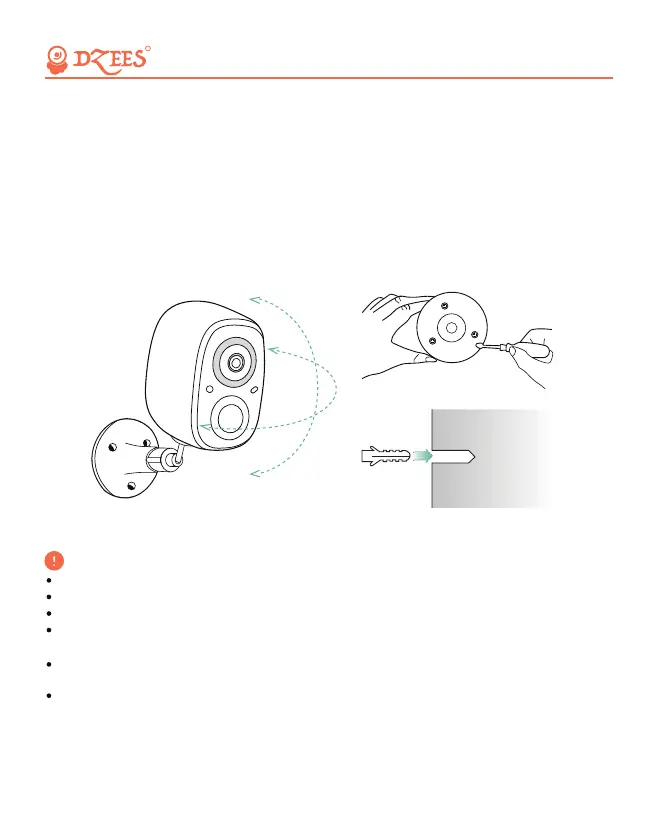
(2) Install bracket
Step 1: Choose a dean, smooth and dry surface.
Step 2: Stick screw the bracket on. For wooden wall, it’s recommended to
screw the bracket on. For cement or ceramic tile wall, it’s recommended
to drill holes in the wall and fasten with provided explosion screws.
Step 3: Adjust the camera to a proper angle.
Tips: To avoid falling down, it is recommended you fasten the bracket
with screws.
All about Your Smart Security
R
To reduce false alerts, please note that:
Do not install the camera in a position facing strong lights/mirror/window/swimming pool.
Do not place the camera too close to any angle with busy traffic.
Recommended distance between the camera and motion objects is within 8M (25ft)
Stay away from the outlets, including air conditioner vents, humidifier outlets, the heat
transfer vents of the projectors, etc.
Keep the camera at least 1 meter away from any wireless devices to avoid interference,
such as microwave stove or Wi-Fi routers and etc.
If there is any motion detection delay or false alerts, please contact 24/7 after-sales service
via Support@Dzees.net
09