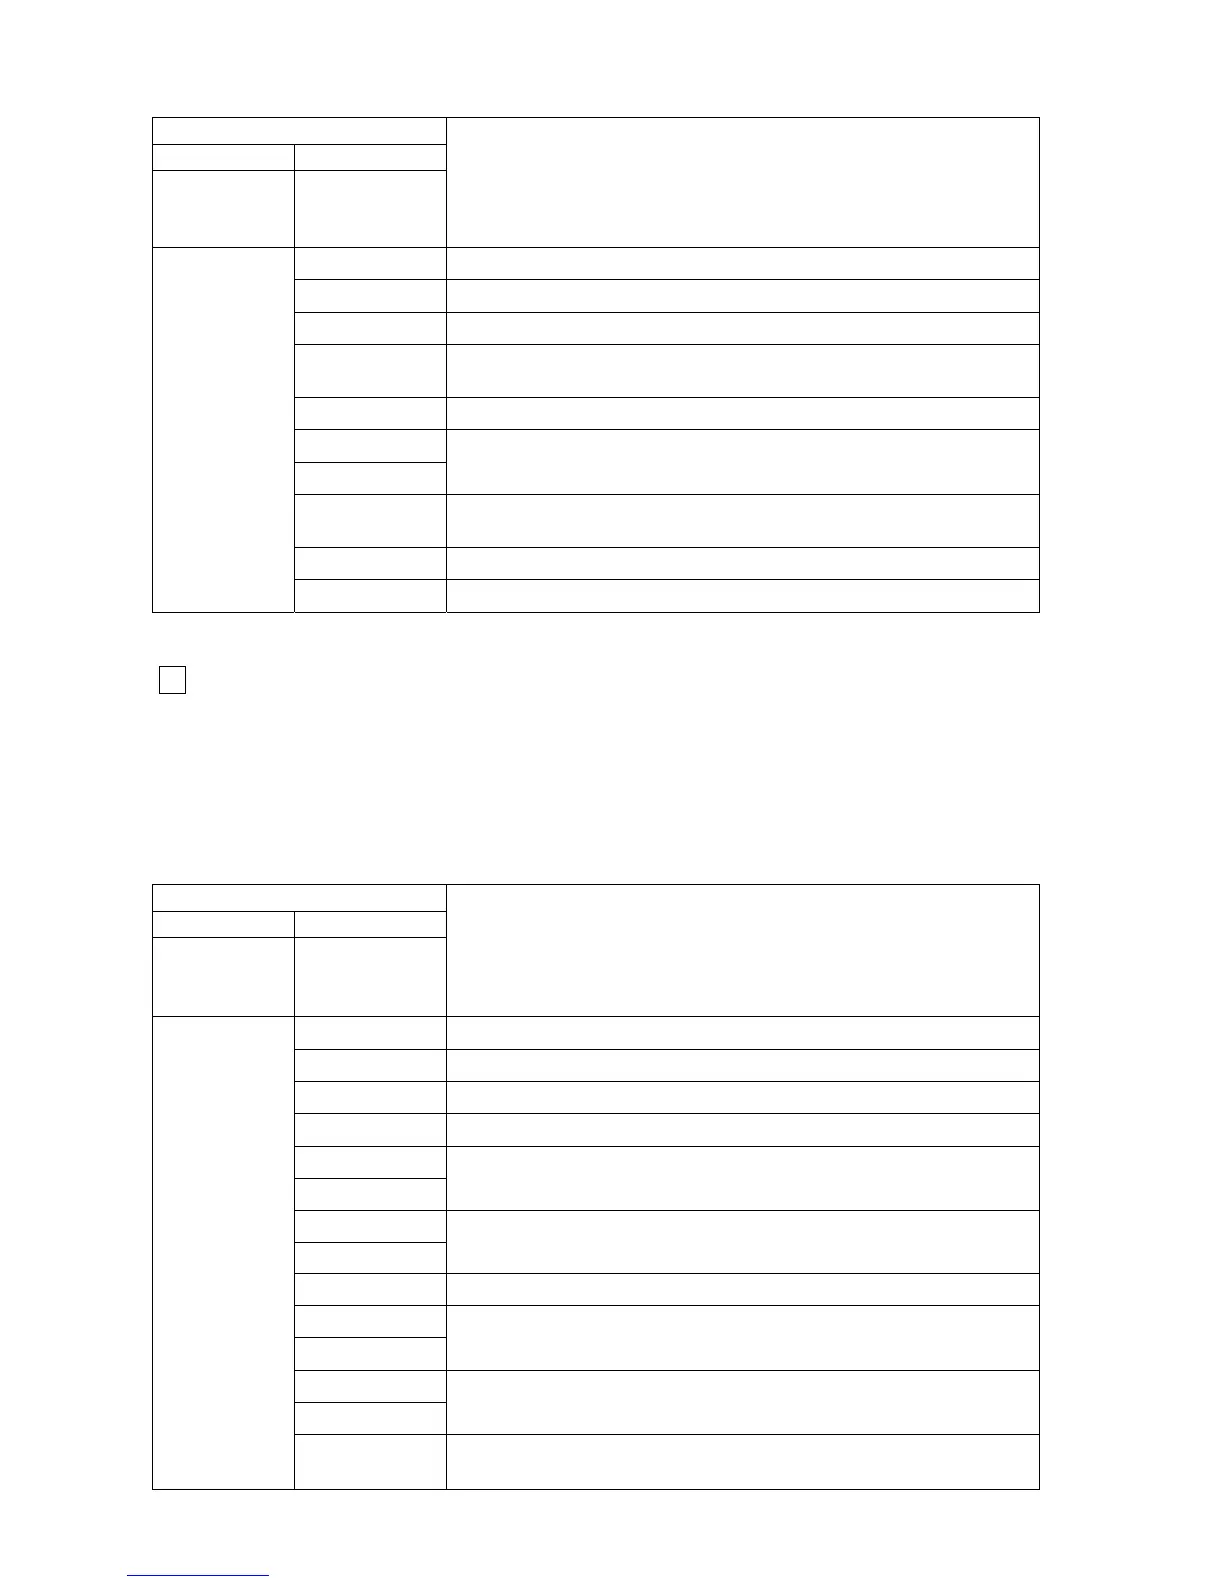
Table 22
7 segment display
1st 2nd
after pressing
PB3 twice
after pressing
PB2
progressively
Description
88
1
st
press: Flame current
88
2
nd
press: Modulation level
88
3
rd
press: DHW flow frequency
88
4
th
press: Flue temperature
(for room sealed type, it's fixed as 25)
88
5
th
press: TTB calculated value
P1
P2
6
th
press: Pump control mode
88
7
th
press: Room temperature
(if a open therm thermostat connected)
88
8
th
press: Software version number for main board (CVBC)
L 2
88
9
th
press: Software version number for user interface (DSP)
- After the 10
th
press PB2, the display goes back to “ L 2 ”.
Level 3 (setting mode)
3
- Press PB3 service push-button 3 times, and see “ L 3 ” on the 7 segment display.
- Press PB2 user push-button progressively to reach some parameters detailed in Table 23.
- The parameters are set by means of the CH potentiometer (P1). The parameters can be increased
by turning the CH potentiometer clockwise or decreased by turning the CH potentiometer counter-
clockwise. The 7 segment display shows the set value during adjustment.
Table 23
35
7 segment display
1st 2nd
after pressing
PB3
3 times
after pressing
PB2
progressively
Description
88
1
st
press: CH minimum power set point
88
2
nd
press: CH maximum power set point
88
3
rd
press: Ignition power set point
88
4
th
press: Anti-cycling time set point
F1
F2
5
th
press: DHW ON-OFF flow rate set point
d 1
d 2
6
th
press: DHW delay time set point
88
7
th
press: OTC curve foot point
O1
O2
8
th
press: Outside temperature limiting set point
P1
P2
9
th
press: Pump control mode selection
L 3
88
10
th
press: Modulation start point ∆T (F/R), if return sensor
existing