10. Adjust the flight controls and transmitter as needed.
11. Perform a radio system range test.
12. Find a safe open area to fly.
13. Plan flight for flying field conditions.
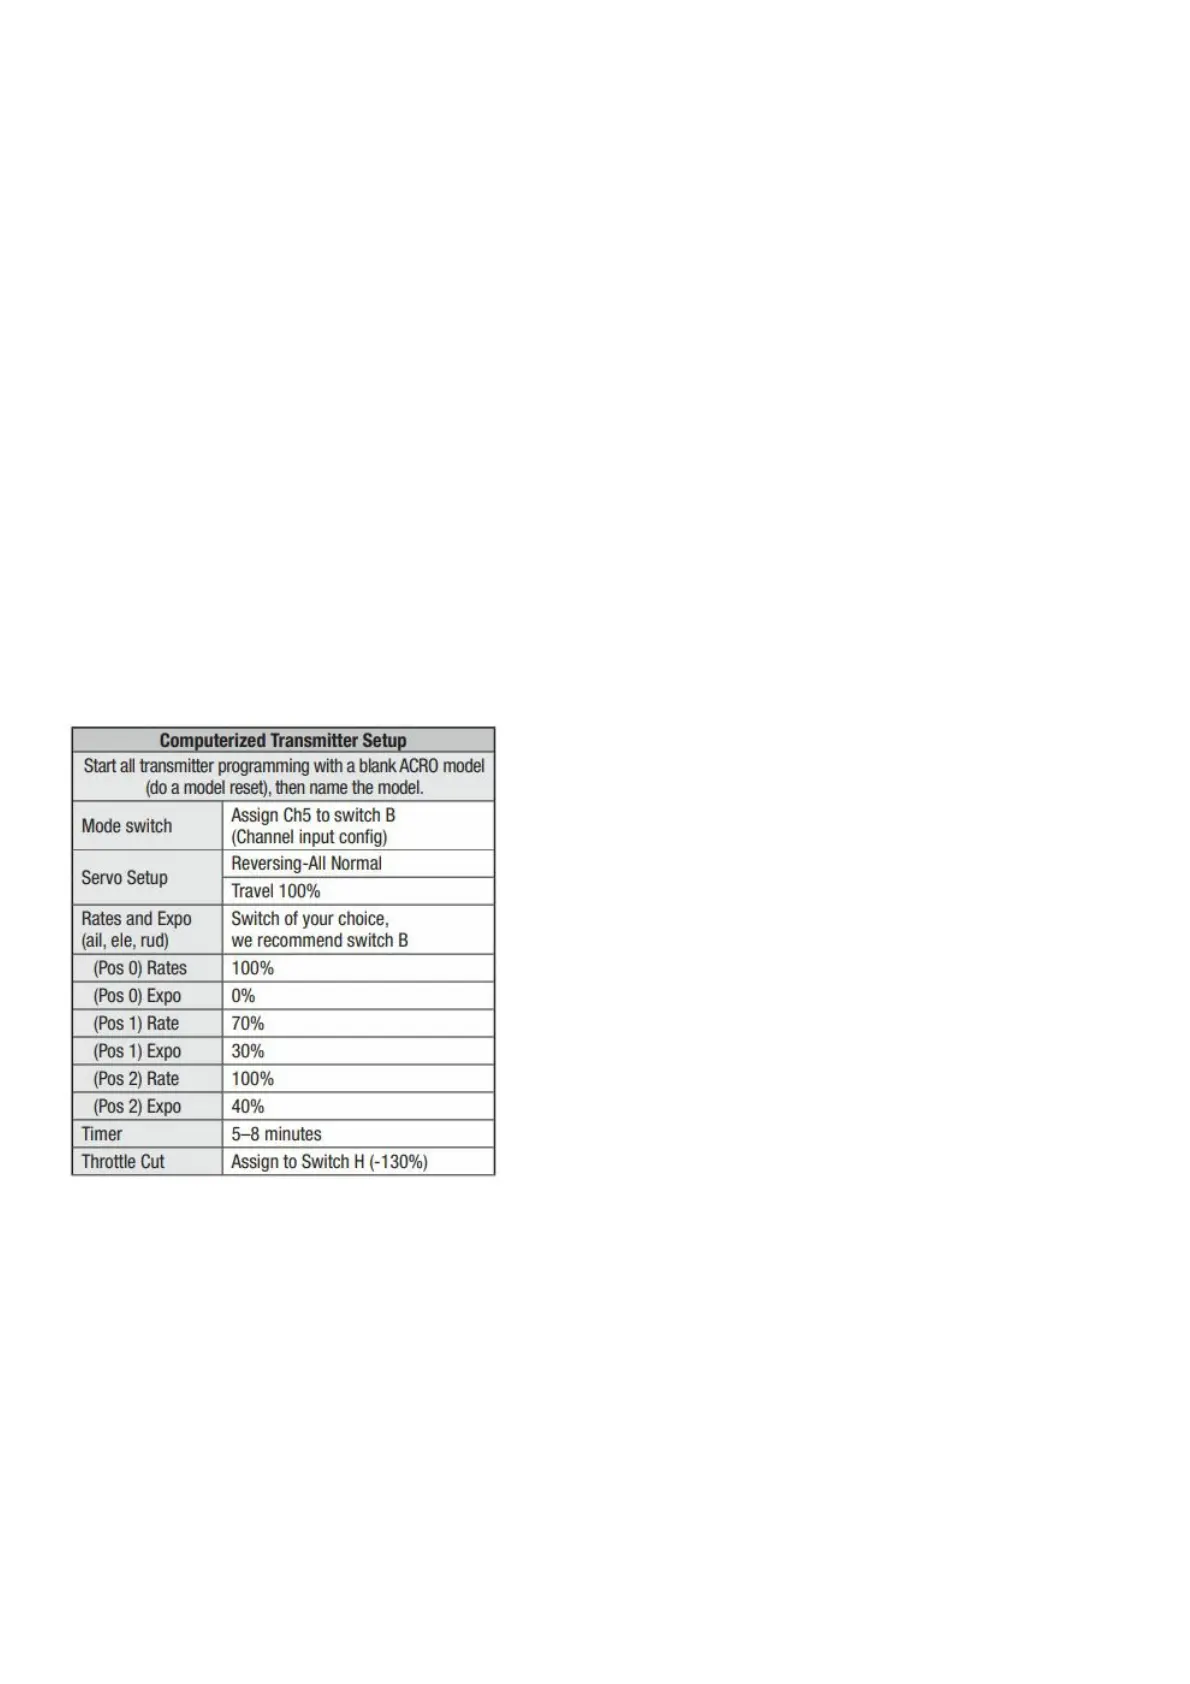
Transmitter Setup
IMPORTANT: After you set up your model, always rebind the transmitter and receiver to set the desired failsafe
positions. If your transmitter allows it, enable the throttle cut feature. Always engage throttle cut before approaching
the aircraft.
IMPORTANT: The Ultrix DOES NOT need elevon mixing. The elevon mixing is handled in the receiver.
Dual Rates
Flight modes and dual rates/expo should be on the same switch. A low rate is recommended for the initial flights.
NOTICE: To ensure AS3X® technology functions properly
do not lower rate values below 50%.
Expo
After your initial flights, you may adjust the expo value to better suit your flying style.
Control For Optional Lights
The optional LEDs are controlled from channel 6. In the channel input menu, set channel 6 (Aux1) to a momentary
switch (I). In the Servo Setup menu, reverse channel 6 (Aux1). The LEDs will change to the next light pattern each
time channel 6 is cycled.
With both Ch 5 and Rates/Expo assigned to the same switch, there are three flight modes.
(Pos 0) SAFE
(Pos 1) AS3X low rate
(Pos 2) AS3X high rate
Install the Vertical Stabilizers
Press the vertical stabilizers into position.