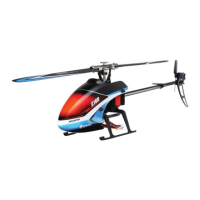
The Eachine E130 is a 4-channel single-rotor flybarless helicopter designed for both beginners and experienced pilots. It incorporates a 6-axis electronic gyroscope to ensure stable flight, making it easier to control. The helicopter utilizes a 2.4GHz communication protocol for reliable connectivity with its remote controller.
Function Description:
The E130 is a sophisticated hobby product that offers excellent flight performance. Its flybarless design reduces resistance on the rotor head, and its aerodynamic blades provide strong power and stability. The helicopter supports both 3D and 6G flight modes. The 3D mode allows for a variety of stunts, catering to more experienced users, while the 6G mode is specifically designed for beginners, offering enhanced stability and ease of control. This dual-mode capability makes the E130 versatile and enjoyable for a wide range of skill levels.
The remote controller features a rudder switch, one-key take-off, throttle joysticks, a hover mode button, and trim buttons for elevator, aileron, and direction. It also includes an LED display and a power switch. The controller can be switched between Mode 1 and Mode 2 for different throttle configurations (right-hand throttle or left-hand throttle, respectively), accommodating individual pilot preferences.
Usage Features:
Before operating the E130, users are advised to read the entire manual to familiarize themselves with its features and safety precautions. It is crucial to ensure that both the helicopter and the transmitter batteries are fully charged. The throttle stick on the transmitter should be at the bottom position, and the TH.HOLD and 3D mode switches should be in the back (OFF) position before powering on the transmitter.
Pairing the Transmitter with the Receiver:
The device comes pre-paired from the factory. If re-pairing is necessary, the process involves:
- Turning on the remote control with the throttle joystick at the bottom and the 3D/IDLE switch in the OFF position.
- Removing the canopy to access the code switch.
- Charging the helicopter; the red lamp will flash slowly. Press the code button for 1 second until the red lamp goes out, indicating it's ready for pairing.
- Successful pairing is confirmed when both red and blue lights turn solid.
It is important to avoid interference from other remote controllers of the same type during pairing. The product is compatible with all FUTABA 2.4GHZ S-FHSS remote controllers. The transmitter will beep if the throttle is not at the lowest position or if the throttle hold/3D switches are in the ON state during power-up, prompting the user to correct these positions.
Initial Flight:
For initial flights, it is recommended to familiarize oneself with the controls. The manual provides illustrations for throttle (ascend/descend), rudder (left/right rotation), elevator (forward/backward), and aileron (left/right sideward) movements. To start the motors, move the jog sticker corner as shown in the picture. After landing, keep the throttle rocker in the lowest position for 2-3 seconds until the motor stops completely.
Aircraft Horizontal Calibration:
If the aircraft exhibits obvious orbit deviation, horizontal calibration can be performed. This involves simultaneously hitting the left and right joysticks to the bottom-left corner for 1-2 seconds. The aircraft indicator light will flash quickly, entering calibration mode. Calibration is complete when the indicator lights return to a solid state. This procedure should be performed on a flat surface, ensuring the aircraft remains still until calibration is finished.
Hover Setting:
The helicopter is factory-set for hover. If it does not hover well, users can adjust it by:
- Powering up the plane, matching the frequency, and taking off.
- During flight, long-pressing the hover setting button to enter the setting (indicated by a dripping sound and flashing indicator light on the remote control).
- Pushing the Trim Button of the corresponding channel in the opposite direction of the aircraft's yaw until it hovers smoothly.
- Landing the aircraft and pressing the hover setting button again to exit the setting (indicated by drops from the remote control and a solid indicator light).
- Restarting the plane and remote control, then re-matching for flight.
Maintenance Features:
Battery Charging:
The helicopter's 7.4V 700mAh 20C battery should be charged using the included standard charger. The charger can be connected to a power adapter with a USB port or directly to a computer's USB port. When the USB cable is connected to the power adapter, the USB charger's red light will flash. Connecting the battery's partial voltage charging head to the USB cable will cause the red light to stay on, indicating charging is in progress. Charging is complete when the red light turns off. It is recommended to use a 2A current adapter for faster charging.
Safety Precautions for Battery Usage:
- Always charge under supervision, especially for children who should be assisted by an adult.
- Use only the original standard charger to prevent fire or explosion.
- Charge batteries away from flammable materials and never leave them unattended.
- Do not charge damaged or altered batteries.
- Avoid touching or using hot batteries.
- If the battery voltage drops below 7.4V, it may be damaged or unable to charge. If the aircraft's power significantly drops during flight, land immediately and charge the battery.
Troubleshooting:
The manual provides a comprehensive troubleshooting guide for common issues:
- LED on receiver flashes constantly with no response: This indicates the transmitter is not bound to the receiver or pairing failed. The solution is to re-pair the transmitter and receiver.
- Helicopter has no response after connecting batteries: Check power connections for both transmitter and receiver, verify battery voltages, and ensure good contact with battery pole flakes.
- Rotor does not rotate when throttle pole is pushed: This could be due to low battery voltage or poor battery connection. Replace/charge batteries and reconnect them.
- Helicopter takes off immediately upon battery connection: This happens if the throttle was not at the lowest position before turning on the transmitter. Ensure the throttle pole is at its lowest position.
- Propeller rotates constantly but helicopter cannot take off: This may be due to low charge in aircraft batteries or a loose main gear. Replace/charge batteries and press the spindle with the gear tightly.
- Helicopter vibrates or shakes in flight: Possible causes include damaged rotor blades, overly tight lateral axis blade grips, or non-smooth main rotor movement. Solutions involve changing main rotor blades, loosening blade grips, or adjusting the lateral axis.
- Main rotor blades shaking in flying: This could be due to a bent lateral axis, loose lateral axis screw, debris in the servo, loose swashplates, or deformed/damaged tail rotor blades. Solutions include replacing the lateral axis, tightening screws, cleaning the servo, compressing swashplates, or changing tail rotor blades.
- Sound of main rotor becomes smaller: Indicates low battery voltage. Charge or replace with a fully charged battery.
- Helicopter has no reaction or cannot fly smoothly: Failure of binding. Rebind the helicopter and transmitter, ensuring the helicopter is static and level next to the transmitter.
- 3D/6G model helicopter appears to yaw: Swashplate servos not returning to mid-position or damage. Adjust the length of the adjustment rod or replace the servo.
- Helicopter yaws in 6G mode: Helicopters hover needs reconfiguration. Refer to the 6G mode setting.
- Helicopter took off spinning to the left: Tail motor power shortage, loose blades, or tail motor damage. Check tail rotor blades and motor shaft, replace if loose or damaged.
- Helicopter power is turned supreme speed governor electric sound: Brushless speed governor fault or poor contact. Check connectors and replace the speed governor.
The manual also includes an exploded view of the helicopter and a detailed accessory list, which can be useful for identifying parts during maintenance or replacement. The receiver interface diagram helps in understanding the connections for the main motor, tail motor, aileron driver, and elevator.