EasyManua.ls Logo

Eachine E180 User Manual

Eachine E180
10 pages
To Next Page IconTo Next Page
Page #1 background imageLoading...
Page #1 background image
Skip to content
Manuals+
User Manuals Simplified.
Eachine E180 Helicopter User Manual
Home » Eachine » Eachine E180 Helicopter User Manual
Eachine E180 Helicopter
This product is compatible with FUTABA 2.4GHz S-FHSS regulations.
Brushless motor, super power, compatible with 3-axis gyroscope and 6-axis gyroscope modes, 3-axis for ultra-stable flight and 6-axis for beginners.
Contents [ hide
1 ITEM LIST
2 ADDITIONAL SAFETY PRECAUTIONS AND
WARNINGS
3 INTRODUCTION
4 HELICOPTER PARAMETERS
5 WARNING AND THE GUIDE OF BATTERY USAGE
6 BATTERY CHARGING
7 NOTICE BEFORE FLIGHT
8 BIND WITH TRANSMITTER
9 THROTTLE CURVE AND PITCH CURVE
10 INITIAL FLIGHT
11 RECEIVER INTERFACE DIAGRAM
12 ABOUT THE TRANSMITTER
13 FLIGHT BATTERY INSTALLMENT
14 TROUBLESHOOTING
15 EXPLODED VIEW
16 ACCESSORY LIST
17 ACCESSORIES LIST
18 File Downloads
19 Related Manuals
ITEM LIST
Question and Answer IconNeed help?

Do you have a question about the Eachine E180 and is the answer not in the manual?

Eachine E180 Specifications

General IconGeneral
TypeHelicopter
MotorBrushless Motor
Battery11.1V 1000mAh LiPo
Charging TimeAbout 90 minutes
Remote Control2.4GHz
Features6-axis gyro, 3D and 6G mode

Summary

Item List

Notice

Warning

Additional Safety Precautions and Warnings

Introduction

Helicopter Parameters

Warning and the Guide of Battery Usage

Battery Charging

Warning

Specific safety precautions for charging the helicopter battery, emphasizing adult supervision and original chargers.

Notice Before Flight

Bind With Transmitter

Notice

Important notices regarding transmitter binding procedures, including throttle stick and switch positions.

Initial Flight

Receiver Interface Diagram

About the Transmitter

Flight Battery Installment

Debugging Pitch of Thread

Procedure for adjusting the helicopter's pitch after component replacement, emphasizing safety during setup.

Sensitivity Adjustment

Instructions on adjusting swashplate and tail lock sensitivity using a flat-blade screwdriver for optimal control.
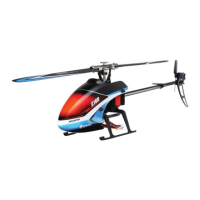
Troubleshooting

Exploded View

Accessory List

Notice for Beginners

File Downloads

Related Manuals

Related product manuals