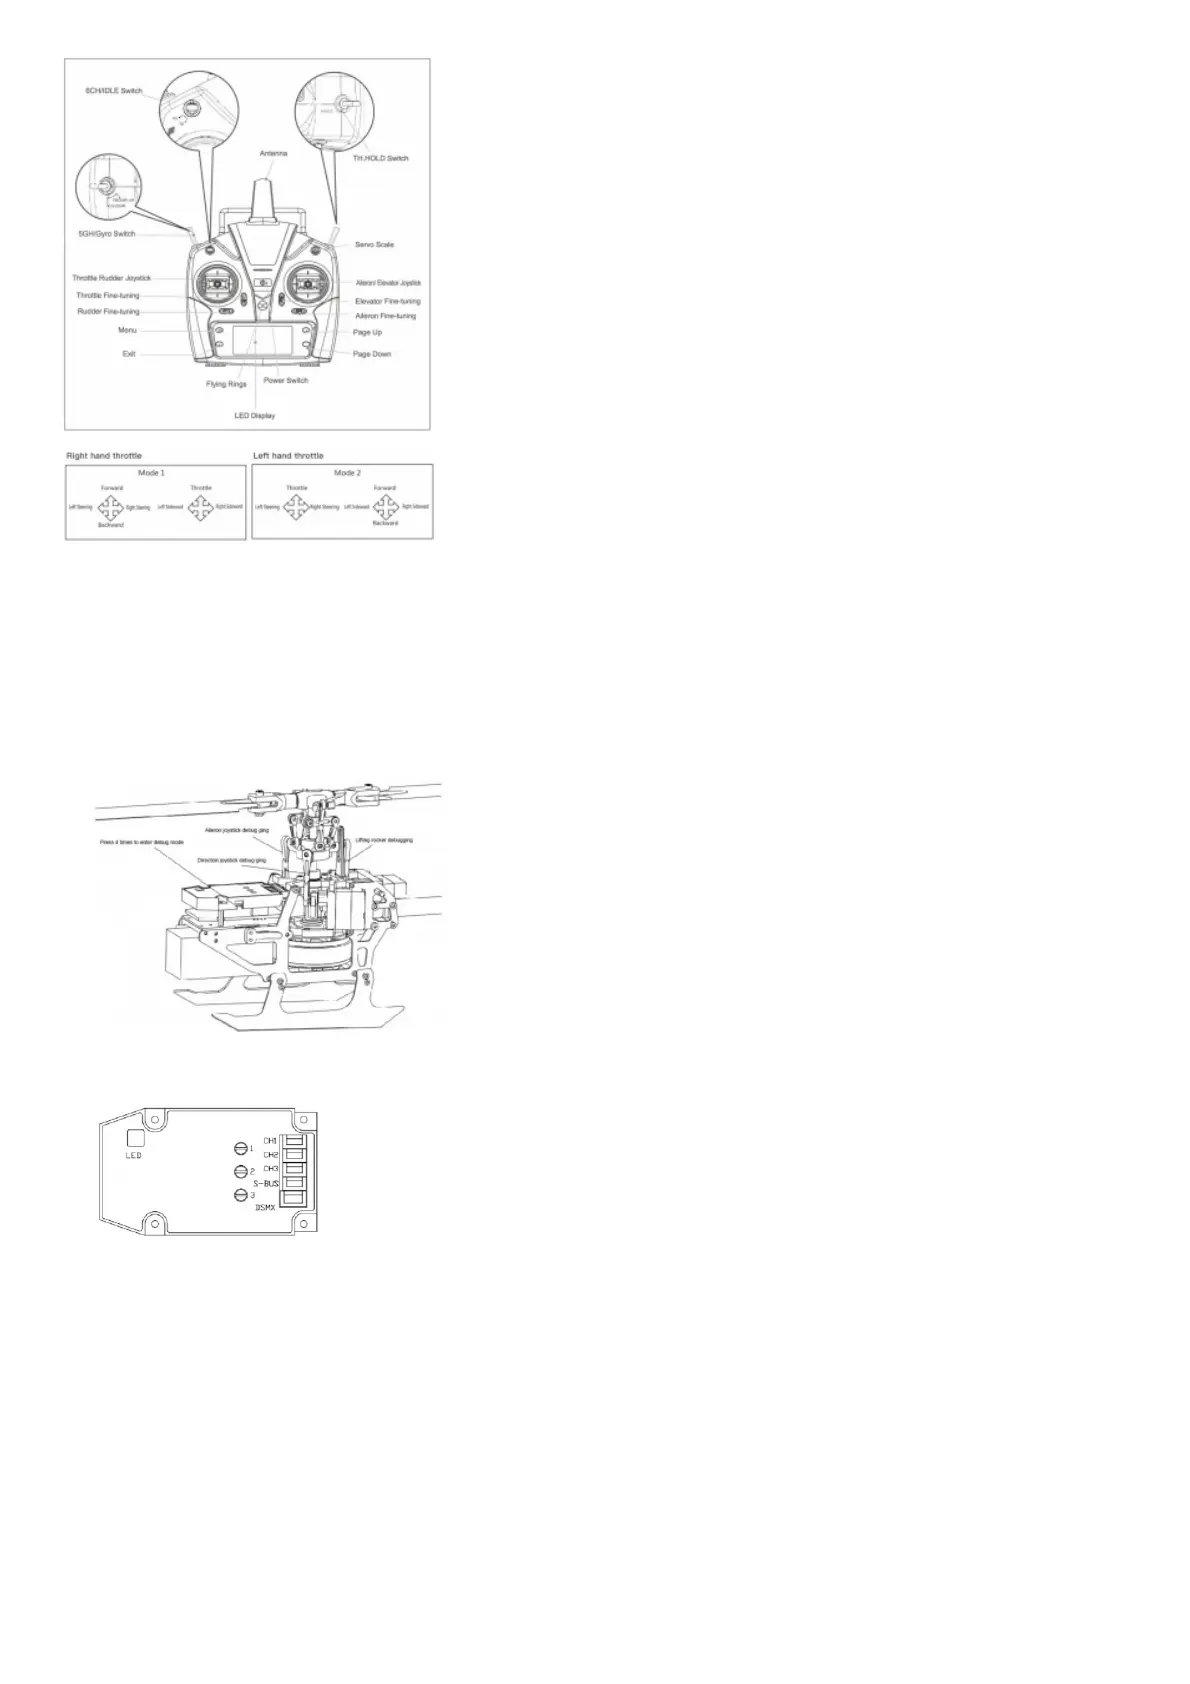
This transmitter supports CCPM 120 degree helicopter dedicated transmitter,
with 3D 6G switching high/ low rudder capacity for two joystick modes, flameout switch (TH.HOLD) and other modes, large screen LCD display multi-function transmitter.
FLIGHT BATTERY INSTALLMENT
1. Debugging pitch of thread
Explanation: The product has passed the inspection before leaving the factory, the user needs to re-adjust the pitch of thread after replacing the steering gear or related accessories.
To ensure safety, disconnect the main motor power cord during commissioning to avoid personal injury caused by motor rotation during commissioning.
The user comes with a special pitch of thread ruler for helicopters that can be adjusted more accurately.
First, bind the aircraft to the code, and the transmitter in 6G self stabilization mode.
Press the code matching key on the flight control board 4 times, the mainboard will flash red quickly and enter the debugging mode.
Use the transmitter to control the aileron rocker, lift rocker, and direction rocker for debugging until the swashplate is balanced and the blades are at O pitch of thread After the
debugging is completed, press the motherboard link key to exit the debugging, the motherboard will resume the red light and the blue light will be on, then you can fly
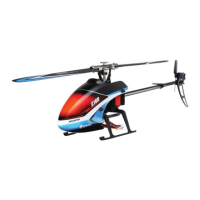
2. Sensitivity adjustment
Users can adjust different lock perception according to their own needs, use a flat-blade screwdriver to adjust, turn clockwise to increase the lock perception, and turn counterclockwise
to decrease the lock perception
1 Lock tail sensitivity 2 Swashplate perception 3 Swashplate sensitivity
TROUBLESHOOTING
Problem Cause Solution
1
LED on receiver flashes constantly with no
responses after connecting batteries to
transmitter.
Transmitter is not bound to receiver.
Pairing of the transmitter and receiver failed
.
Re-pair (Refer to P.5, Programming your
Transmitter)