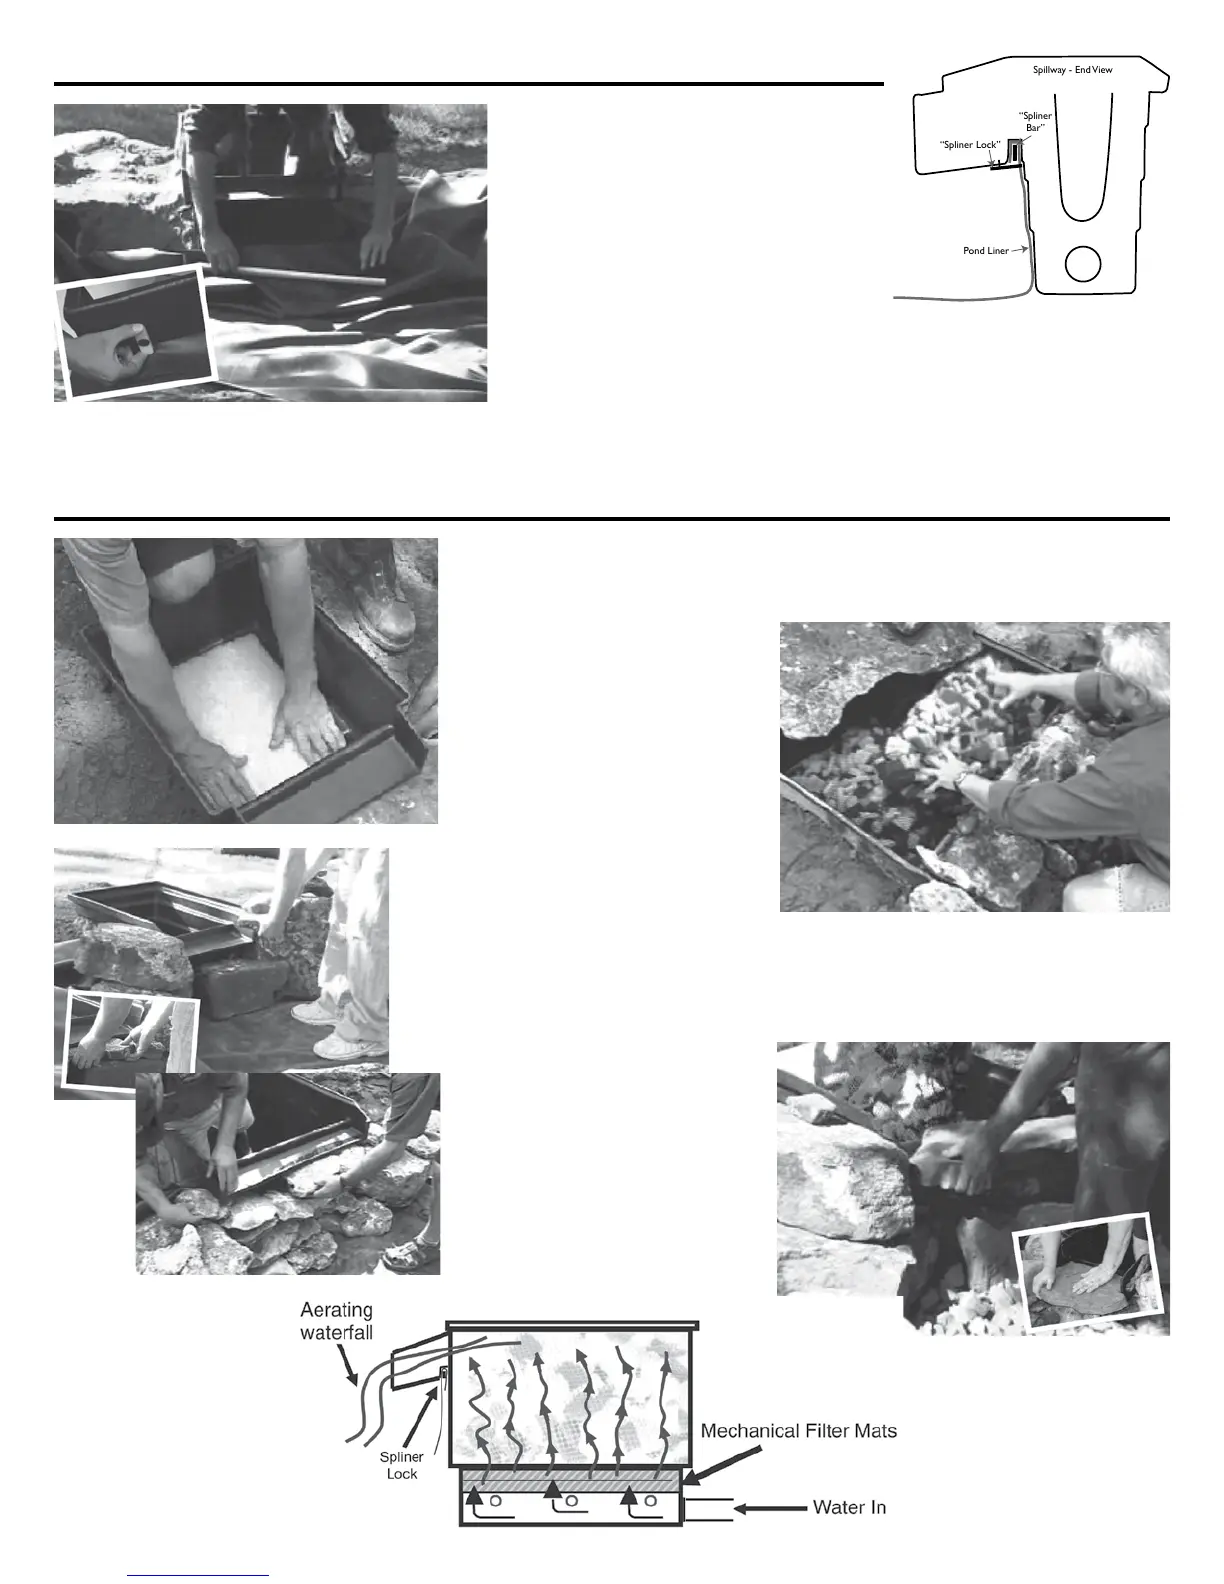
STEP THREE - INSTALLING THE UNDERLAYMENT AND LINER
Run the protective underlayment
in the pond and up the stream (if
one is installed). The underlayment
should overhang the stream bed
and be up to the bottom of the lter
box. Lay the liner in the pond over
the underlayment. Work as many
wrinkles out of the liner as pos-
sible. The liner should be run up the stream or to the lter box.
Folder the liner over the Spliner Lock. Slide the Spliner Bar into
the spline channel and secure with the Spliner Locks. Be sure
to leave plenty of extra liner going to the lter box. The liner should not be tight. Trim the excess liner
and underlayment later, after the installation is complete.
STEP FOUR - FINISHING UP
Lay the lter mats in the bottom of the lter box on top of the sup-
port tubes or support stands depending on model.
Place the supplied Bio-Blox
media bags on top of the lter
pads, making sure they are
snug into the corners. Cover
the top of the lter box with a
agstone or lter cover.
Stack stones up the front of the
falls lter to conceal the lter box
and liner. Additional stone can be added on top, just below the lip, to
extend the waterfall.
You may also want to put
a piece of agstone in
the mouth of the falls to
hide the weir and to make
a more natural looking
water feature.
“Spliner Lock”
“Spliner
Bar”
Pond Liner
Spillway - End View
 Loading...