Installation procedure
Removal
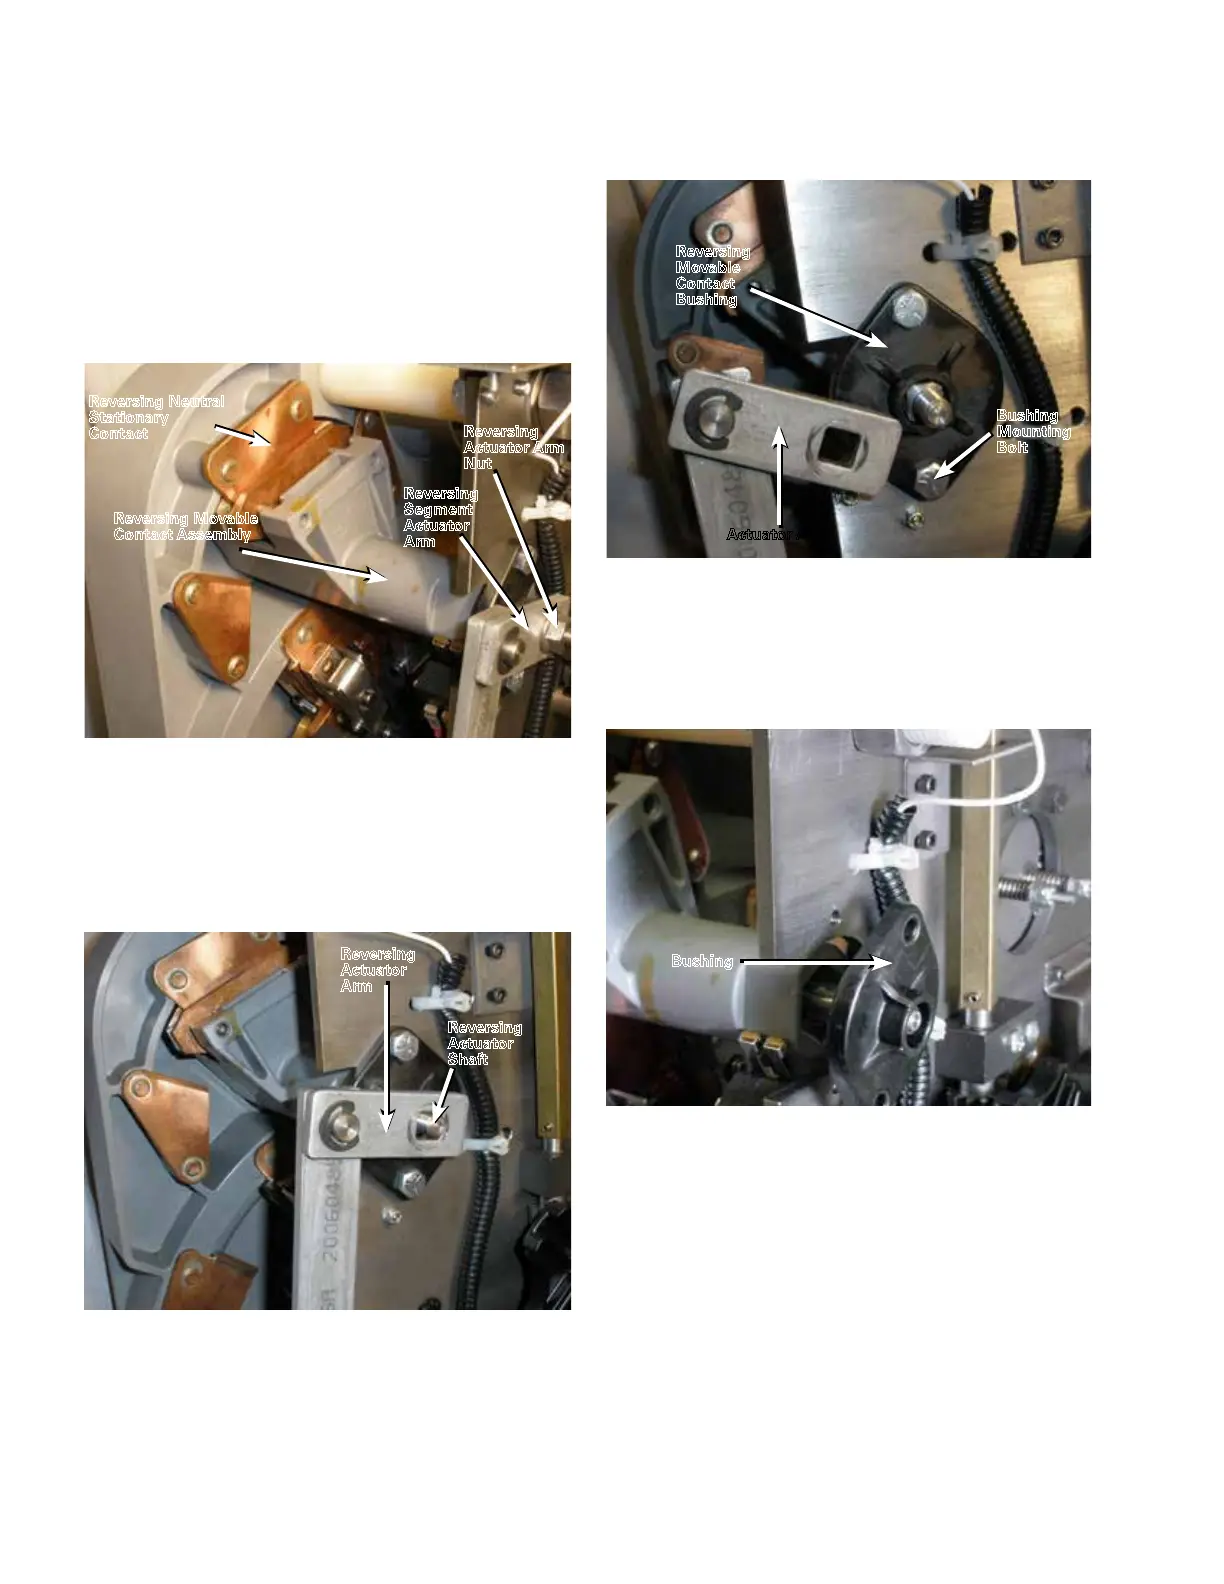
1. Hold the reversing movable contact assembly to
prevent the assembly from moving. Using a 9/16"
wrench loosen and remove the reversing actuator arm
nut. See Figure 29.
2. Lift outward on the reversing actuator arm and remove
it from the reversing movable contact bushing. The
reversing actuator shaft may be tapped in to allow
clearance to remove the arm. See Figures 30 and 31.
3. Using a 7/16" wrench, loosen and remove both bushing-
mounting bolts. See Figure 32.
4. Remove the bushing from the reversing movable
contact shaft. See Figure 32.
Figure 31. Bushing.
Figure 30. Removal of actuator arm.
Reversing
Actuator
Arm
Actuator Arm
Reversing
Movable
Contact
Bushing
Figure 29. Actuator arm and hardware.
Reversing Movable
Contact Assembly
Reversing
Segment
Actuator
Arm
Reversing
Actuator Arm
Nut
Bushing
Mounting
Bolt
Reversing Neutral
Stationary
Contact
Figure 32. Removal of bushing.
Bushing
Reversing
Actuator
Shaft
16
QD5 QUIK-DRIVE TAP-CHANGER INSTALLATION AND MAINTENANCE INSTRUCTIONS MN225012EN March 2016
 Loading...


