only ppb levels of combustibles.
5.3 Calibration procedure
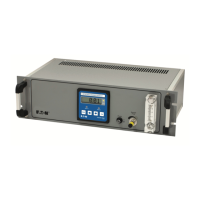
NOTE: see Figure 3
All calibration screens operate on the same principle :-
• The display shows the present reading. This may be changed by pressing
“Edit” and then using the “
” or “ ” arrows to adjust the value.
• “Edit” saves change.
• “Cal” cancels the change.
5.3.1 ‘High point’ calibration
Expose the process side of the cell to air at normal ambient pressure.
Press and hold the “Cal” button for about 8 seconds until the display changes to show “1L
xxxx”, where “xxxx” is the gas concentration measured by the instrument (if the button is
released before the display changes then the analyser will remain in normal measuring mode).
Cycle through the menu entries using the
“ ” or “ ” arrows until display shows “1H xxxx”
(pressing
“ ” at the bottom of the menu returns you to the top).
When the reading has stabilised, press the “Edit” button and use the
“ ” or “ ” arrows to
adjust the reading to the correct level, then press the “Edit” button to store the calibration
setting (or “Cal” to cancel).
To return the unit to measuring mode press and release the “Cal” button, otherwise the
“
” or “ ” arrows until the display changes to “L xxxx” to continue with setting the “Low”
calibration point.
5.3.2 ‘Low point’ calibration
Change the sample gas supply to the “Low” level concentration and establish a flow of the gas
through the analyser.
In measuring mode, Press and hold the “Cal” button for about 8 seconds until the display
changes to show “1L xxxx”.
In high point calibration, use the
“ ” and “ ” arrows until the display changes to “L xxxx”.
When the reading has stabilised, press the “Edit” button and use the
“ ” or “ ” arrows to
adjust the reading to the correct level, then press the “Edit” button to store the calibration
setting (or “Cal” to cancel).
With the calibration complete press and release the “Cal” button to return the unit to normal
measuring mode.
NOTE
Calibration limits are set in the software that prevents the user from adjusting the readings
too far away from where the sensor output would indicate. When these limits are reached
the displayed value will stop changing.
 Loading...

