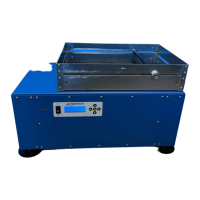
The Eberbach E6003.00 Shaker Power Unit is a benchtop reciprocating shaker designed for laboratory use, featuring variable speed control, a digital tachometer, and a programmable digital timer. It operates on 115-230V, 50/60 Hz power.
Function Description:
The shaker is designed to provide a continuously variable speed range for reciprocating motion, suitable for various laboratory applications requiring agitation. It allows users to set specific run times and speeds, and monitors the actual shaking speed in real-time.
Important Technical Specifications:
- Catalog Number: E6003.00
- Speed Range: Continuously variable, adjustable between 60 and 260 oscillations per minute (osc/min).
- Stroke Length: Fixed at 1.5 inches (38mm).
- Power Requirements: 115-230V, 50/60 Hz.
- Maximum Shaking Weight: 50 lbs.
- Timer: Programmable digital timer, capable of counting up to 999 hours.
- Tachometer: Digital, providing real-time speed readout.
Usage Features:
The unit features a front panel display with a Power Switch, Liquid Crystal Display (LCD), Directional Pad (D-Pad), Enter Button, and Cursor for intuitive operation.
Operation Modes:
- Run Mode:
- Starts at the lowest speed.
- Speed is controlled by the user using the D-PAD's up/down arrows.
- The LCD shows both the target speed (in parenthesis) and the actual tachometer readout.
- The timer counts up to 999 hours.
- Allows pausing and resuming the shaker and clock.
- Exiting returns to the main menu.
- Timed Run Mode:
- Features a countdown timer that automatically shuts off the shaker when time runs out.
- Users input run time in hours, minutes, and seconds (up to 999:59:59).
- Speed is set using the D-PAD.
- The shaker starts at the selected speed, and the timer counts down.
- Speed can be adjusted in real-time during the run.
- Allows pausing and resuming.
- Exiting returns to the Timed Run Setup Menu.
- Speed Run Mode:
- Allows programming a set run speed.
- The timer counts up to 999 hours.
- Users set the desired speed using the D-PAD.
- The shaker starts at the selected speed.
- Behaves similarly to Run Mode, but exiting returns to the Speed Run Setup Menu.
Important Notes for Usage:
- Always handle the unit with care and check contents against the packing list upon receipt.
- Do not install or use without reading the manual.
- Never touch the reciprocating portion of the shaker while it is running.
- The leftmost speed displayed on run menus (in parenthesis) is the target speed, while the rightmost is the actual tachometer reading. The actual speed should be within +/- 5 RPM of the target when calibrated correctly.
- Reciprocating shakers display OSC (oscillations) instead of RPM (revolutions per minute).
- Use the slowest speed necessary to achieve the desired shaking action.
- Refer to the loading capacity chart for recommended loading at various speeds.
- When using tiered platforms, place equal load on each, or heavier mass on the lower platform.
- If the shaker "walks," secure rubber suction cup feet to the floor.
- A minimum load is recommended for optimum operation and long trouble-free life.
Maintenance Features:
All maintenance can be performed by removing either the front or rear housing panel.
Tachometer Calibration:
- Hold down the Green Enter Button and power on the machine to access the utilities menu.
- Select "Tests Menu" and press Enter.
- Select "Calibration" and press Enter.
- Ensure the machine is empty and ready for maximum speed. Select "Yes" in the "CONFIRM MENU" and press Enter.
- The machine will run at maximum speed for one minute. The display will show the tachometer scaling ratio, DAC set point, target RPM (####), and tachometer reading (####). Compare this reading with a "Calibration Test Kit" for the true RPM.
- Use the up/down arrows to input the TRUE RPM reading in the "CORRECTION MENU." Select "Save" and press Enter. The Machine Tach Ratio will be adjusted to match the true RPM, aiming for +/- 5 RPM accuracy.
- Calibration is complete and should remain accurate until the next belt replacement.
Belt Inspection:
- Inspect belts at each oiling period.
- Replace if broken or if cords are exposed and frayed. Small outer fabric breaks are not harmful.
Belt Adjustment:
- The motor belt driving the 9" idler pulley may stretch.
- To adjust: Run the shaker at the slowest speed, turn off, and prop it up for bottom access. Remove the front panel.
- Loosen the four hex head cap screws holding the motor.
- Adjust the motor belt for proper tightness. Do not overtighten to avoid overloading bearings.
- A properly tightened belt should bow slightly when pressed lightly in the middle, equal to its width.
- Contact Eberbach Tech Support for instructions on replacing the belt between the idler assembly and crankshaft assembly.
Lubrication:
Use a good grade of SAE #30 oil.
Continuous Duty (100 hours or more) Lubrication Schedule:
- Crank Bearing: Oil through the hole in the center of the bearing bracket every 3 months.
- Rocker Arm Bearings (8 places): Oil at the top and bottom of each of the 4 rocker arms every 3 months. Place oil on the shaft next to the bearing.
- Connecting Rod Bearings: Oil at the upper end and at the crank end of the connecting rod every 3 months. Place oil on the shaft next to the bearing.
Intermittent Duty Lubrication Schedule:
- Crank Bearing: Oil through the hole in the center of the bearing bracket every 6 months.
- Rocker Arm Bearings (8 places): Oil at the top and bottom of each of the 4 rocker arms every 6 months. Place oil on the shaft next to the bearing.
- Connecting Rod Bearings: Oil at the upper end and at the crank end of the connecting rod every 6 months. Place oil on the shaft next to the bearing.
For any doubts or inquiries concerning operation or technical service, contact your supplier or Eberbach Corporation technical service at 1-800-422-2558.