Now go to the DDNS Status from step 1.9.7 and check if it says ‘succeed’. You should now be able to login to the camera
from remote access.
However, we showed you one example, there are many different kinds of routers, therefore it’s difficult to show fixed
steps for each router, but here are some other samples of different router’s port forwarding settings. Remember,
portforwarding.com is a very useful source of information.
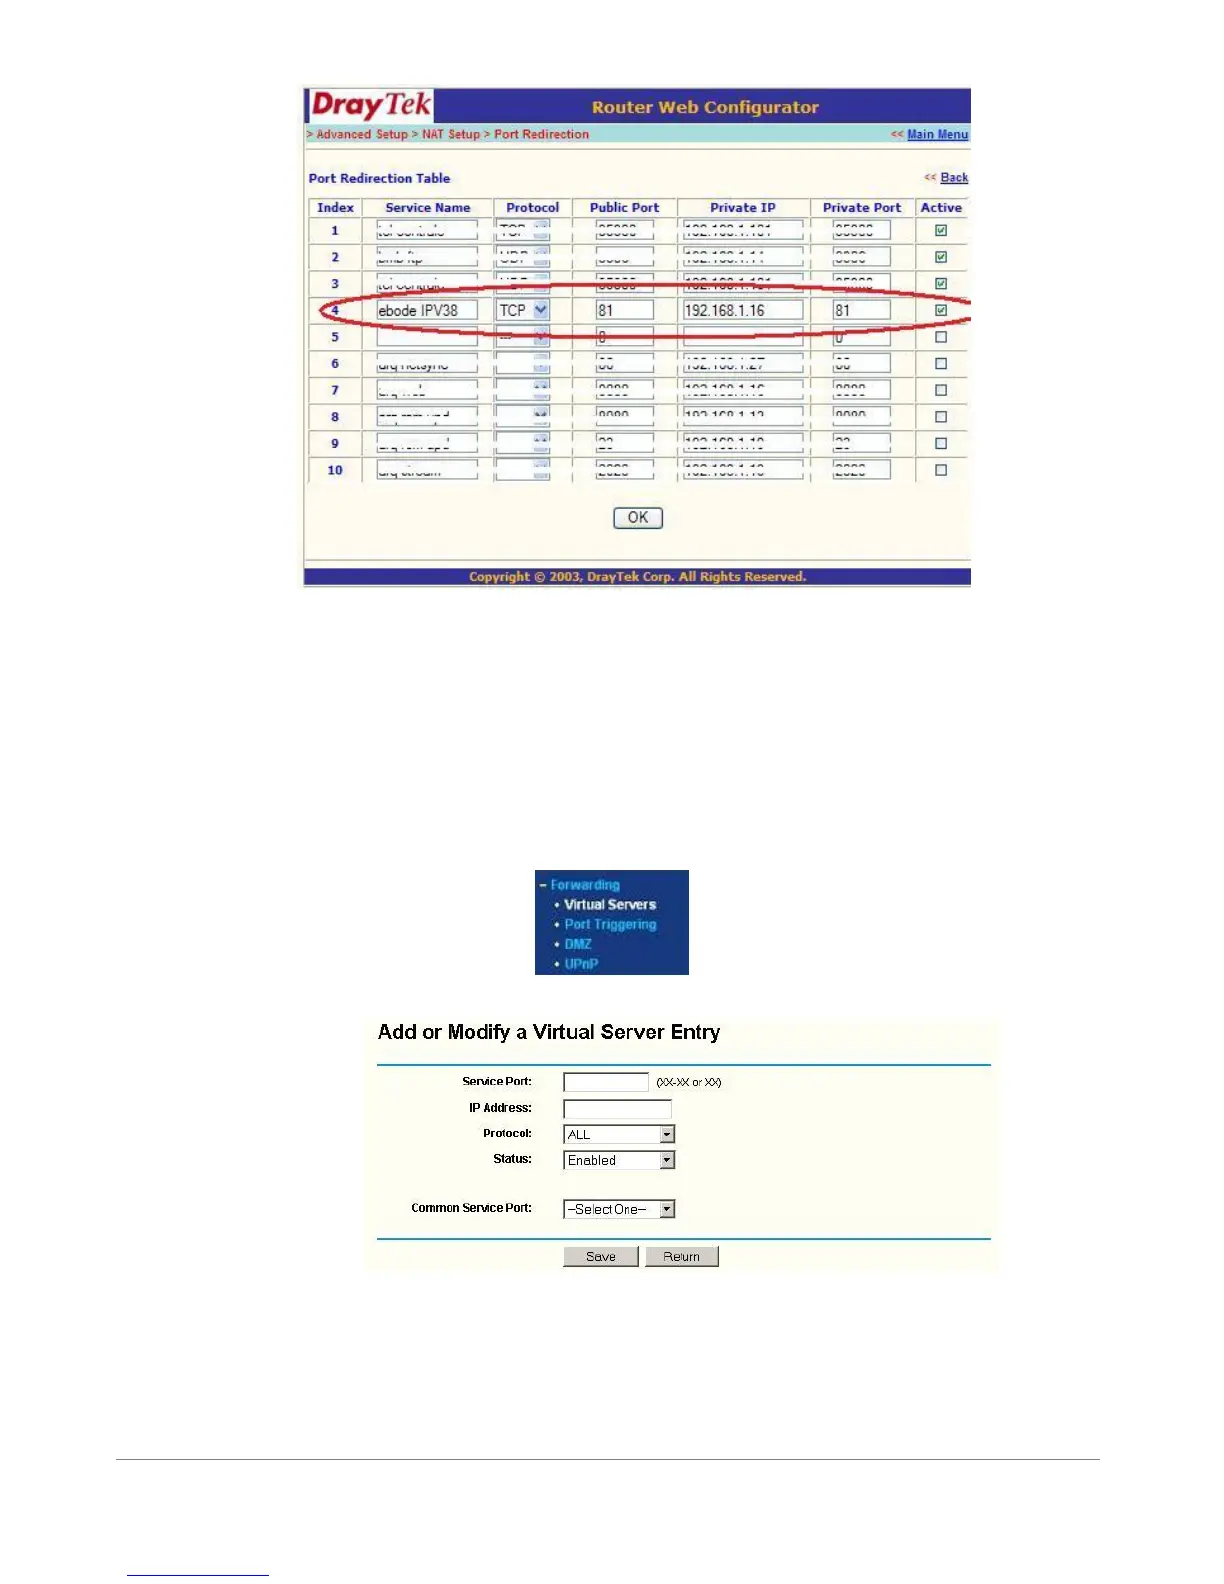
TP-LINK:
1. Login the router.
2. Choose “Forwarding”, select “Virtual Servers”
3. Click the Add New button, pop-up below:
Figure 7.5
Fill the service port (except 80), IP address of the camera, then click Save
NOTE: The port and IP address should be the same as the Camera.