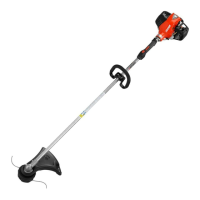
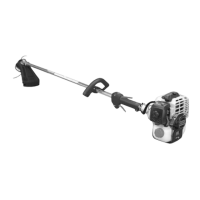
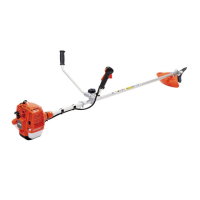
3
ASSEMBLING
(U-HANDLE
VERSION)
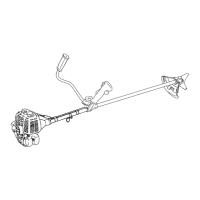
1. Right hand
grip
assembly
2. Slot
3. Right
hand U-handle
4. Grip assembling
bolt
lnsert right hand grip assembly
into right
hand U-handle
and fit il to the slot
lor rotation
prevention
of right hand U-
handle.
Fit grip assembling bolt and
secure
the grip firrnly.
1.
Handle
assembling
bracket
(upper)
2. Handle assembling
bolt (8
mm)
3. Bolt retainer
tube
4.
Lelt
handle
5.
Handle
assembling
bracket
{lower)
6. To
engine
Remove bolt retainer tube trom
end
of
handle assembling
bolt (8
mm).
lnstall handle
assembling bracket
(upper)
in handle
assembling bracket {lower)
and fix handle
by tightening
handle assembling
bolt
(8 mm) lightly.
ZUSAMMENBAU
(U-GRIFF
VERSION)
1.
Rechter Handgriff kpl.
2. Nut
3. U-Griff rechte
Seite
4.
Griffbefestigungsbolzen
Stecken Sie den rechten
Handgriff auf
das rechte Griffrohr.
Passen Sie den Handgriff in
die Nut ein,
urn einer
Rotation
des
Handgriffes
vorzubeugen.
Nehmen Sie den
Griff-Befestigungsbolzen
und
befestigen
Sie
den Grift
sorgfältig.
1.
Griffbefestigungsbacken
{oben)
2.
Griffhaltebolzen (8 mm)
3. Schutzkappe
4.
linkes Griffrohr
5.
Griffbefestigungsbacken
(unten)
6. zum
Motor
Entfernen Sie die
S,chutzkappe
vom Ende des
Griffhaltebolzen
(8 mm).··
Seizen
Sie den oberen
Griff-Befestigungsbacken
auf den
unteren und fixieren Sie
das linke
Griffrohr indem
Sie den
Haltebolzen
leicht anziehen.
ASSEMBLAGGIO
(VERSIONE
CON
IMPUGNATURA
AD
U)
1. Comando acceleratore
complete per
mano destra
2. Scanalatura
3.
lmpugnatura destra ad
U
4. Bullone fissaggio comando
acceleratore
lnserite il
comando acceleratore per
la mano destra
nell'impugnatura
destraad U ed
adattatelaallascanalatura
onde evitare la rotazione
dell'impugnatura
destra ad U.
Adattate la
vite
montaggio presa
e fissate bene la
presa.
SRM-3805
42
1. Supporto
(superiore)
impugnatura
2. Bullone
impugnatura
(8 mm)
3. Distanziale
bullone
4. lmpugnatura sinistra
5.
Supporto impugnatura
(inferiore)
6.
Al motore
Togliete il distanziale dall'estremitá
del
bullone
montaggio
impugnatura (8 mm).
Moniale il supporto
impugnatura
(superiore) nel
supporto
impugnatura
(inferiore) e fissate
l'impugnatura
sinistra
stringendo il bullone di
montaggio impugnatura
(8
mm),
ma non
troppo.
,,
(i
©
{)
1.
Right handle assembling
bolt
2. Right handle assembling
bracket
3. Right
hand U-handle
4. To engine
Loosen 4 right
handle
assembling balts
and insert right
hand U-handle
into
right handle assembling bracket.
(toward direction of
arrow<=:,)
Fix the right hand
U-handle
by tightening 4 right handle
assembling balts lightly.
1.
Halteschrauben
rechter
Handgriff
2.
Halterung
rechter Handgriff
3.
rechter Handgriff
4. zum
Motor
Lösen
Sie die 4
Halteschrauben
und stecken Sie
den
rechten
Handgriff in die Halterung.
(in Pfeilrichtung<=:,)
Fixieren Sie
den rechten Handgriff
indem Sie die
4
Halteschrauben
lèicht
an·ziehen.
1. Vite montaggio
impugnatura
destra
2.
Supporto
impugnatura destra
3.
lmpugnatura destra ad
U
4. Al motore
Svitate
Ie 4 viti montaggio
impugnatura destra e
inserite
l'impugnatura ad U nel supporto
impugnatura
destra
(in
direzione della freccia<=:,)
Fissate l'impugnatura destra a U
stringendo Ie
quattro viti
montaggio impugnatura
destra, ma non troppo.
43
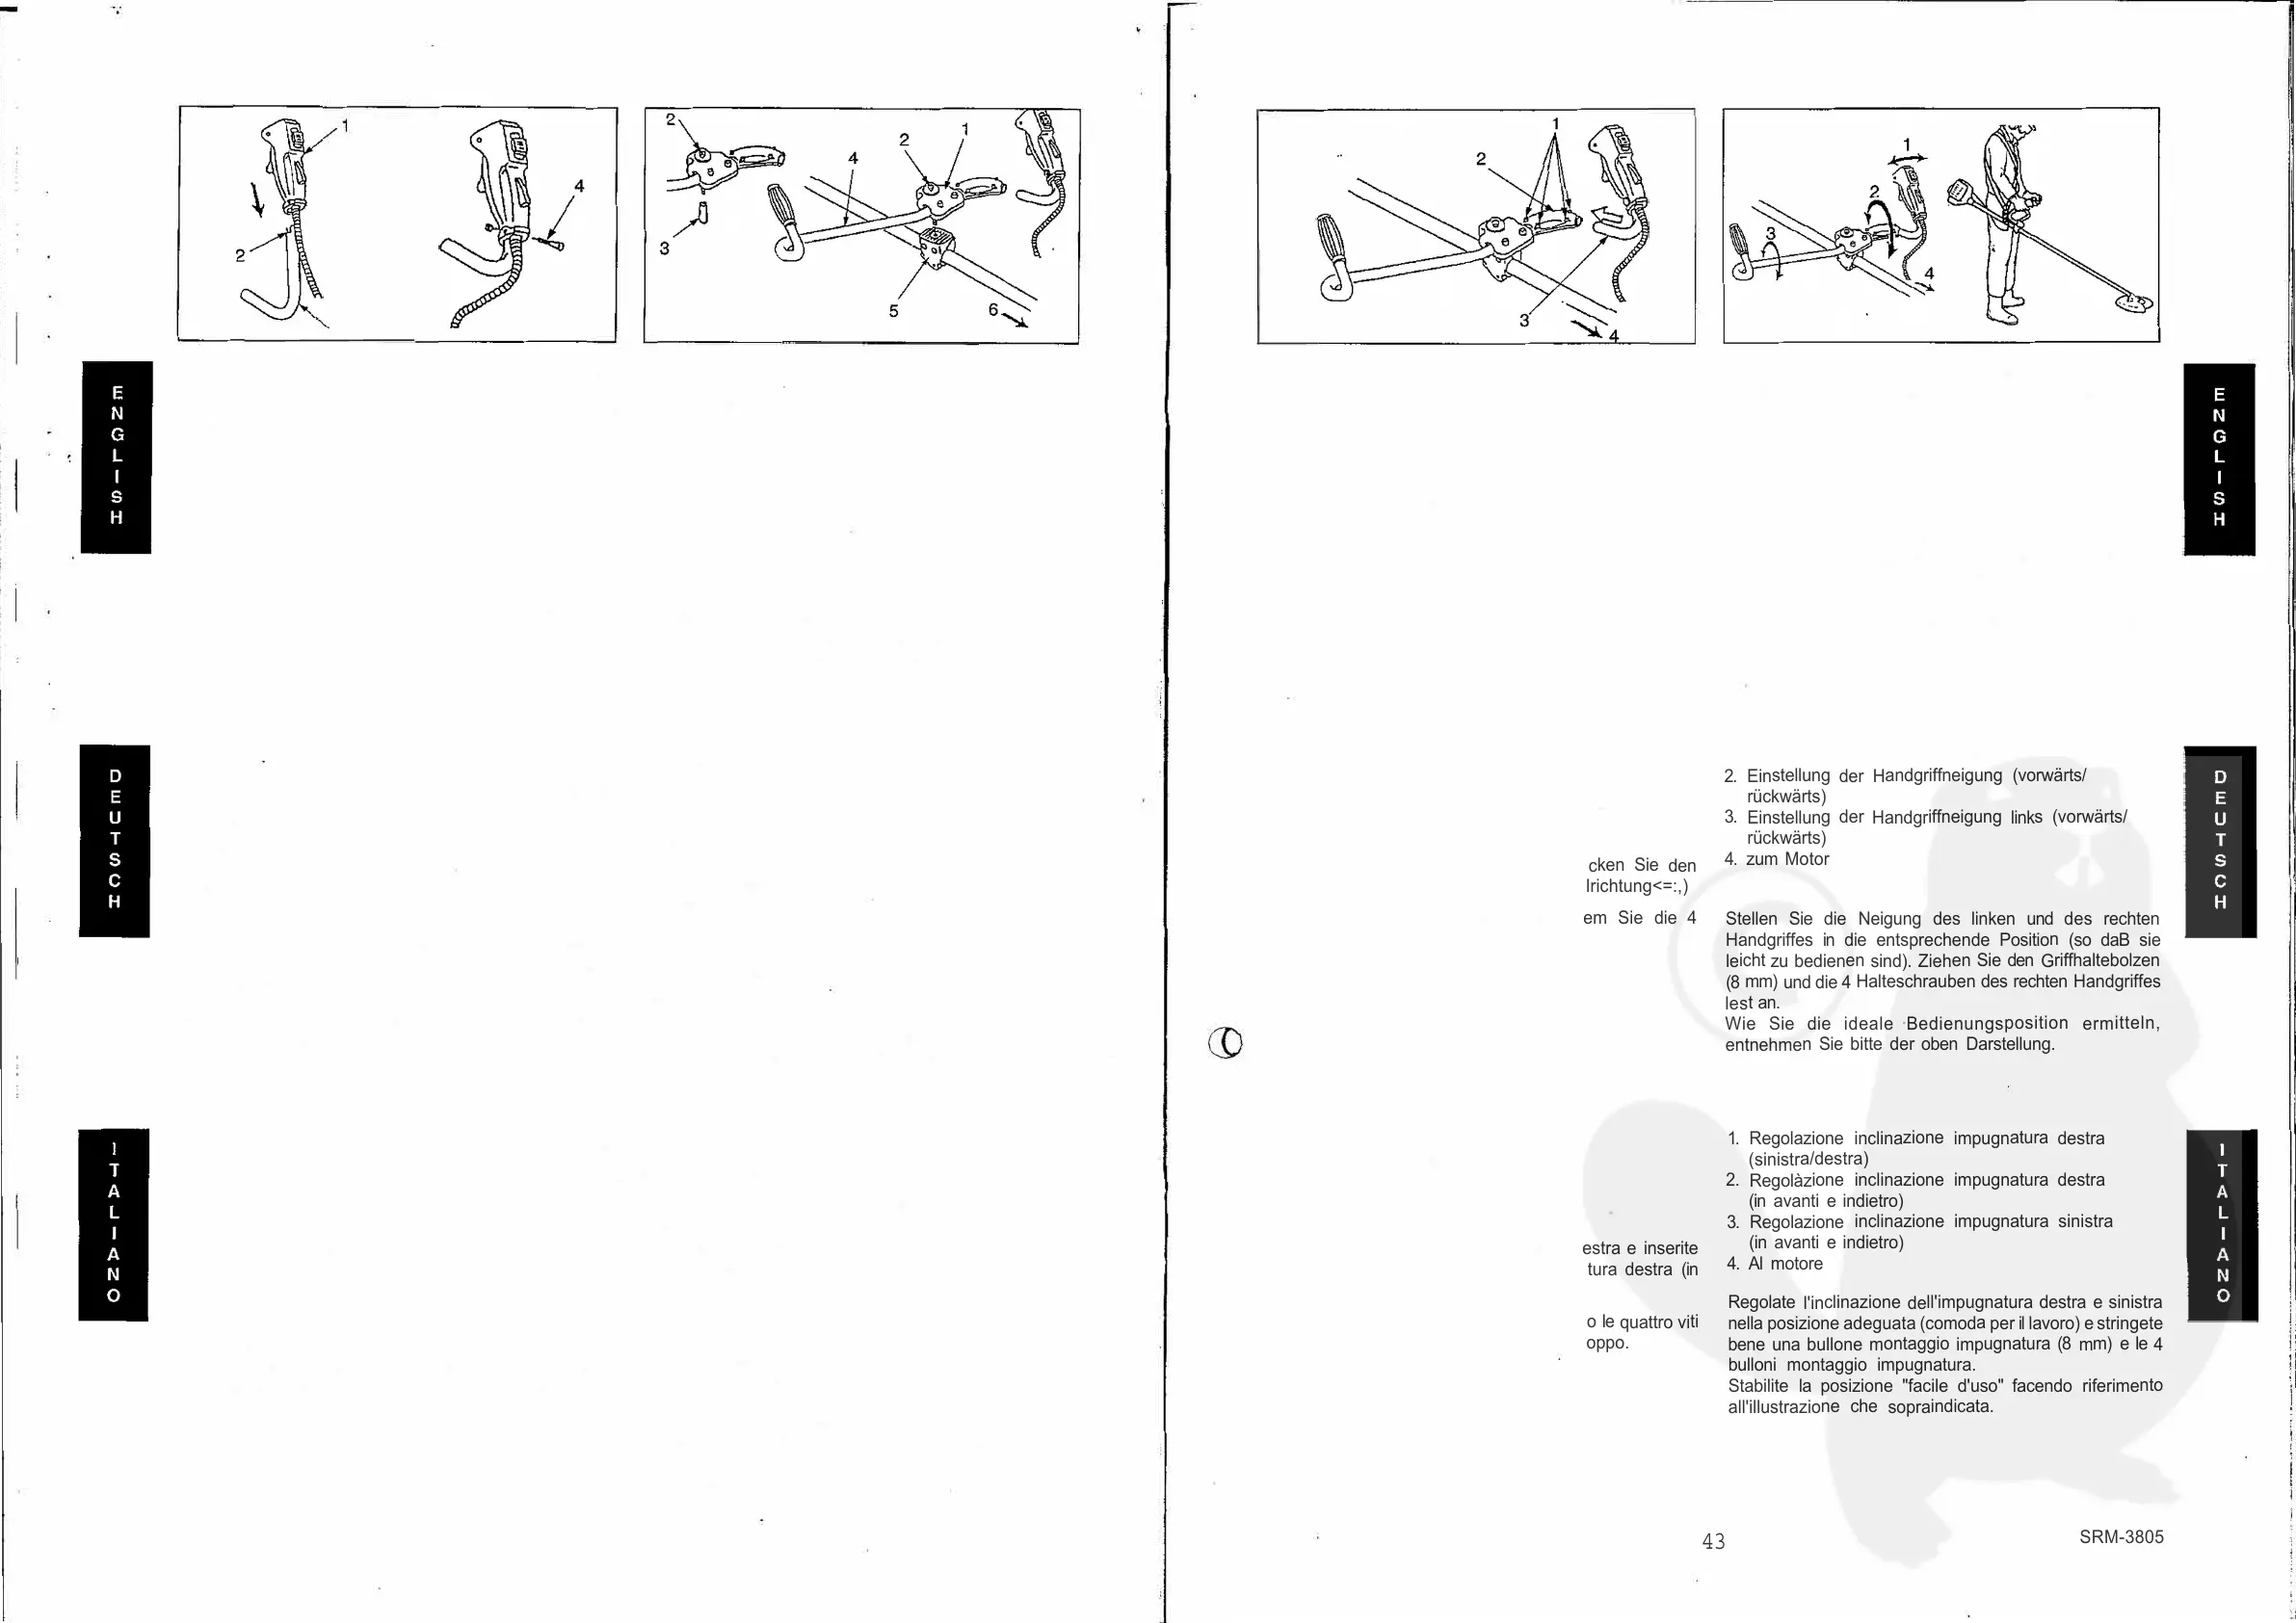
1. Adjustment
of right handle
inclination
(lefVright)
2.
Adjustment of right handle
inclination
(forward/
backward)
3. Adjustment
of lelt handle inclination
(forward/
backward)
4. To engine
Adjust each inclination of right
and lelt handles
to adequate
position (easy to operate)
and tighten
firmly handle
assembling bolt (8 mm) and 4
right
handle assembling
balts.
Determine "Easy to operate"
position
seeing illustration
above.
1.
Einstellung der
Handgriffneigung
(links/rechts)
2. Einstellung
der Handgriffneigung
(vorwärts/
rückwärts)
3.
Einstellung der
Handgriffneigung
links (vorwärts/
rückwärts)
4. zum
Motor
Stellen
Sie die Neigung
des linken und
des rechten
Handgriffes in die
entsprechende Position
(so daB sie
leicht
zu bedienen
sind). Ziehen Sie den
Griffhaltebolzen
(8 mm)
und die 4 Halteschrauben des
rechten Handgriffes
lest an.
Wie Sie
die ideale
Bedienungsposition
ermitteln,
entnehmen Sie bitte der oben
Darstellung.
1.
Regolazione inclinazione
impugnatura
destra
(sinistra/destra)
2.
Regolàzione inclinazione
impugnatura destra
(in
avanti e indietro)
3.
Regolazione inclinazione impugnatura
sinistra
(in avanti
e indietro)
4. Al motore
Regolate
l'inclinazione
dell'impugnatura
destra e sinistra
nella
posizione adeguata (comoda
per il
lavoro) e stringete
bene
una bullone montaggio
impugnatura (8
mm) e Ie
4
bulloni
montaggio impugnatura.
Stabilite la posizione
"facile d'uso"
facendo riferimento
all'illustrazione che
sopraindicata.
SRM-3805
 Loading...