Fitting Instructions - (continued)
You will want to mount the control module behind one of the vehicle’s body panels.
Clean a suitable location using the provided alcohol swab. Plug in all the wires, adjust
dip switches, then peel backing of Velcro liner to mount. Finish by securing any loose
and/or excess wiring. Before reassembling any panels that might have been removed
from the vehicle, test the system.
Mounting Control Module
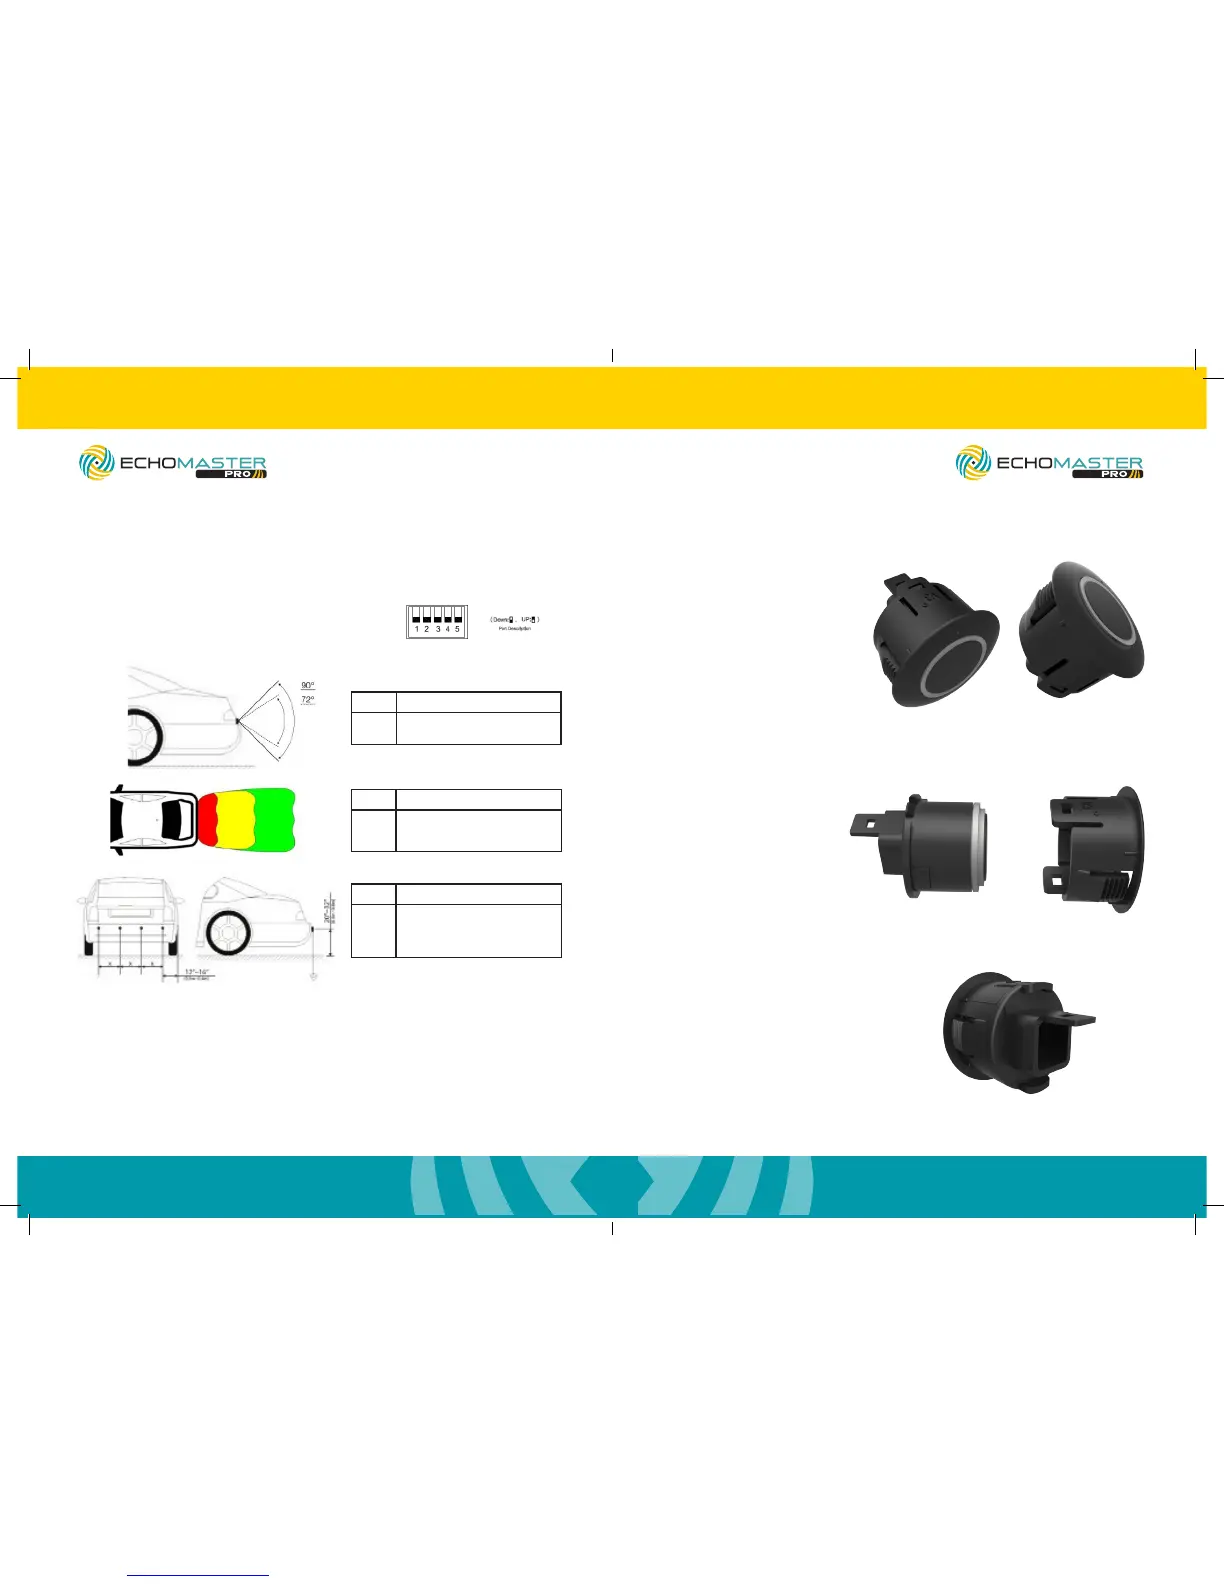
Choosing Correct Dip Switch Conguration
Switch Vertical Angle
1 Down: Original Coverage Range
Up: Reduce 20% Coverage Range
Switch Zone Range
2 & 3 Down & Down: Default Zone Range
Down & Up: Add 20in to Range
Up & Down: Add 28in to Range
Switch Sensor Spacing (in)
4 & 5 Down & Down: 16-16-16
Down & Up: 14-20-14
Up & Down: 12-24-12
Up & Up: 8-32-8
For most vehicles, all switches DOWN will work ne.
However, should you need to make changes,
please see below.
Sensor Assembly
Step 1
To take the sleeve off of the
sensors lift up on 1 clip and
push the sensor out with
your thumb.
Step 2
Slide the sensor angle
sleeves onto the sensors.
The embossed angle
measurement should be on
the same side as the clip.
Step 3
Ensure that the arrow
molded into the back of the
sensor points to the line on
the angle sleeve.
PS-RBP/PS-RDIS
ParkAlert Rear Sensor System
with Buzzer or Display
PS-RBP/PS-RDIS
ParkAlert Rear Sensor System
with Buzzer or Display