-
19
-
Installing the main unit
Installing the main unit
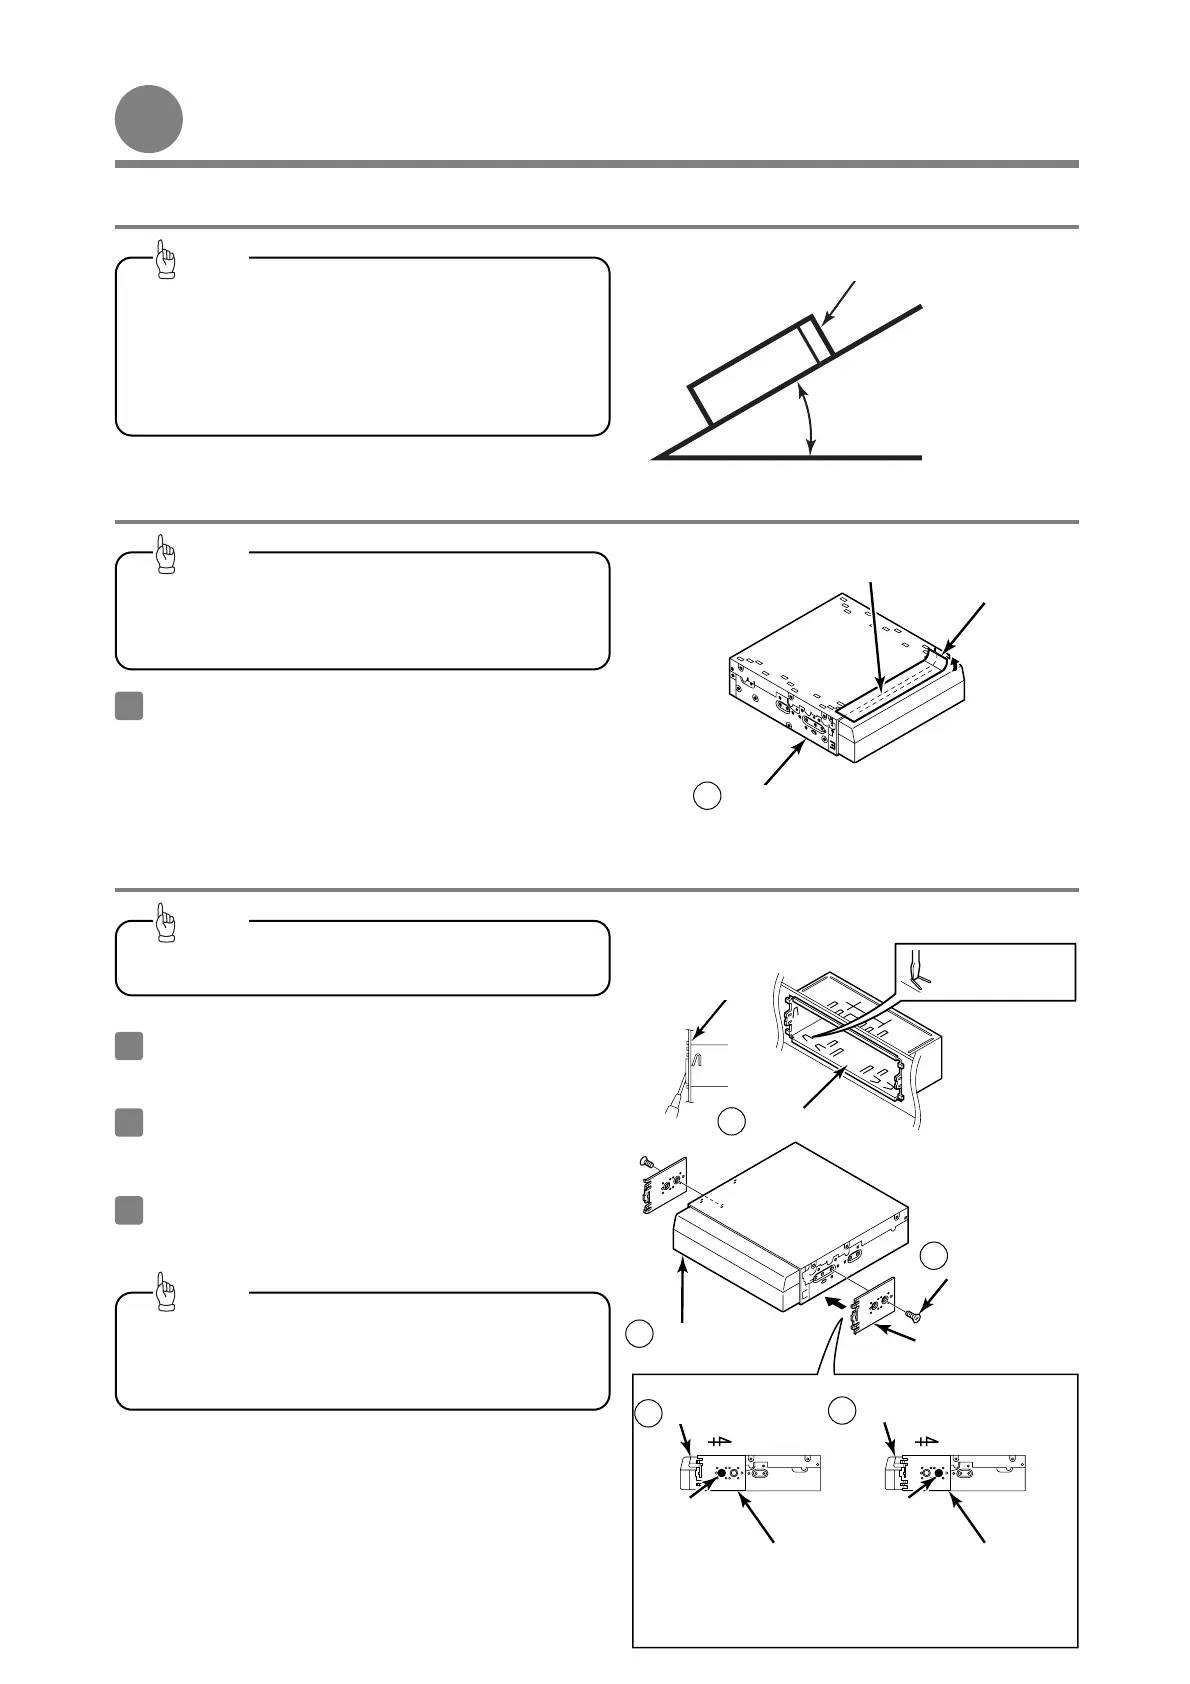
30˚ or less
Level (reference)
Front
-
Installation angle
-
Caution label
Caution
-
Installation preparation
-
To maintain proper function, the unit must be
mounted less than 30 degrees. If the angle is in
excess of 30 degrees, DVD/CD skipping and
improper DVD/CD and Memory Stick ejection may
occur.
Tip
Before the main unit installation, be sure to
remove the caution label.
1
Tip
In the event that the main unit requires shipping, re-
attach the caution label to help prevent potential
damage that may be caused by shipping.
Main unit
1
Insert the mounting sleeve into the opening in the
vehicle dashboard or console box.
1
Use a screwdriver or a similar tool to bend the
tabs in the mounting sleeve to secure the
mounting sleeve.
2
-
Mounting the main unit (If installing the main unit using the mounting sleeve)
-
Connect all cables before installing the main
unit.
Tip
Bend the mounting
tabs.
Dashboard or
console box
Mounting sleeve
7
example 2
3
By adjusting the positions of the brackets, the main unit's
installed depth can be adjusted.
example 1
Front of vehicle
Attach the side brackets to the main unit using
flathead screws.
Be sure to use the supplied accessory mounting
screws (M4 x 6) as the mounting screws. If any
other screws are used, they may damage the
inside of the unit.
Tip
Side brackets
Flat head screws
(M4 x 6) x 2
Main unit
1
Front of vehicle
11
Side brackets
Side brackets
Main unit
1
Main unit
1
Screw
position
Screw
position