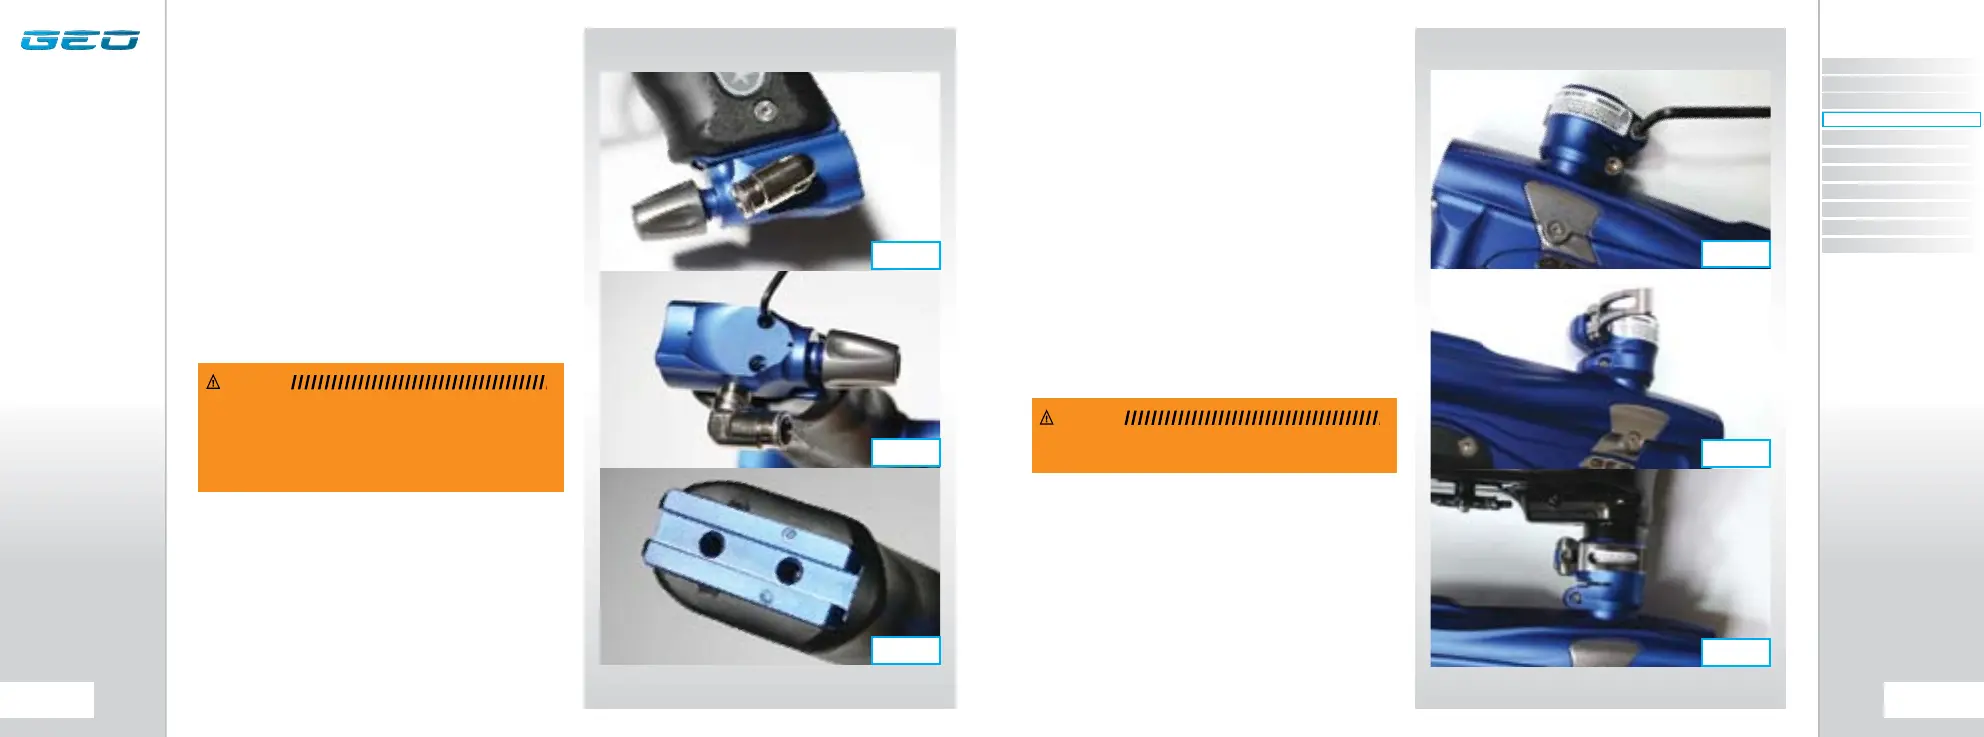
ATTACHING A LOADER
Using a 5/32” hex key, turn the top screw of the
clamping feed neck counter clockwise (SEE FIGURE 5.1).
Release the clamping lever on the feed neck (SEE
FIGURE 5.2) and test to see if your loader can easily
be pushed into the top of the feed neck. If the loader
cannot easily be pushed into the feed neck, loosen the
top screw of the clamping feed neck a little more by
turning it counter clockwise using a 5/32” hex key (SEE
FIGURE 5.1).
When you have managed to push your loader into the
clamping feed neck, close the clamp to secure it firmly
in place (SEE FIGURE 5.3). If the loader is loose then
you will need to release the clamp, tighten the screw
slightly by turning it clockwise with a 5/32” hex key and
closing the clamp. Repeat this process as necessary to
secure your loader in place.
You have now attached a loader to your Geo. Once you
have filled your loader and air tank you will then be
ready to begin using your Geo.
INSTALLING AN
ADJUSTABLE AIR SYSTEM
Firstly disconnect the macroline hosing from the elbow
attached to the OOPS at the base of the grip frame
(SEE FIGURE 4.4).
Using a 3/32” hex key turn the two screws on the
bottom of the OOPS in a counter clockwise direction so
that the OOPS can be removed from the rail by sliding
it backwards (SEE FIGURE 4.5).
As well as the integrated slide rail at the base of the
Geo’s grip frame, there are also two 10-32 UNF threaded
screw holes which will accept all standard bottom line
screws (SEE FIGURE 4.6).
Attach the air system of your choice, taking care to
ensure that you use the correct length and size of
hosing to accommodate your requirements.
WARNING: BEFORE ATTACHING ANY FIXED AIR SYSTEM,
PLACE ATTACHING SCREW IN DESIGNATED SLIDE RAIL
AND MEASURE PROTRUDING SCREW LENGTH. SCREW
LENGTH MUST NOT PROTRUDE MORE THAN 10MM/0.40”
OTHERWISE THE GEO CIRCUIT BOARD WILL BECOME
DAMAGED.
WARNING: DO NOT OVER TIGHTEN THE CLAMPING FEED
NECK AS THIS MAY DAMAGE THE LOADER.
FIG 5.3
FIG 5.2
FIG 5.1
FIG 4.6
FIG 4.5
FIG 4.4
CONTENTS
ORIENTATION
QUICK SET-UP
USING YOUR GEO
ADVANCED SET-UP
MENU TREE
MAINTENANCE
FAULT FINDING
SERVICE CENTERS
PARTS LIST
SPARES & ACCESSORIES