EasyManua.ls Logo

Eclipse POWERSHADE - User Manual

Eclipse POWERSHADE
2 pages
Print Icon
To Next Page IconTo Next Page
Loading...
ADVANCED PROGRAMMING INSTRUCTIONS
7. If using a multi channel remote, select required channel by using the ‘Le or Right’ channel selection
buttons on the remote. If using a single channel remote, proceed to Step 8
8. Press Set button on motor until motor jogs. Press the ‘Upbutton on the remote, motor will jog
3. Press Prog button, release when light shows
4. Press Prog button again, release when light shows
5. Press Prog button and hold until light shows twice
6. Press Prog button and hold until motor jogs twice
1. To start you will need an installed motorised blind, remote
control and push pin/paperclip/pen.
2. Make sure when tting the blind into the brackets that the
SET button & charge port are facing downwards.
9.Using the remote, check that the motor is turning in correct direction. If motor direction does not need
adjusted proceed to step 11 . If direction needs changed, follow step 10.
10. Press Stop button on remote for approx. 5s, motor will jog. Press the ‘Downbutton on the remote, motor will jog
Single
Channel
- Up
- Stop
- Down
- Channel Selection
INITIAL SET UP
PROGRAMMING INSTRUCTIONS
LINK REMOTE TO MOTOR
MOTOR RESET
SET BUTTON
CHANGING MOTOR DIRECTION
Six
Channel
Sixteen
Channel
SWITCHING MOTOR ON/OFF:
To switch o:
1. Press and hold the Set button on the motor until the red light
ashes3times
(please note motor will jog aer approx. 2s while
holding the set button)
,motorisnowswitchedo
To switch on:
1. PresstheSetbuttononthemotoruntiltheredlightashes,
motor is now switched on
SETTING MULTIPLE BLINDS ON ONE CHANNEL:
If blinds have been pre-programmed already follow these steps:
1. Select the desired channel on the remote
2. Press the set button on the motor until the motor jogs
3. Presstheupbuttonontheremote,motorwilljog
4. Repeatsteps2&3forallotherblindstobesetonthischannel
(Please note: blinds already set on this channel may react to the press of
the up button during step 3)
If blinds are being programmed for the first time
follow these steps:
1. Usinginstructionsaboveswitchoallmotorsthatareto
beprogrammedonthesamechannel,
leavejustonemotortobeprogrammedswitchedon
2. Select the desired channel on the remote
3. Followbasicprogramminginstructionsforlinkingremote,
 checkingdirection&settinglimits
4. Oncompletionofprogramming,switchblindoasper
instruction above
5. Switch on next blind to be set on this channel
6. Repeatsteps3-5,repeatthisprocessforallotherblinds
to be set on this channel
(Please note: Once all blinds have been individually programmed
ensure that all motors are switched back on)
SWITCHING BETWEEN DOT MOVEMENT AND CONTINUOUS
MOVEMENT:
1. Press the Set button on the motor until the motor jogs once
2. Pressthestopbuttonontheremote,themotorwilljogonce
3. SwitchbetweenDot&Continuousmovementiscomplete
1
SET BUTTON
Up
Stop
Down
Channel
Selection
Question and Answer IconNeed help?

Do you have a question about the Eclipse POWERSHADE and is the answer not in the manual?

Summary

Switching Motor On;Off

To Switch Motor Off

Procedure to turn off the motor by holding the Set button until the light flashes.

To Switch Motor On

Procedure to turn on the motor by pressing the Set button until the light flashes.

Setting Multiple Blinds on One Channel

Adding Pre-programmed Blinds

Steps to add existing blinds to a selected channel on the remote.

Programming First-Time Blinds

Guide for programming new blinds onto a channel for the first time.

Switching Movement Mode

Dot vs. Continuous Movement

Steps to switch between dot and continuous movement modes for the motor.

Setting Additional Limit Positions

Setting Mid Limit Positions

Instructions for setting up to 4 additional mid limit positions.

Fine Tuning Limit Positions

Fine Tuning Pre-set Limit Positions

Steps to fine-tune existing pre-set limit positions.

Deleting Limit Positions

Deleting an Additional Limit Position

Instructions for deleting an additional limit position.

Deleting Channel Memory

Deleting a Single Channel from Motor Memory

Instructions for removing a single programmed channel from motor memory.

Overview

This document describes the programming instructions for Eclipse PowerShade advanced motorized blinds. It covers various aspects of setting up, controlling, and maintaining the blinds, including switching motors on/off, programming multiple blinds, setting and fine-tuning limit positions, and managing channels.

Function Description:

The Eclipse PowerShade system allows for the remote control and automation of window blinds. It supports individual and group control of blinds, precise positioning, and the ability to switch between different movement modes. The system utilizes a remote control for user interaction and a "Set" button on the motor for direct programming.

Important Technical Specifications:

While specific technical specifications like motor voltage or battery type are not detailed in this document, the instructions imply a radio frequency (RF) communication system between the remote and the motor. The system supports multiple channels (Single, Six, and Sixteen Channel remotes are shown), allowing for the control of individual blinds or groups of blinds. The motor provides tactile feedback through "jogs" (brief movements) and visual feedback via a red light during programming.

Usage Features:

  • Switching Motor On/Off:
    • To switch off: Press and hold the Set button on the motor until the red light flashes three times. The motor will jog after approximately 2 seconds of holding the button.
    • To switch on: Press the Set button on the motor until the red light flashes.
  • Setting Multiple Blinds on One Channel:
    • For pre-programmed blinds:
      1. Select the desired channel on the remote.
      2. Press the Set button on the motor until the motor jogs.
      3. Press the Up button on the remote; the motor will jog.
      4. Repeat steps 2 and 3 for all other blinds to be set on this channel. (Note: Blinds already on this channel may react during step 3).
    • For first-time programming:
      1. Switch off all motors to be programmed on the same channel, leaving only one motor switched on.
      2. Select the desired channel on the remote.
      3. Follow basic programming instructions (not detailed in this document) for linking the remote, checking direction, and setting limits.
      4. Once programming is complete, switch the blind off.
      5. Switch on the next blind to be set on this channel.
      6. Repeat steps 3-5 for all remaining blinds. (Note: Ensure all motors are switched back on after individual programming).
  • Switching Between Dot Movement and Continuous Movement:
    1. Press the Set button on the motor until it jogs once.
    2. Press the Stop button on the remote; the motor will jog once.
    3. The switch between Dot and Continuous movement is complete.
  • Setting Additional Limit Positions (up to 4 mid-limit positions):
    1. Use the Up/Down buttons on the remote to move the blind to the desired position.
    2. Press the Program/Learn button on the back of the remote until the motor jogs.
    3. Press the Program/Learn button on the back of the remote again until the motor jogs; the limit position is now set.
    4. Repeat steps 1-3 for all desired positions.
  • Fine-Tuning Pre-Set Limit Positions:
    1. Use the remote to move the blind to the pre-set limit position that needs tuning.
    2. Press the Program/Learn button on the back of the remote until the motor jogs.
    3. Use the Up/Down buttons on the remote to fine-tune the position.
    4. With the blind in the new desired position, press the Program/Learn button on the back of the remote until the motor jogs. The new limit position is now set.
  • Deleting an Additional Limit Position:
    1. Use the remote to move the blind to the limit position to be deleted.
    2. Press and hold the Program/Learn button on the back of the remote for approximately 7 seconds until the motor jogs (the motor will jog after approximately 1-2 seconds after the button is pressed, and then jog again after approximately 7 seconds). The limit position is deleted.
  • Deleting a Single Channel from Motor Memory:
    • (Note: This action only deletes a single pre-programmed channel and does not remove any limits).
    1. Select the channel on the remote that is to be deleted.
    2. Press the Set button on the motor until the motor jogs once.
    3. Press the Program/Learn button on the back of the remote until the motor jogs; the channel is now deleted from the motor.

Maintenance Features:

The document does not explicitly detail maintenance features such as cleaning instructions or battery replacement. However, the programming instructions themselves serve as a form of "maintenance" for the system's functionality, allowing users to reconfigure or troubleshoot their blinds as needed. The ability to switch motors off and on, reset channels, and adjust limit positions contributes to the long-term usability and adaptability of the system.

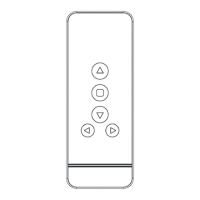
The remote controls feature distinct buttons for "Up," "Stop," and "Down" movement, along with a "Program/Learn" button, typically located on the back or within a recessed area to prevent accidental presses. The motor itself has a "Set" button for direct interaction. The visual and tactile feedback (red light flashes, motor jogs) are crucial for confirming programming steps. The system is designed to be user-friendly, allowing for flexible control over individual or multiple blinds in a home or office environment.

Eclipse POWERSHADE Specifications

General IconGeneral
BrandEclipse
ModelPOWERSHADE
CategoryWindow Blinds
LanguageEnglish

Related product manuals