4
Basic Operations
Powering on
To power the player on, press and hold the power button for 5 seconds until the
eclipse logo displays on the screen.
Powering off
To power the player off, press and hold the power button for 5 seconds until the
screen displays Bye-Bye and then goes dark.
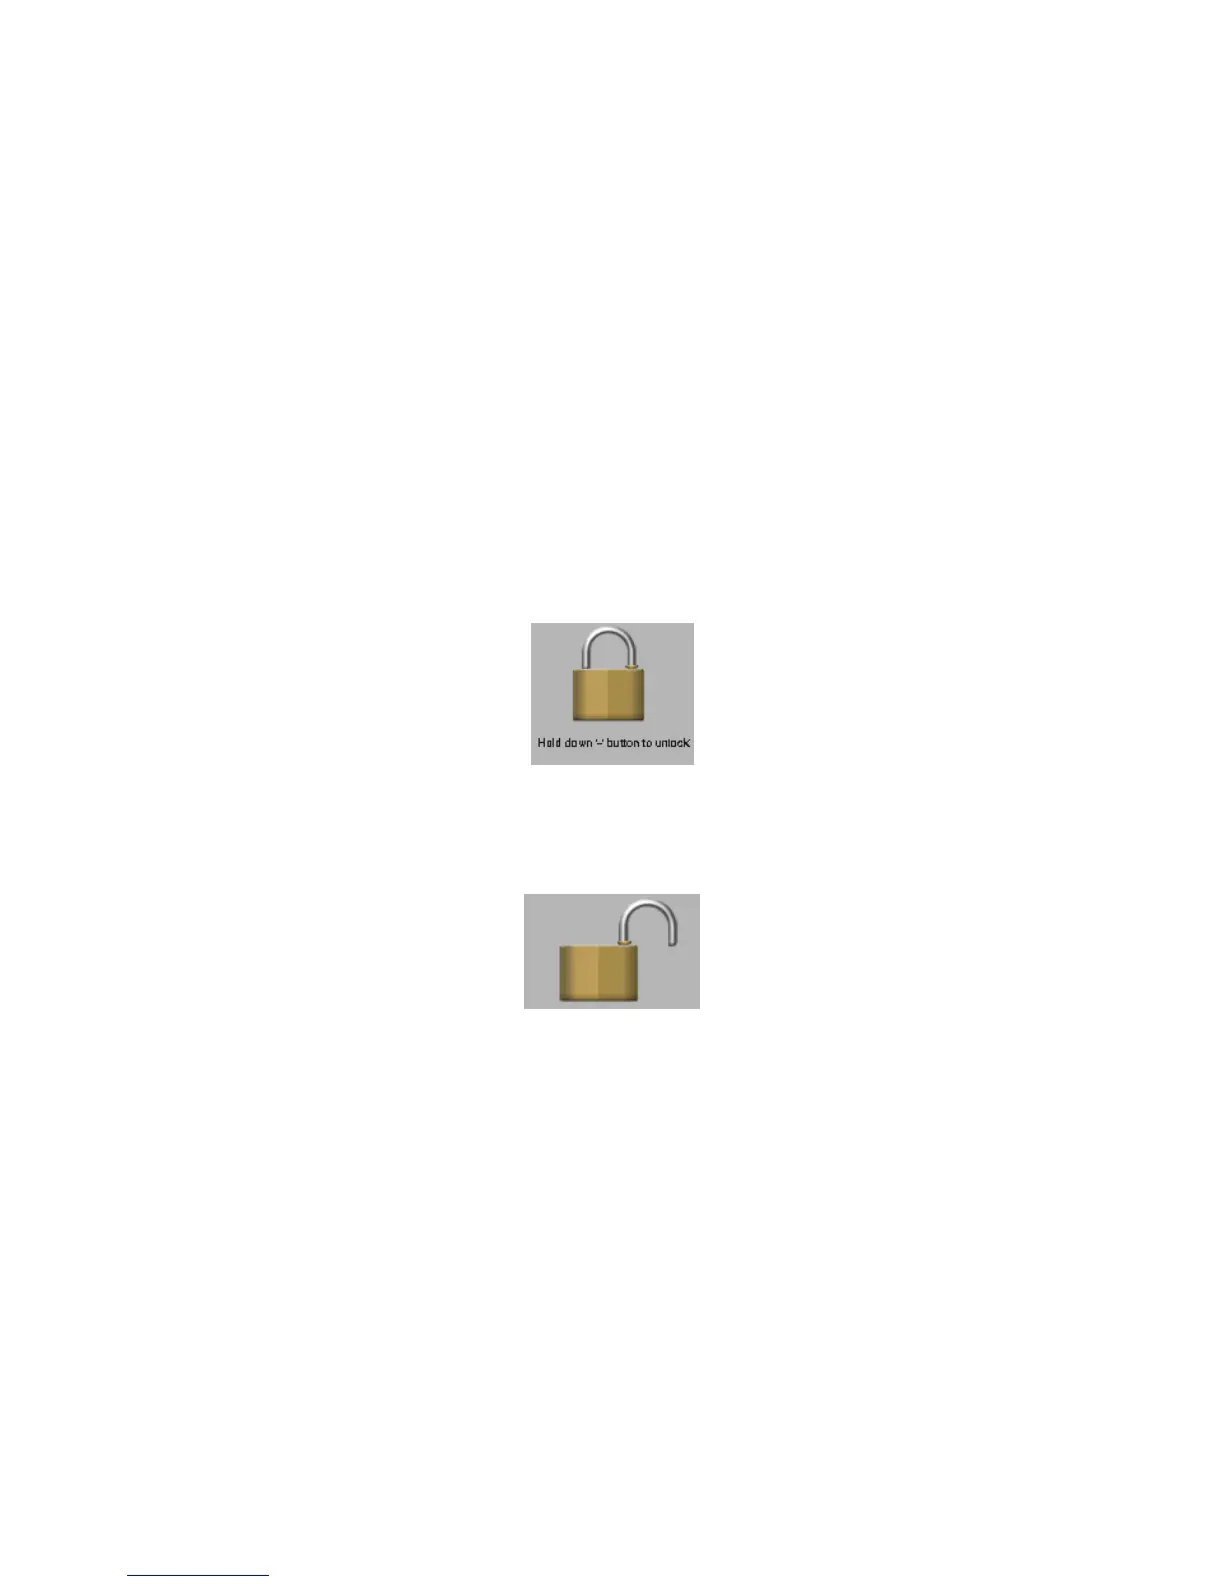
Locking and Unlocking the touch screen
When the screen powers down (Due to the battery saving auto dim feature in
settings) the screen will lock to prevent accidental screen taps.
When you touch a button on the top of the device to bring your screen back up, it
will still be locked, and you will see the below image.
To unlock your screen, press and hold the minus button (-) until the screen
displays a lock unlocking.
Charging
To charge your player, simply connect the device to a powered USB port on your
computer, or an AC adapter with an output of 5V and 1Amp.
Inserting and removing the Micro SD card
Inserting: Ensure that the player is powered off, and disconnected from the
computer. Hold the Micro SD card face up (side with words aligned in the
opposite direction of the display screen), and slide the card into the socket on the
player, slightly past flush. When you hear the card click into place, you can
access the card.
Removing: Ensure that the player is powered off, and push the SD card just past
flush. When you hear the click, release pressure, and the card will slide out.